Sunday, January 30, 2011

Sweater Purse 1.0

I have been putting off writing this post; I'm not sure why.  I am very excited to have show and tell with what I wanted to be the gift I gave everyone for Christmas last year.  But...unfortunately, I ran out of time and was only able to make a few.  What I did was I made purses from felted wool sweaters.  I had invisioned these purses as the coolest things ever.  I named this post with a "1.0" because I have others to do (with different ideas in mind), that will need to be in several editions!

I have to give kudos to my AlterKnits books.  I mentioned AlterKnits in my Lace-up Fingerless Gloves post, at the beginning of January.  The "pattern" for these purses seemed simple enough: Take a wool sweater, felt it in the wash, cut off the sleeves and neck and you've got yourself a bag!  The book, obviously, goes into more detail, but that's the gist of it.

Now, I mentioned that I invisioned these being the coolest things ever, but I could not get my purses to look like the book.  Now, just because they did not look like the book purses, didn't mean that they weren't cool in their own right.  I did four purses and gave three of them as gifts.  The first one I made, I kept because I'm not truely satisfied with it.  I feel like I am still tweeking it.

Let's start from the beginning.  After digging out the AlterKnits for the gloves, I remembered that I loved the idea of felting a sweater for a purse.  In the past I had knitting a purse with a handle and felted it; it came out so good that it amazed me that it actually worked. 

The Pink Lady purse

So, I then got the idea that I would make a purse for all my gal friends.  It would take me less time to felt a sweater and cut it up than it would for me to knit a purse for everyone.  I went to Goodwill over several weeks and bought about eight or nine wool sweaters and vests.  My first felting expedition occurred at my boyfriend, Vince's mother's washing machine.  She has a top-loading machine and she was willing to enable me in my crazy idea.

Remember the size of the gray striped sweater

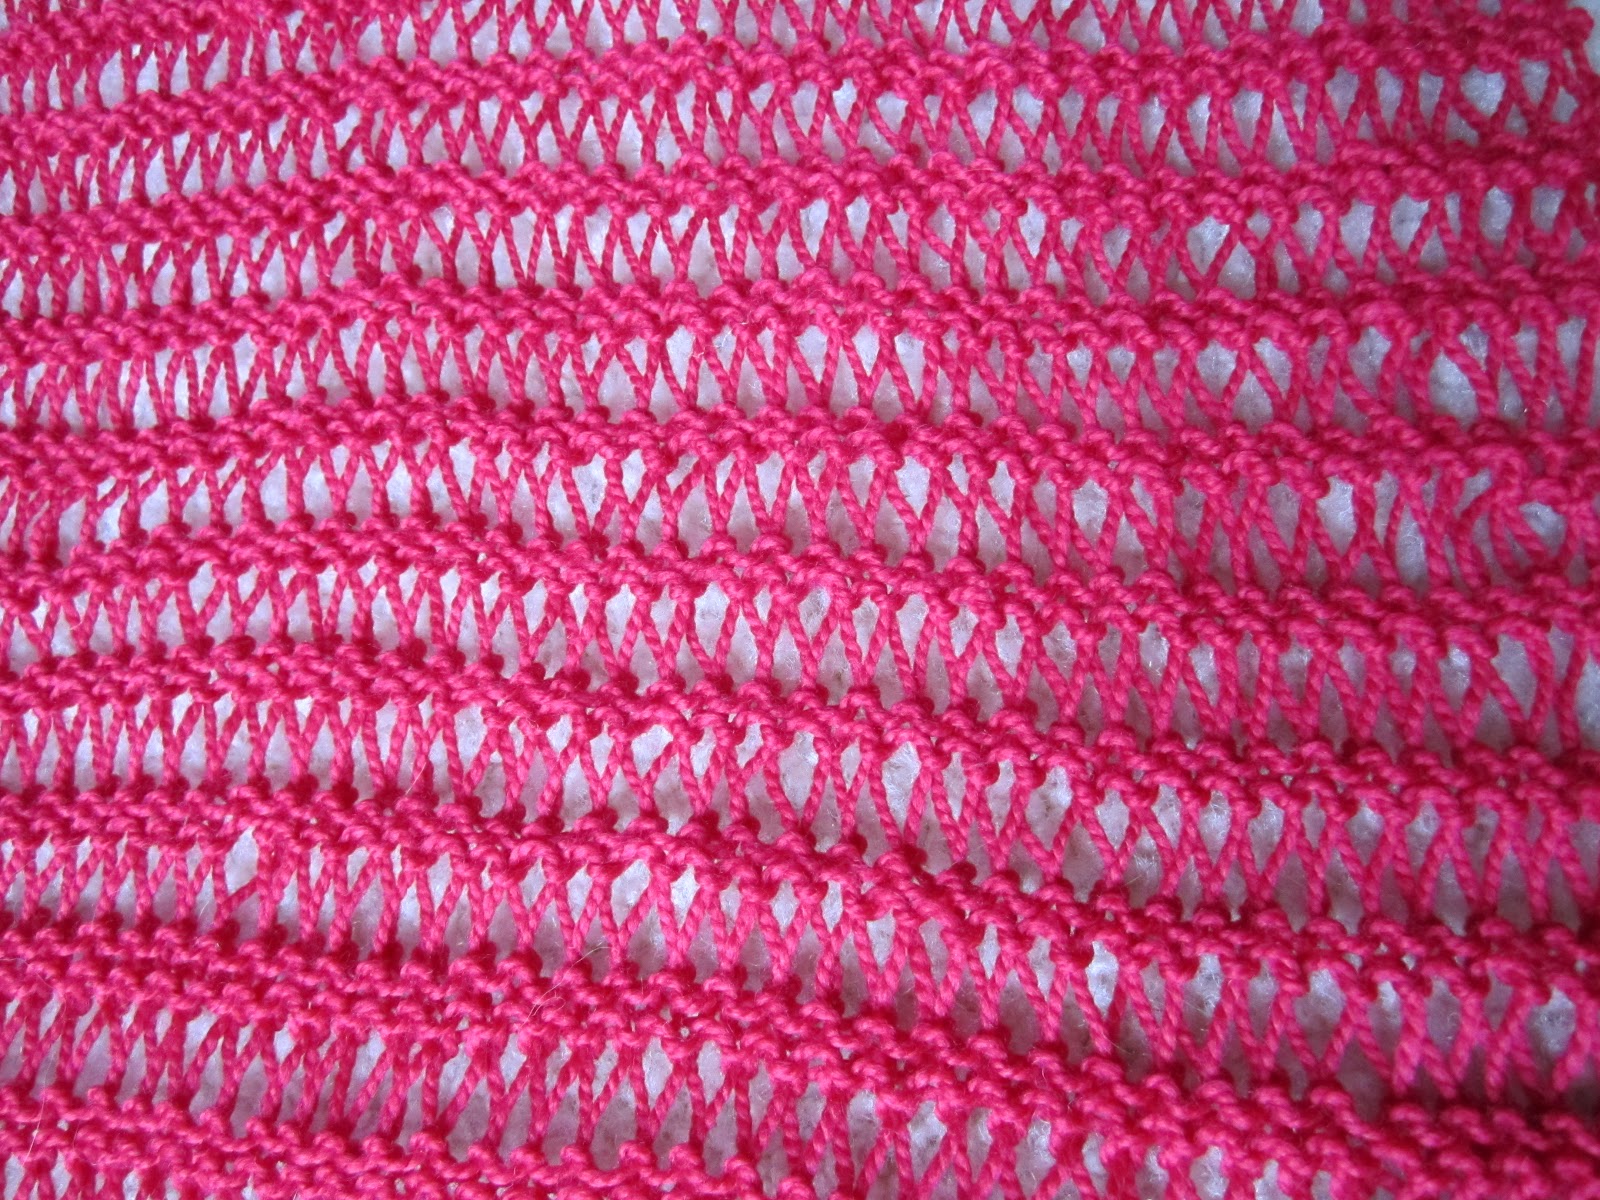
First in felting, you need hot water, soap, agitation and 100% wool.  This can occur in a sink with rubber gloves or in a washing machine on high agitation.  So, I put the temperature on high, squirted in some dish soap (like Dawn) and waited until it got nice and sudsy, then I threw a few sweaters in.  I let the washing machine start the agitation cycle and checked on it every five minutes or so.

Shrink, baby, shrink!

When I checked on it, I lifted it out of the water and tried to stretch the fabric.  If it easily stretched and I could distinctly make out the knitted stitches, I threw it back in.  I had to reset it back to the agitation cycle a few times.  I didn't want the rinse and spin cycles until I was happy with the degree of felting.  Each item will felt differently, so you really cannot compare them, they need to be judged individually.  They will shrink and the texture will be very different from when they were thrown in...you will be awed in their transfomation.

Since each sweater felted at different rates, I had to take them out and hold them in buckets until they were all ready for the rinse and spin.  Once I was happy with all of them, I put them back in and then switched the water temperature to cold, and forward the machine to engage the rinse and spin cycles. 

Just chillin, waiting to get spun

If you have several to do, then this could be a long process; if just one, then it goes by quick.  Sometimes, you can overfelt the item and it can be smaller then you thought possible.  But if you ever mistakenly washed and dried a cashmere or wool sweater and found doll's clothes when folding the load, then you know where I'm coming from.  The gray sweater with the stripes is one of the items where I may have overfelted.  It was supurb in it's thickness, but did not yield much for me to work with.  Here is a quick look at what to expect:

Yup, it's the same sweater!

One thing I may have to mention before you get started on your first felt project: it creates ALOT of lint.  So much lint that it is gross.  See for yourselves...

New meaning to ring-around-the-collar

And then this nice ball...
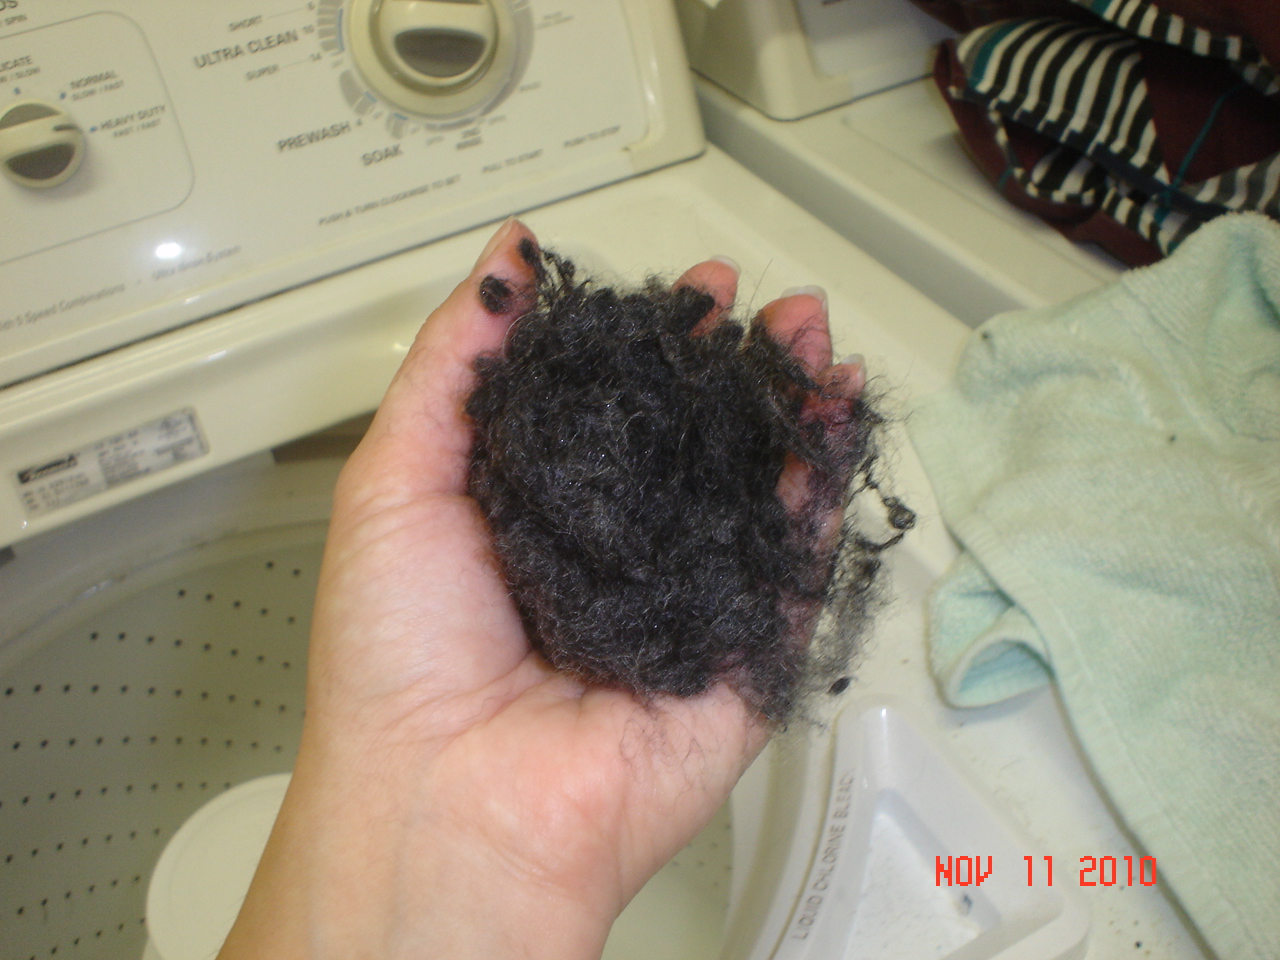
Try not to gag!

The lint will be literally dripping off of the garments.  But, I just picked them off.  I wonder if trying to felt up the lint balls is going too far?  Eh, anyway, I did end up throwing it out.  So, once they were felted and spun out (they tend to still be very wet, but since they are so thick, it is hard to spin all the water out), I threw them in the dryer and dried how I nomally dry a load (using heat).  They won't shrink any more. 

After this, I was ready to start cutting!  I consulted the book at great lengths, making sure I understood where to cut.  The term: "measure twice, cut once" ain't just for carpentry, Ladies!  I will show how I made the gray striped one:

Doll clothes with monkey arms, very strange!

The idea is to cut off the arms and the neck and utilize the shoulders as the handles.  Very clever!

No going back now!

So I was very cautious about cutting.  The shoulder area got cut back way farther, but I was just making sure I understood what I was doing when I made the first cut.  The sleeves are no longer used in this project, but I kept them, because ya just never know.  I'm glad I did because I made my Camera Cozy out of one of these very sleeves.

Next, I turned the sweater inside-out and positioned the side seams of the sweater so they will be in the front, then I sewed the bottom hem line closed (where the sweater ribs).  The book does this a bit different, where they sew it rightside-out and leave the ribbed hem long, but this is just my spin on it.


Then I turned it back, rightside-out.  This is where I had to fuss with it for awhile.  I needed to cut the side openings so they were the same width, then cut the handles so they, too, were the same width.  I trimmed and pinned, then unpinned, then trimmed some more.  Once I got the handles to the width I thought was good, I folded them and pinned again and sewed.

Fold, Pin & Sew!

Yeah, I make it sound easy and it may look like a piece of cake, but I really had a hard time with this.  My sewing machine is just your average Singer, nothing "professional".  I tried sewing through these two thicknesses and my foot kept getting hung up.  Not sure if it was the dogfeed not gripping or what the deal was.  Anyway, I swore and pricked myself a bunch of times and said, "That's it!  It's [bleeping] good enough!"  (Even though I knew that it wasn't, I had to stop working on it for awhile.)

Finished Sweater Purse

I was pleased that I was able to get this far with it.  I will say again, my sweater purse does not look like the pictures in the book.  Nope, not at all.  But, it was unique in itself.  I am still not satified with the handles, and have not given it to anyone.  It will be my sample, until I get that Eureka! moment and do-up those handles nice.

I did have some other sweaters that I converted to purses that each developed their own personality and so I am glad to have had the AlterKnits book so that it could inspire me to create bags/purses using old sweaters.  Here are a few that I have done so far:

My other purses

From the left is a cream colored sweater that had thin pin-striped ribs in it.  The felting kept the thin indented ribs and so that gave the purse texture.  The purse was very floppy on the sides so I just took the top sides in at an angle.  Not perfect, but one of my favs. 

The one on the right came from an argyle vest.  I could not turn it so the side was the front, like with the other two because the argyle pattern was only on the front, so I had to be creative.  I cut this at the armpit and took the shoulders off.  I cut four strips from the shoulders and sewed two strips on top of each other to make each handle.  I then used a zig-zag stitch and stitched the heck out of it attaching the handles to the body.  I felt like this argyle vest did not felt up the best.  It was very flimsy, not stiff like the gray striped one.  But, hey, you gotta work with what you got and make the best of it.

Last sweater purse

This had been my last purse that I squeezed out before I left to go to Mass in December.  It came from a burnt orange sweater that I cut and sewed like the others but kept the neck and used it as a pocket on the front.  I sewed it on with constrasting colored stitching.  Like I said before, none of these look like the pictures in the book, but they all took on their own personality.

I gave the cream one to a friend in Mass, the argyle one to a friend in Florida, and the orange one to my sister.  My sister has been using it as a project bag (perfect) and my Floridian friend has been using it as her everyday purse.  I really did not think any of these would withstand everyday wear and tear, but the argyle one has been holding on.  I think the handles need to be beefed up, but since it was a vest, there are no sleeves to make anything else out of.  But, she has told me that she receives compliments on it all the time. [This is me glowing inside]

Like I mentioned in the first paragraph, I have a bag full of felted sweaters just waiting to become something else.  I have other bag ideas in mind and maybe even a hat or a scarf.  You will have to stayed tuned to see the next edition of the Sweater Purse.

Sunday, January 23, 2011

Raspberry Scarf

For the record, this is my fifth scarf of the winter season.  The funny thing is, is that it is not even cold in Florida (compared to the North, getting snow and ice)!  I am not complaining anymore when the weather is 50 degrees in Tampa and my parents are shoveling snow in Mass.  I say that now, but when I have to put a sweatshirt on over my tank top, then I probally will. :-)

This scarf I am calling my Raspberry Scarf (rather than beret) because I am using this saturated deep pink that I love.  There is a story with this yarn/project that I would love to tell you about, but you have to be willing  to read for awhile with no pics.  First, I brought a lovely dainty pink ball of sock yarn to Mass with me during my December visit and had a pattern picked out and was going to start on the plane.  This yarn has more air miles than the average yarn ball because I originally bought it last December and brought it home with me, never used it, then brought it back to Mass to try out this pattern. 


Just lovely

Well, the pattern actually called for a yarn weight of a 3, which is like sport weight or light worsted weight.  There lies my first problem: I had sock yarn which is considered a yarn weight of a 1 or 2.  (Translation: my sock yarn was too thin for this pattern).  I start the pattern (which was a scarf, surprise!) and the details are not that defined and the drape is all wrong.  I knew this was not the right yarn for the project, but I desparately wanted to use it!  I tried it on a smaller size needle, but then the scarf would end up being only a few inches wide.  I was disappointed, but realized that the dainty pink yarn would be wasted if I used it on this pattern. 

So, in being Miss Preparedness, I had another project on the ready when I got to my sister's house.  I ordered this yarn online ahead of time and had it mailed to her house; so it was waiting for me when I arrived.  Since my scarf was not working out, I was glad I had this back-up project.  This new project was to be knit with yarn with 1% elastic.  I did not think that would be a big deal, well my blogger-readers, it actually was.  Of course, this new project I wanted to do Magic Loop on it (can't be simple, can it?) but the size needles I ended up needing, I did not have.  Remember, Magic Loop needles need to be at least 36" long.  I went to Michael's and the longest they had was 29" or something.  I bought them, but in my gut, I knew it was not going to work.  Rats! 

At some point during the visit, I make my sister bring me to her local yarn shop (not Michael's or Joann's, but a real yarn shop).  They had the needles I needed in 40" - cool!  We are cooking with gas now!  I figured, while we are here, let me get the proper yarn for the scarf I tried working on while on the plane.  I had one of the shop keepers help me and I explain the sock yarn thing vs. the sport weight, blah, blah.  She directs me to the sock yarn.  I did bring my pink sock yarn to show her that it was thin, but she chose another brand that was a bit thicker and said that it should be perfect for my scarf.  I was doubtful, but thought, "she's the expert."  I bought two balls of yarn and the 40" circular needles. 

Now, normally when you go to a real yarn shop, if the yarn you are buying is in a hank (a twisted skein of yarn) and not in a normal looking ball form, the shop with wind it for you.  You cannot work with yarn that is in a hank form; you must wind it into a ball or cone form.  The yarn manufacturer's put it in a hank so that the yarn can be properly showed-off to visually see the colors and the texture that yarn in a ball form could never do.  But, the hank is impossible to knit directly from because the yarn will tangle and you will have a huge, expensive rat's nest on your hands.

I asked the shop keepers if they wind the yarn and she replied that I could wind it myself, but they will not wind it for me.  Hmmmm...okay.  So, they set me up on the winder, but they only have the winder that holds the hank of yarn, not the winder that winds the yarn into the cone.  Guess what?  My sister and I had to hand ball the yarn ourselves.  She took one ball and I took the other.  Some customer service, huh?

Ok, now I know you are wanting some pictures or for me to hurry up with this story.  It gets better.  I get home to my sister's and try out the new yarn.  Can you predict what my next sentence will be?  You betcha!  The new sock yarn was still TOO THIN for the scarf pattern!!!!!  I knew it!  Dumb yarn ladies.

So, now I have two sets of yarn that I cannot use on this pattern.  I now turn to my elastic yarn project, now that I have the 40" long circs.  I could not get the Magic Loop to work with the elastic yarn, I kept getting the laddering that I prided myself on overcoming in my last post, Lace-up Fingerless Gloves.  So, this is strike 3 with the project thing.

I finally go online to Berroco and find a scarf pattern perfect for my new sock yarn.  This is where the Raspberry Scarf comes on stage.  The yarn I bought from the dumb yarn ladies was called Happy Feet from Plymouth Yarn Co (90% Superwash Merino Wool / 10% Nylon).  Now, this was not good for the original scarf pattern, but it is wonderful for the pattern called Facinate on the Berroco website.  If you click on the Berroco link in this paragraph, it will bring you to the pattern.  It is an elongated stitch scarf.  The pattern is a four row repeat, with knit being two of the four rows and most of what you do on the other two rows.  It took some practice, but I was able to get it right.

A little swatch...

At first, I was thinking that this was going to be difficult because I had never tried an elongated stitch before. I did my mini gauge swatch (gauge is not important in this pattern) and seem to have gotten the hang of it.  The color of this scarf is a raspberry not a red, like how is may seem in the picture.

I have to tell ya, this is the most forgiving knit pattern I have ever done.  At the start of this scarf, I was not counting the rows but "remembering" what row number I was on.  Don't ask me why I thought this would work, because I misremembered several times and just finally got a counter to track it.  But, I did not rip out the wrong rows.  That is the forgiving part, you cannot even tell where my mess-ups are.  I love this pattern!!

Hidden picture: can you see the incorrect rows??

This scarf is like an optical illusion where there are incorrect rows in the above picture but because your eyes focus on the elongated stitch, you can't notice them!  Perfect!  Although not recommended as a beginner pattern, a very good one for knitting while talking and watching TV.

As I say this is a great pattern, since it is so repetitive, it got boring after the first ball of yarn was knitted.  But, like I said, it ended up being simplier than I thought.  It is a good combo of easy but looks elegant. 

Stitch close up

I knitted this as a scarf, but now that it is done, it can be several types of accessory pieces.  I will begin my montage of scarf modeling.  It can be a cowl:

Holy cowl, this is cozy!

Another way is it can be worn as a shawl during an elegant evening out (or at work when they have the A/C on in the winter):

No, you may not take my shawl, sir.

Or as tied caplet:

The possibilities are endless!
I can always wear it as a normal scarf or tie it on my waist as a waist scarf.  I could go on and on.  I did go on and on during this post, but I felt as though it was necessary for you to know the history of how this scarf and I met.

I will go back and try that elastic yarn project again and will search for the perfect yarn for my original pattern.  But, I think I will break from the scarves for a bit.  I have some sewing ideas that I need to blog about that I have already done and some that I need to put into motion.

Thanks for sticking around! 

PS.
Kathy, I'll mail you back your bambo needles soon!  TY!

Tuesday, January 18, 2011

Camera Cozy

This is the first installment of the Mid-Week Mini.  For my small projects, I will post them mid-week as a "mini" project.  Now, don't get used to this blog-post-twice-a-week thing.  It is just for the occasional small, simple things I have on my plate. :-)

Let me start from the beginning.  For Christmas, Santa got me a new digital camera. [Insert me jumping up and down here].  This camera is hot pink and matches my personalty, for I love, love pink.  My last camera I had for about eight or nine years; I really can't complain because it has served me well.  I did drop it about a couple of months ago and a piece that held the battery door closed, chipped off.  It still closes, but one side is not secure.  So, I really hinted at my honey that a camera was at the top of my Christmas list. 

The case that my old camera came in was a zippered clamshell.  It served it's purpose and held additional batteries.  My new camera has a rechargable battery that has a special adaptor, so I don't need to carry around the extra batteries anymore.

I wanted a cute cozy for my new camera that I could easily carry in my purse, while protecting the screen.  I was originally going to knit it a "sock", with lime green sock yarn.  I had it all planned out, I just needed the time to do it.  Well, it has been three weeks since Christmas and my time to do this has not arrived.  Instead, I went to my scrap bag and dug out a piece of felted sweater.  I felted a few sweaters to repurpose, but I have not blogged about it yet, so I will not spill the beans on what my reason for felting sweaters were (some of you out there know, but, shhhh, don't say anything).

Anyway, the piece I chose to use was a section of a sleeve.  When you felt wool, you are essentially ruining the piece of knit.  But, you are intentionally ruining it.  You do this by washing pure wool in a hot water bath or washing machine on high agitation.  I will get more into it when I blog about the sweaters.  This project only used one of the discarded sleeves.

Felt will not fray when cut

I cut a portion off that was slightly longer than the camera and turned it inside-out and sewed the side seam a bit more.  I fit the camera in it so it would be snug and sewed the side seam again a little closer.  Once I was satisfied that it fit, I then sewed the bottom seam and trimmed the hem and clipped the corner.  Then I turned it right-side out.

Next, I took a regular covered hair elastic and a button I had in my button jar.

Just a few odds & ends

I left the top edge raw.  I hand-sewed the button to the front and then hand-sewed the hair elastic to the back.  This way, the hair elastic will keep the camera in place when it is stretched over the top and buttoned in the front.

Wool-aful!

Viola!  A little camera cozy.  This was a fun project that took no time to do.  I was happy to use my scraps and it is cute as well.

Hot-Pink Mamma!

Thanks honey, I love my new camera!  And I love the new cozy I made for it; it sure beats knitting a sock on a pair of toothpicks, right Kathy?  Hey blog-readers...send me some of your completed or WIPs.  I need to know I'm not the only one that has them.  C'mon!!

Sunday, January 16, 2011

Hooded Scarf

This project came as a request.  My boyfriend had his eldest daughter down from California for a visit over winter break from college.  She knew I knitted because I knitted her a scarf for Christmas.  Below is the Christmas scarf:

Third scarf of the season

The scarf I knitted her for Christmas was the same pattern as the Trio Scarf and the Quintet Scarf.  One thing that was different between this scarf and the other scarves is that I knitted this with hand-dyed cotton rather than hand-dyed wool.  I did continue to use the Katia silver novelty yarn.  I am definitely getting my money's worth with that yarn.  So, by using cotton, the drape is heavier than the wool, but I think it has charm. 

Ok, so back to the request: She had asked if I could make her a hooded scarf and a skirt.  I said that I would make her the hooded scarf, but to ask her grandmother to crochet the skirt for her.  (Hey, I have to divy up the workload, you know?)  I have a ton of knit magazines and there is a wealth of free patterns on the web; I was bound to find something.  I searched the web first to get an idea of what this will entail.  It appeared simple enough, although I did find a varied selection of how the hood is assembled onto the scarf.  I looked through my knit mags next, but found a scarf with a cap rather than a hood.  Eh, I didn't like it much.  Now, I just got a Knitting desk calendar (the kind that has a pattern-a-day) for Christmas.  Even though I vowed not to look ahead at the patterns and to take it one day at a time, I thought since this is for a purpose, that I should be allowed to look in the index and search for a hooded scarf.  So, guess what?  In March, there is an easy, great pattern for a hooded scarf!  Who knew this would be popular? 

So, I talked it out with the daughter, and the yarn she selected was not the one they knit the sample with, but it looked like a pattern that you could work up with just about anything and it will come out good.  I went to Joann's that evening and bought Vanna's Choice (100% Premium Acrylic) from Lion Brand in Oatmeal.  It is a natural-grayish-brown yarn with tweed flecks in it.  It is the very yarn that my sister knitted up my cabled blanket that I showed at the end of the Crazy Cables post. 

The right-side is wavy

The scarf in the pattern sample was made with a faux mohair yarn that gave a flatter look than my scarf was.  Vanna's Choice is very, very stretchy, so it tended to shrink into itself and give this wavy look to the right side.  The pattern alternated between knit and purl to make a sort of basketweave ribbing.  Here is the appearance from the wrong side (back side):

The wrong-side basketweave

I really liked the wrong side and during the process, I had asked if the daughter wanted this to be the right side, but, after thinking, she chose the right side to be facing.  So, this yarn, as I mentioned, is very stretchy.  I had to do a few gauge swatches to get it right (and it still was questionable)!  The pattern called for size 9, I ended up using a size 11.  I even could have gone up another size, but I did not want to make another gauge swatch, so I stuck with the 11's. 

This pattern is so simple that you knit the scarf really long, then fold the scarf in half to find the middle, then seam down from the fold along one edge about 12 " and, viola!  You have a hooded scarf!  Very clever.  The creator of this pattern is Designs by KN.  She is also known as DBKN and she has been published in several books and magazines.  Her website offers free patterns, too.  This is a great beginner project.  It is something more than a scarf, but not complicated.

The best thing about this scarf was that I bought the yarn on a Thursday night and knitted it throughout that weekend and finished it up on the following Monday.  Here is the hooded scarf complete:


Definitely will keep the chill out!

After the hood was seamed, I added fringe to the ends and added a tassel to the hood.  At first I was not going to add the tassel, but it really does add a cuteness factor to it:

To tassle or not to tassle...

The original pattern called for the tassel and not the fringe, but I think that it needed something else than just the tassel.  Maybe if I used the yarn recommended in the pattern, the fringe would have been unnecessary, but since I like to reinvent the wheel all the time, I added it.

I feel like all I have been knitting lately are scarves.  I am actually working on one right now.  I think once my current one is done (which it is for me, yippee!) I am moving on.  I like scarves and will most likely come back to them after a few months have gone by, but I am feeling overscarved right now.  I have some sewing projects in the queue and a few more knit ones, too.  I have a couple of dying projects too, but I am searching for a used stock pot that I can dedicate to dying on the stovetop.  The bucket method took a long time (remember Halloween 2010?), so I will be searching yard sales and the local Goodwill for the perfect one.  Wish me luck!

Sunday, January 9, 2011

Lace-up Fingerless Gloves

Let's back-up a bit this week.  In addition to a few scarves, I also made a pair of lace-up fingerless gloves as a Christmas gift this year.  These gloves came from a knit book called AlterKnits by Leigh Radford

Very creative knit pattern book

This book I received as a gift one year for my birthday.  I've had the book for about four years and this is the first project I have made from it.  There are a ton of cute and cool items to knit or otherwise create with wool that it is definitely worth checking out. 

The yarn I chose for this project was Encore by Plymouth Yarn (75% Acrylic / 25% Wool) in a peach color. First, they instruct you to knit a gauge swatch.  You know how I feel about gauge swatches, so I sort of make one then just go with the needle size recommended, which was a size 7.  The cool thing about these gloves that make them different than many other gloves, are that they are longer up the arm and lace-up with a ribbon.  Wait until you see how nice they came out.

So, right away I make a mistake.  The pattern starts at the arm and you knit on straight needles for 6" or so.  In the arm part, on each side you do some yarn overs (yo) and create eyelets for the threading of the ribbon.  I missed the first eyelet on one side.  I did not discover this until I was, oh, I don't know.....

Can you read the tape measure?

Let's see, what does the tape measure read?  Yup, five inches along.  Well, I did what any insane knitter would do:  I ripped it out and started over.  I had to!!  I could not lace it up, in good faith, through a random stitch and give it as a gift.

Rip, rip, rip!

By this time, I had the eyelet pattern repeat down pat.  Once I got myself back on my feet and knitted the required inches for the arm, they instruct to transfer to double pointed needles (dp), aka double points, so you can knit in the round (join the two sides together to form a tube).  Double points are knitting needles that are short and have a point on each side and come in sets of four or five.  I have several sets and I hate using them.  You have to evenly distrubute the stitches over three or four needles and use the empty one as the second knitting needle.  I may have lost you but that is okay.  They are confusing and I can't ever hold them right.

But, alas!  There is a cure for the dp blues.  It is called Magic Loop.  You get a pair of circular needles in a length of at least 32" long and you do this thing where you have loops on both sides of your knitted tube.  This technique eliminates the "ladder" effect that alot of knitters get with the dps.  I'm not really going to try to explain, just click on the link above to see a video from YouTube.  It is only three (3) minutes long and it will convert you!!

Me, Magic Looping!!

This part is shaping the hand portion and the thumb.  The below pic shows that the join of the sides is seamless and you cannot tell (no laddering).  Laddering is when the joining stitch is slack and is not uniform with the rest of the stitches, but is consistent going up the side and looks like rungs on a ladder.  I think I am getting too technical, so forget all this!  Just let me show off my seamless stitches and be done with it! :-)

Yeah, Me!

Nothing else disasterous happened while knitting the rest of the gloves.  You work the hand up to the  knuckle, making a spot for the thumb.  Meanwhile, the thumb stitches are placed on a holder to be worked later. 

WIP (Work in Progress)

Once the thumb was knitted and yarn tails weaved in (I had to sew up a hole that formed between the thumb and the hand, so I just used the tail that was from the thumb), I had to model to show the almost complete fruits of my labor.

The rolled-edge is cute, huh?

So, when I got to this point, I just wanted to be done already!  But I wanted to block the gloves so the stitches will lay flat and to tame the eyelets so they will be straight and flat, not curling.  Here are some things you need when you block something:

Take the time to block, you will thank yourself

A flat surface (I used a wooden tv tray), a spray bottle with water, towel, and pins.  In this case, I did not need the pins.  The pins help set the item to a measured size; I did not need to size the gloves.  I wet the gloves on both sides until they were damp, but not soaking wet.  Rub the water into the stitches (this, to me, is like feeling a wet dog...yuck), then position the gloves in a single layer on the towel.  I folded the towel over the gloves, but left the rolled edges hanging out.  I did not want the rolls to be flat.  So I had essentially sandwiched the gloves between two layers of towel.

Towel sandwich

Then I placed some heavy items on top to weight it down.  Then I came back the next morning and took a look.  The gloves were dry and set.  On a side note, yes, that is a Dexter board game!  I just got it for Christmas from a very close friend and I played it on New Year's Eve.  The game is won by collecting your suspect game tokens in a mini black garbage bag and moving your piece around the board until you get to the marina to "dump" the evidence.  Yes, a bit demented, but if you are in love with the show, you would get a kick out of the game concept.

So, here are the final results of my lace-up fingerless gloves:

Now, how do you lace the ribbon?

I am pleased with how they came out.  I did have an interesting time actually lacing up the ribbon.  I wanted the ribbon to actually show but could only think of how a shoe was laced.  I figured it out, eventually. 

In my opinion, this was not a difficult project, considering that they are pretty much a half a glove (no fingers), but it still took me at least two weeks to complete them.  It actually spanned about a month, but I did not work on them each day and I visited MA for 10 days in December, so I finished them up when I got home during Christmas weekend.  I did not give these as a gift until New Year's weekend, so I had a bit of breathing room.

No matter what, it is always hard for me to part with my creations.  I may not have come up with the pattern or the idea, but I take pride in the finished piece, so I end up wishing I made the item for myself!  Selfish, I know, but I did give the gloves away, so it is not too selfish.  (I hope).

Now that you see how I got through a pattern, with a few hiccups.  What hiccups have you encountered in your latest WIP?  Let me know, take pics, send them to my email by clicking the envelope link below.  I would love to show off your pieces!

Sunday, January 2, 2011

Craftolutions 2011

Happy New Year!  With the new year here, why do we feel obligated to create goals?  My answer to that is so we can be a better person than we were the year before.  Although these are my Craftolutions, my knitting, sewing, and on the path to enlightenment declarations, if I make someone happy by making something handmade for them, then it will be worth my time and make me feel good in the process.


I want to complete my UFO's (unfinished objects).  Now, I am allowing myself the freedom to do an alterante project with the yarn.  I have a few projects that are only about a few inches long, so I can unravel it and repurpose those yarns into a project that will actually see the light of day.  I think that is more important than completing a project that had it's issues from the start!

I want to organize my patterns and craft ideas in a 3-ring binder.  I have knit and crochet patterns stuffed everywhere, swatches in random bags, yarn labels in my notions bag and magazine image clippings tucked in books.  My sister has her's organized in this manner and it was so nice to look through.  I want to organize it with a section for Completed and one for To-Do.  I will include those swatches in a sheet protector along with the pattern and yarn label.

I want to have patience (aka HP).  I can't tell you the number of times I get worked-up over a project that is not coming out right or is taking too long.  Mostly my sewing projects get me frustrated.  I imagine something being easy or should only take a few hours and when it doesn't lay flat, or takes forever to complete, I often have meltdowns.  Yes, I am admitting that I swear and often shed a few tears over my inability to accomplish the task at hand.  I believe it is due to me always wanting to challenge myself and so, of course, I don't always pick it up as quick as I would like.  I need to take a time-out and deal with my patience.  New mantra: Breathe in, HP, Breathe out...

I would like to knit, crochet, or sew something for charity.  There are several charities that knit for babies or animal shelters that can always use blankets.  I am not going to put a number on how many items I will make and donate, I can only say that I will do what I can throughout the year.  A few that I have Googled are Knitting for Charity, Knit-a-Square, and Hugs for Homeless Animals.  Reading through these websites makes me feel like I should have done this ages ago.

I would like to teach someone to knit.  This may be for selfless or selfish reasons.  I want to share my knitting skills with someone; it is a great gift to give.  But, I would also like to have a local knitting buddy to hang out with and do my projects and swap ideas.  I have taught one person to knit.  She is still knitting and is developing her skills wonderfully.  She emails me once and a while for help and I do what I can, long distance!  A few people have expressed interest in learning to sew, so maybe I can get them to make that sewing machine purchase and I can help with that skill.  Although, knowing my record with meltdowns, it might not be the best idea.  Or I could think of it as working on my patience (Craftolution #3).

This is always something that needs constant watching.  I need to be realitic with projects and I need to give myself more time to complete them.  For example, with Christmas, I started in the beginning of November, but it still was not enough time to do all my homemade gift ideas.  Another example is stating I'm going to make this one thing for everyone, then not liking the first one and having to come up with a Plan B; that happens often.  So, if I start early enough, coming up with a Plan B or even C should be no sweat!

I want to get back into jogging.  Now you're thinking, "How does this relate to the Craftolutions?"  My thoughts are that knitting, crocheting, sewing, etc are pretty sedentary "sports" if you will.  I need to keep a healthy body and a healthy mind to cut down on meltdowns and to have HP.  Along with this, I want to complete at least one 5k a quarter.  One year I did a 5k each month, because I had a goal to get my time under 30 minutes.  I did not get under 30 minutes, but at least I was out in the sun doing something.  I am not going to say under 30 minutes this time, but to get it between to 30 to 34 minutes. That is being realistic :-)

My last Craftolution is reading!  Last year I read 16 books, so this year my goal is to read 17 books.  I did finally finish reading my last book of 2010 (Knit Too).  Not sure when I will be reading, since I will be so busy with jogging and completing UFO's.  Ha ha.  I don't like to pre-choose books, I will just read whatever I'm in the mood for at the time.  I will try and break it down into quarters, so that will be about four books a quarter.  I will post my reading lists as I go so I can stay on track.

So, what are your New Year's Resolutions?  As long as you stay postive and set realistic goals, then you can achieve them.  If you are having trouble, see me and I will help you stay on track.  But, I also reserve the right to get your support with keeping me on track!  Here is to 2011 [clink your knitting needles, crochet hooks, sewing needles, and book bindings together now]!