Happy Easter!
Since my quilt blocks have been done for weeks now, it is time to pick a layout and sew them together. I first blogged about my Scrappy Quilt here:
Next step you choose a layout. Since I chose the lap size, I only have three (3) layouts to choose from. I mean, you can do whatever you want, but to have some pattern, there are 3 ideal layouts for this size quilt. I will lay them all out for you and then I will tell you which one I am doing.
A neat trick I learned in quilting class, is when you have your blocks laid out and you are trying to figure out which one you like best, you look at it through a peephole. Yup, a door peephole. A peephole for a door can be bought at any hardware store for about $5.00. If you work with colors and palettes, I highly recommend a peephole. It makes everything look like a kaleidoscope. Wait and see....

Ok, I'm getting ahead of myself. The next actual step is to press your blocks on the wrong side to get all of the seams laying flat and pointing outwards.

That is the back of one block. See how one seam is all crazy on the right? You will press that down so it is neat as a pin back there.
Next you "square-up". Squaring up is a crappy job. Nobody likes doing it. It is easiest if you have a clear plexi quilting square in the size of your block so you can just zip around it with the rotary cutter. Alas, I do not have said plexi square. When I measured my blocks, the numbers were all over the place. I had real job in store for me.
Not sure how or why the blocks were as much as an inch off one another. No clue how that happens, unless I cut the strips wrong, and I would have noticed a half inch difference when I was making the blocks. Whatever, no need harping on what I can't figure out...
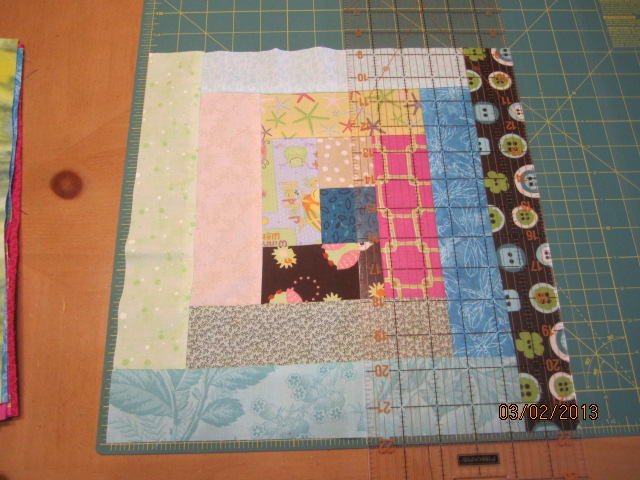
So, because of the measurement differences, I now had to pick a size and cut them all to that size. In the end, no one will notice that the outer strips are a 1/4" thinner than the next one. I cut them all to 13-1/4". They should have been about 14".
Now for the fun part...the layouts! You will now see why I separated the Lights from the Darks.
Layout #1: Fields and Furrows

Kind of chaotic. Now look at it through the peephole:

Can you see the Light and Dark diagonal stripes? Cool, huh?
Layout#2: Timberline


That one makes one Light diagonal line with the other Lights pointing to the center stripe.
Layout# 3: All Sevens


I am noticing on this one that one block is not facing the right direction. All Dark corners should be pointing down and to the left. The bottom middle is pointing up and to the right. Darn! You get the idea!
All my log cabin quilts have been done in the Fields and Furrows layout. Can you guess which one I am choosing to do??
If you chose Fields and Furrows, then you would be WRONG! I'm breaking my rut and choosing Timberline. Below is all of the blocks sewn together in the correct order.

The book explains how you ensure that your blocks are in the correct orientation when you go to sew them. I won't explain it here. All I have to say is pay attention when you do this. I did make one mistake and had to take the seam ripper to it. Also, be careful when you rip out these seams, you can poke a hole in the fabric. Ha, trust me.
Next will be making the borders. I will save that for some time later in April. Thanks for stopping by!
No comments:
Post a Comment