Showing posts with label sewing. Show all posts

Sunday, December 22, 2013

Braided Towel Rug


Merry Christmas!
 
For Christmas this year, I wanted to make my sister something.  I had an idea for last year, bought the items to make it and then ran out of time.  This year, I uncovered the items I bought and convinced myself that I had enough time to make it and just do it, no more excuses.

I got this idea from a blog called Sisters of the Wild West, with a project called Braided Towel Rug.  Pretty much the project is a braided rug made with towels.  So, I bought 3 different colored towels, a green, a beige and a yellow towel.  I washed them and then cut them into strips.


This sounds easier than it was.  This made a complete mess.  I will soon show you...


Cutting the towels require you to trim off the seamed edges.  Then cut the towel into about 1.5" strips.  Well, let's just say that this project is very forgiving and you can be 1/2" to 1.5" and still be okay with it.


Cut into strips, each towel.  Depending on how big you want this rug, depends on how many strips you will use. 


Each towel yielded about 19 strips.  Because the towels are terry cloth, the loops in the towel get trimmed and make a complete mess.  Utterly miserable!!


This was generated by a shake down of each strip to separate the cutting colors after cutting into strips.   My cutting mat was not too pleased with the after-results either:


I did use a rotary-cutter.  The rotary cutter left behind all of this in the cutting mat.  I had to take my fingernail and scrape the mat.  Not too much fun, but it was a quick task.

 
First, you take one strip of each color and sew them together.  Next, start braiding the three strands.

 
When you come to the end of the strands, you then sew the next strand onto the end of the braided respective color.  You do this for several strips until you have an extremely long braid.  You then start your rug forming.  To form the rug you take the initial sewed strips (the beginning) and start forming a circle in itself:


In order for you to keep everything together, you will need a needle and button thread.  Button thread is thicker and will hold-up to tough wear-and-tear.  So, sew the inner braid to the outer braid of the inner circle. 
 

I made a long braid and then started the rug.  When I got to the end of the braid, I then sewed on more strips and braided.  Continue in this fashion until your rug is the diameter you would like it.

 
I wanted to make a bath mat sized rug.  I only used about a quarter of the rug strips.  It took me about 2 hours to wash and cut the towel strips.  Then another 4 hours to braid and sew the rug in a circle.  No joke, it took awhile.  Plan for this to be a half day to full day project.


I was pleased with the bath mat size, no too shabby!


I almost used a full spool of button thread on just this bath mat.  Buy a few spools, just to be on the safe side. 


Here it is complete.  I like it!!


The cats liked it too.  I left the rug unattended for a few minutes and I come back to them snuggling on it!  I should not be surprised by this. 


Ahhh, the rug feels nice under my bare feet.  I hope that my sister enjoys it too.
 
Merry Christmas!!

Sunday, September 22, 2013

Powder Puff

This is a really silly project.  It took no more than 5 minutes; it will take me longer to type out this post than it did to actually sew.
 
My honey is a baby powder guy (probably TMI for those of you that know him...LOL).  As a joke-but-for-real gift, my sister bought him a 3-pack of powder puffs.  Vince is probably not the most delicate when he handles the powder puff, so as a result, the puffs are ripping.


The ribbon has been ripped off and there is a big gaping hole in two of them.  He still has one that is in pristine condition, because he has not used it yet.


I took a needle and white thread an sewed it up.  I did not worry too much about the thread being hidden because the puffs are fluffy and the thread was hidden anyway.


So, I did not get another satin ribbon, but the holes are now sewn shut.  No more foam sticking out.


I did not tell him that I sewed them up.  I will see how long it will take for him to notice or even if  he notices.  This was not a news-breaking fix, but sometimes it is the little things that matter. 

Sunday, July 7, 2013

T-Shirt Tanks

Happy 4th of July!

I know that the official day of summer already occurred, but the 4th always licks off the summer with a bang!

I have been sitting on this project for a few months.  I promised to work on this for a friend and kept putting it off.  But now, no more excuses!  I have completed this project and think that it was a quick and simple project.

My friend got this idea from Pintrest and I found the source of the project.  It started off as a no sew t-shirt tank project, but I only use fusible webbing for when I'm in a pinch or when a needle is not the most practical way to go.  My machine will make it more durable, so that is what I did.

The project is from the blog Crafter Hours and it is how to make a t-shirt into a tied tank top.

First you take a t-shirt you don't mind cutting up.  But pick one that you would wear to the beach, the pool, hanging around the house or running errands on the weekend.


Cut the neck off straight, then the sleeves and a few strips from the bottom.  I threw away the very bottom edge that has the hemming.  Cut 2 more strips from the bottom.

Then seam  the top cut edges where the neck is big enough to form a casing for the tying strips.


Snip the strips so they are long and thin, not a circle.  Then thread the strips, one in the front and one in the back.  Bunch the fabric up a bit and tie on the shoulders with the strips.  Trim away any excess striping material once you have the ties at a good length.


I left two out of the three shirts I did with the cut raw edge at the bottom.  Once that is done, then you are done!!


Another one:


And one more:


This one I also put a casing at the bottom and threaded another strip so that it can cinch on the side.  This t-shirt was a men's XXL, so I had to take it in at the sides.  I had plenty of room at the bottom to do the cinching.


There you go, go forth and cut up all of your husband's t-shirts so that you can have some chic beach shirts and all-round comfy tees.

Sunday, June 30, 2013

Kathy's Cardi Conversions

Way back when, like last year, my sister gave me a bunch of sweaters to convert into cardigans.  She saw my post, Unbiased Cardi, and wanted some!  Well...let's just say I have been sitting on them...not making them into cardis.  Ugh, I know, I'm a procrastinator.

When my sister came down, one of the days we finally worked on those sweater conversions.  The first one was a polo-neck style:

Before

We cut this one up the middle, sewed the front band towards the inside and sewed a hem up each side.  Here is Kathy modeling:

After

Next, we took a cabled crew neck:

Before

We cut it up the front and cut the sleeves down a bit.  The sides were hemmed.  Here is her modeling that one too:


So, for the last one, we did something very different.  Well, not so different that we did not cut it up the front, but different enough.  Here is the before:

Before

This one was a cashmere turtleneck.  We cut it up the front, but at a slight angle, cutting right through the turtleneck.

Angle Cutting - In Action

Then, we took some yarn that I used for the Fuzzy Wuzzy hat and scarf set last Christmas and crocheted it on the edge.  Huh?  Yes, we did a mixed media project!!

Just Poke It Through

We took a steel crochet hook and poked it through, grabbed the yarn and pulled it through.  This part Kathy did, I was working on the other cardi conversions.  She did a single crochet around the whole edge, then crocheted double crochets for two rows.  Wait until you see it...pretty neat...

After

We looked through my button jar and found a nice Celtic silver button to cinch it closed.  I'm proud of her!  Here are a few more pics of it:

Close-Up

Ever After

I can say we had a good 'ole crafting time with her sweaters.  They all got a new lease on life when Old Man Winter hits Mass again this year.  Kind of funny to see her wearing a sweater next to a cactus in the month of June.

Let me know if anyone else has done their own "cardi conversions"!

Sunday, June 2, 2013

Sewing Room - Part 2

I wrote a tester at the end of the Bata Blanket post about the progress of the sewing room.  I am ready to reveal what we are doing:

Making shelves along the one wall that is indented and having a computer work station built-in

Whoo-hoo!  I know you guys are probably, like, Big deal, shelves?  Anyone can do shelves.

Although this may be true, these will be my shelves, made especially for me by Vince and myself, made for my sewing room.  I can really, seriously get organized and take my crafting serious.


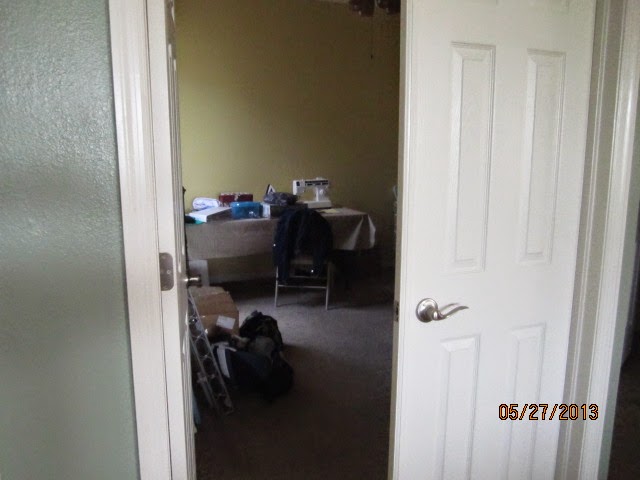
This is how the sewing room has been.  An eyesore with junk everywhere, having one door closed so I don't have to look at it.  In the pic, it is not very inviting.  The cats hang out there and that is about it.  Sad.


That is a pic of the left side of the room when you walk in.


That is a pic of the right side of the room when you walk in.


This is the wall where the shelves will go and computer station.  It is like a nook.

Ok, you can say it: What a mess!  The bookcase is the only thing in this room that is organized and I did not even take a pic of it.  Later.

The Plan:  There will 4, 8 foot long shelves that are a depth of 15 inches each.  Then the computer station will be a 24 inch deep shelf, running in parellel to the other shelves that will be above it.  There will be a 4 foot  long shelf under the computer station that will hold the printer and paper shredder.

Everything will fill in around these shelves.  I will get rid of the current computer cabinet, that you see above.

To start, Vince bought wood and had it cut.  We got it home and he trimmed it so it would fit in the nook.


My job was to sand using the belt sander.  Cool!


Vince rounded the edges with a separate piece of sandpaper.


He used the compound miter saw to trim up and make the ledge where the planks will be sitting on.  He cut 2 x 2's at 45 degree angles so they will fit into each other.


Next was staining the wood.  I chose a Cherry color.  Very nice!!!


I did one coat on the bottom of the plank and 2 coats on the tops of the planks.  Man, that is manual labor!!


A finished plank.  What a handsome plank!  Ok, I am going to stretch this project out a bit more.  Next time you will see it actually in the room!!