Showing posts with label family. Show all posts

Sunday, December 29, 2013

Ice Cream Cozies

For the ladies at work, I wanted to knit them all an ice cream cozy.  I had previously knitted one and gave to my friend and she loved it!  Here is that post:
I have 6 ladies at work and I assume they all love ice cream.  Perfect!  I started out by buying a bunch a different, vibrant colors of yarn at Joann's:

 
I chose Deborah Norville's Everyday Soft Worsted (100% Acrylic).  The colors I went with were, clock-wise from top:
  • Electric Green
  • Aubergine (Purple)
  • Baby Yellow
  • Wild Blue
  • Neon Pink
  • Snow White
Here are the finished cozies:

----
----
----
----
----
 
 
Once I was done knitting those, I decided to make 2 more, one each for Vince's daughters:


When I gave my work friends their cozy, I also had a cooler full of pints of Ben & Jerry's ice cream.  They each got to pick out their flavor.  I will do the same for Vince's daughters.
 
I do still owe the friend I originally knitted one up for at least one more.  She has two daughters, so, I will probably knit up two more.  These make the best gifts!
 
What is your favorite Ben & Jerry's ice cream??  Share your thoughts in the comments!
 
Mine is Chunky Monkey (Phish Food is a close second) :-)


Sunday, December 22, 2013

Braided Towel Rug


Merry Christmas!
 
For Christmas this year, I wanted to make my sister something.  I had an idea for last year, bought the items to make it and then ran out of time.  This year, I uncovered the items I bought and convinced myself that I had enough time to make it and just do it, no more excuses.

I got this idea from a blog called Sisters of the Wild West, with a project called Braided Towel RugPretty much the project is a braided rug made with towels.  So, I bought 3 different colored towels, a green, a beige and a yellow towel.  I washed them and then cut them into strips.


This sounds easier than it was.  This made a complete mess.  I will soon show you...


Cutting the towels require you to trim off the seamed edges.  Then cut the towel into about 1.5" strips.  Well, let's just say that this project is very forgiving and you can be 1/2" to 1.5" and still be okay with it.


Cut into strips, each towel.  Depending on how big you want this rug, depends on how many strips you will use. 


Each towel yielded about 19 strips.  Because the towels are terry cloth, the loops in the towel get trimmed and make a complete mess.  Utterly miserable!!


This was generated by a shake down of each strip to separate the cutting colors after cutting into strips.   My cutting mat was not too pleased with the after-results either:


I did use a rotary-cutter.  The rotary cutter left behind all of this in the cutting mat.  I had to take my fingernail and scrape the mat.  Not too much fun, but it was a quick task.

 
First, you take one strip of each color and sew them together.  Next, start braiding the three strands.

 
When you come to the end of the strands, you then sew the next strand onto the end of the braided respective color.  You do this for several strips until you have an extremely long braid.  You then start your rug forming.  To form the rug you take the initial sewed strips (the beginning) and start forming a circle in itself:


In order for you to keep everything together, you will need a needle and button thread.  Button thread is thicker and will hold-up to tough wear-and-tear.  So, sew the inner braid to the outer braid of the inner circle. 
 

I made a long braid and then started the rug.  When I got to the end of the braid, I then sewed on more strips and braided.  Continue in this fashion until your rug is the diameter you would like it.

 
I wanted to make a bath mat sized rug.  I only used about a quarter of the rug strips.  It took me about 2 hours to wash and cut the towel strips.  Then another 4 hours to braid and sew the rug in a circle.  No joke, it took awhile.  Plan for this to be a half day to full day project.


I was pleased with the bath mat size, no too shabby!


I almost used a full spool of button thread on just this bath mat.  Buy a few spools, just to be on the safe side. 


Here it is complete.  I like it!!


The cats liked it too.  I left the rug unattended for a few minutes and I come back to them snuggling on it!  I should not be surprised by this. 


Ahhh, the rug feels nice under my bare feet.  I hope that my sister enjoys it too.
 
Merry Christmas!!

Sunday, July 28, 2013

TreeUmph!

I did say that I was going to start doing some fun activities before the summer is done.  Last weekend, Vince, me and his daughters went to TreeUmph!


TreeUmph! is an Outdoor Zipline Adventure and Obstacle Course.  It is an obstacle course that you do in the trees.  So, first you have a climbing harness on with a contraption for the zipline and two carabiner clips attached to separate lengths of rope (rock climbing rope grade).  You must tether yourself to the safety wires at all times up on the course, but all obstacles can be done with your ability to balance and use your weight wisely.


First, we have us ladies, all geared up and ready to rock and roll!  We all had to go through a practice obstacle course with an instructor so they can show us how to be safe and to trust the ropes and gear attached to us.


Behind me in this course, you can see some of the obstacles.  There were a total of 6 obstacles for adults; they got progressively harder and higher.  The course behind me had a tube that you had to crawl through.


All of the courses were in the trees, you had the ladder to climb up, the landing, the bridge and the zipline.  I have pics of all of these elements.


Alex and I are on a landing, having just completed a bridge.  The bridges are the spans that connect the landings.  Each one is slightly different.


This is a bridge.  This bridge were logs suspended only by ropes hanging from wire ropes.  I am tethered to the safety wire rope above my head.  You accomplish bridges by either holding onto the ropes attached to the logs, the wire rope they are attached to, or the wire rope you are attached to.  There is some upper body strength required for some of the obstacles.  Look how high up I am!!


Vince was the cameraman; he took this picture from the ground.  I am holding onto the wire rope that I am attached to.  There is nothing else to hold onto to.


Like I said, the obstacles got progressively more challenging.  This bridge was a series of ropes hung like a U or jump-rope like and you stepped onto the rope loop only, to get across.  Weeee!!!


 Here is Alex doing a zipline.  We had a special attachment for the ziplines.  This was so much fun!


There was even a Tarzan moment, where you attach yourself to a swinging rope and literally swing and grab onto the rope netting.  Once you are on the net, you climb over to the landing.


Another bridge where you are stepping on the end of the log, where the log will move on you, not to mention that they are suspended by more rope.  Did I mention that rope is very flexible?  This section was the optional section.  It was Course 4 that gave you a choice to continue with Course 4 or start Course 5.  You cannot start Course 5 from the ground.  Right away, Course 5 was monkey bars on ropes...ugh!  Alex and Gen continued with Course 4 and Vince and I did Course 5.  Course 5 took the longest and is the most challenging.  I did complete it, but it was not easy.


This bridge was Course 4, where once you were done with Course 5, Course 4 picks right back up in the trees.  This one had a wire rope to walk on, with rings that you had to go through.  I was very tired, almost exhausted at this point and straddled that damn ring!  There was no fancy moves to get through that!

There was a final zipline that was 650 feet long and starts 60 feet off the ground.  Not everyone make it completely across, ending just shy of the landing.  You would just grab the wire rope and use the hand-over-hand method to reach the landing.  Vince made it and I came up just shy.


After all of that, which was about 4 hours of straight obstacling, we ate lunch at a restaurant called the Linger Lodge.  If you did not know it existed, you never will find it; you will never stumble upon it.  It was located within a housing community, in a trailer park/camp site area.  Yes, we drove through a very nicely established, maturely landscaped community and then heading into a campground-like place with trailers.  First thing, there is the Linger Lodge attached to a bait shop and complete with a laundry facility in the back near the ladies room.  Interesting!

We sat out by the back screened in patio overlooking the Braden River.  There is a side story that the owner got his leg bitten or bitten-off by an alligator.


This is supposedly the alligator that bit the leg.  He is stuffed and on the wall of the restaurant.  Along with others...


Behind the bar they had animals not naturally seen in nature, ha, like the jackolope.


In addition to fish and lots of animal skulls.  Vince tried one of the more exotic items on the menu, alligator chowder.  We all had a bite...it wasn't bad!  It had a cajun flavor.

Our day was filled with lots of excitement.  Unfortunately, TreeUmph! is only located in Bradenton, FL.  But I do believe there are other adventure courses similar to TreeUmph! around the states, somewhere.  I'm excited to know that this is only a 1 hour drive and we can have a half day of some serious climbing!  I will definitely be back!

Sunday, July 14, 2013

Hair Donation

Surprise!  I have always had long hair.  When I was a kid and early teenager, it was really long and hit below my waistline.  Then I decided to trim it back a bit and then I have settled with below shoulder length for a good part of my life.  Once I did get it cut just below my shoulders, maybe brushing the tops, that has been the absolute shortest I have had it since a child when my sister and I would get the same thick bangs, bowl-like hair cut.

My friend Kj and my sister Kathy have both donated their hair to charities and I have been wanting to do that too.  But that means cutting my hair really short or growing it forever to get it long enough where I won't miss the long length.

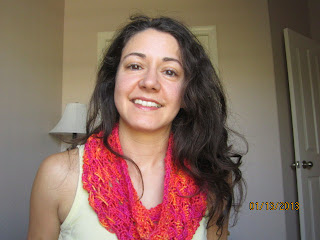
As you can see from these two pics, my hair was getting pretty long:

January 2013

May 2013

I chose the charity that Kj used which was Pantene Beautiful Lengths.  This charity was started in 2006 and it is Pantene partnered with the American Cancer Society to bring real-hair wigs to women fighting cancer.

I made my appointment and then rescheduled it because I had not made up my mind about the style.  I finally went on July 3 to get the snip!

Here is me preparing for the cut:


The hair must be freshly washed and dried.  So she pinned up my shorter layers that were on the top and blew dried the bottom layer, which was the longest.  She placed it in rubber bands and then cut right above where the top band was.


It may be hard to see the ruler on the left, but I was able to cut off and so therefor donate 11 inches!!!  They only require a minimum of 8 inches!  


Here is the after:


Wow, huh?  I almost don't even recognize myself!  She has styled my hair kind of funny, where it curled under into a big mushroom.  Ugh...not helping!  I was feeling a bit strange as it was, then to have a mushroom on my head!?  In addition to it raining outside, the style took a dive anyway.

After dinner, I went home and flat ironed it so the ends were straighter, since I was looking for a flatter style, not a bushy one.  I like the side-swept bangs.  I parted it on the opposite side than I am used to, so I need to train the hair to stay over on it's own.  Right now it just wants to be in my face.

Overall, I am liking it!  I did tell a few people that I was growing it to donate, but did not really say when I was doing it.  Surprise, surprise!

Sunday, June 30, 2013

Kathy's Cardi Conversions

Way back when, like last year, my sister gave me a bunch of sweaters to convert into cardigans.  She saw my post, Unbiased Cardi, and wanted some!  Well...let's just say I have been sitting on them...not making them into cardis.  Ugh, I know, I'm a procrastinator.

When my sister came down, one of the days we finally worked on those sweater conversions.  The first one was a polo-neck style:

Before

We cut this one up the middle, sewed the front band towards the inside and sewed a hem up each side.  Here is Kathy modeling:

After

Next, we took a cabled crew neck:

Before

We cut it up the front and cut the sleeves down a bit.  The sides were hemmed.  Here is her modeling that one too:


So, for the last one, we did something very different.  Well, not so different that we did not cut it up the front, but different enough.  Here is the before:

Before

This one was a cashmere turtleneck.  We cut it up the front, but at a slight angle, cutting right through the turtleneck.

Angle Cutting - In Action

Then, we took some yarn that I used for the Fuzzy Wuzzy hat and scarf set last Christmas and crocheted it on the edge.  Huh?  Yes, we did a mixed media project!!

Just Poke It Through

We took a steel crochet hook and poked it through, grabbed the yarn and pulled it through.  This part Kathy did, I was working on the other cardi conversions.  She did a single crochet around the whole edge, then crocheted double crochets for two rows.  Wait until you see it...pretty neat...

After

We looked through my button jar and found a nice Celtic silver button to cinch it closed.  I'm proud of her!  Here are a few more pics of it:

Close-Up

Ever After

I can say we had a good 'ole crafting time with her sweaters.  They all got a new lease on life when Old Man Winter hits Mass again this year.  Kind of funny to see her wearing a sweater next to a cactus in the month of June.

Let me know if anyone else has done their own "cardi conversions"!