Showing posts with label Berroco. Show all posts

Sunday, April 13, 2014

Colonnade Jacket

This sweater is going to drive me to drink!  Let me start from the beginning...
 
I love this sweater, the Colonnade Jacket from the Interweave Knits Summer 2013 issue:


I bought yarn for it at the end of November of 2013 and did a gauge swatch and have not did a thing with it until the end of March.
 
The yarn I bought is Berroco Vintage (50% Acrylic, 40% Wool, 10% Nylon) in a blue color called Cerulean, at my LYS Brandon Yarn Boutique.  It is so soft and has a heathered look to it, not completely solid in color.


Love It!!
 
Anyway, as you can see in the picture of the jacket, there is a lace on the entire front edge.  This pattern is written so that you knit side to side, so at the beginning and end of each row, you are knitting the lace pattern, with knit or purl sts in between.
 
This is where the drinking comes into play.
 
I wanted to challenge myself and read the pattern from the chart and not do words or a written out pattern.  Seems like an easy chart:


I mean, I have seen some pretty involved charts, and this one is easy.  WELL, it turns out my brain has not been wired to read charts.  I tried, really tried to get the hang of this.  I just could not successfully complete a pattern repeat through to the 10th row to save my life.  I would goof-up on something at some point.
 
I attempted this pattern on a gauge swatch, of course.  I'm crazy, but not that crazy to jump in on the project before getting the sts down pat on a practice swatch.


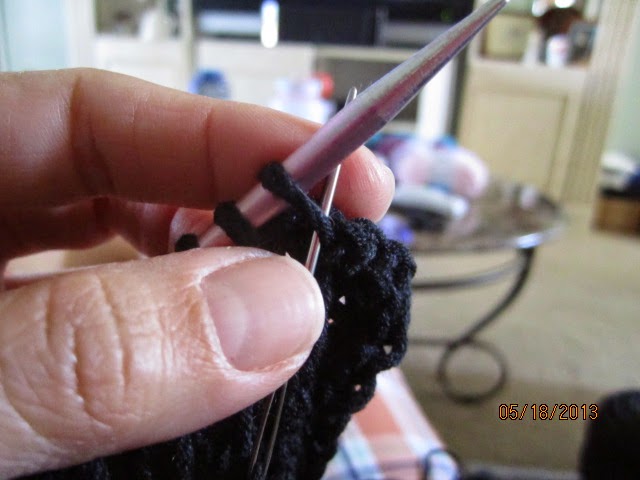
I grabbed leftover acrylic from my stash to practice.  The orange string is my lifeline.  Yes, a chart and a lifeline.  Two new techniques to me in this one project.  The object of the lifeline is that you have the string in your project at a point where you know that it is error free.  Like you are good up to that point and you mark where this point is.  You continue to knit and if you do make an error that you cannot fix, you can rip out your work down to the lifeline.  The lifeline has secured your row and you slip your needle in the stitches that the lifeline is holding.  Viola!  You do not have to rip the whole thing out and you just resume knitting from where you marked.
 
The use of the lifeline is critical in lace knitting.  There are yarn-overs (yo) and slip, slip knit (ssp) all over the place, where you would never be able to recreate that if you dropped a yo somewhere or whatever the error may be.
 
Once you get to a point, you insert a new lifeline and continue knitting.  I use two, so that when I am ready to place the 3rd one, I remove the bottom-most lifeline and use that same string again.  You remove it by simply pulling it out.
 
In the above picture with my practice swatch, just above the bottom repeat, there is an error.  A big boo-boo.  I had ripped out the whole thing multiple times and since I had not put the lifeline in at the start, I had to cast-on again and again and again.  Like I said, I was chart reading and really trying.
 
When I made that boo-boo, I just started back at row 1 and continued with my first lifeline.  It worked!  I had to rip back a few times to the lifeline in my practice swatch.  Well, at least that is what it is there for.
 
I continued with my practice swatch for a few more repeats and then bound off.  I wanted to graduate to my actual yarn that I will be knitting with and with the size needle I determined I would use.  Not bad, I have removed the lifelines, which I was gaining confidence on:


I can do this!!  Ok, so I cast-on for the project, ahem, 180 sts.  Jeepers, I hope we are good-to-go!!
 
I place my lifeline at Row 1, my first knitted row.  Good thing, because I messed up and ripped out... a few times at various rows.  I was getting a bit fed up with this.  So, I reverted back to the way I like to knit: with flashcards.
 
I write out each row on an index card in words or abbreviations.  I have one card where I mark what row I am on and where I have placed the lifeline.  This way, I am only looking at the very row I am knitting, not distracted by symbols or viewing the entire chart and losing my place and translating in my head what to do next.


Let me tell you, this has worked out SO much better!  I no longer feel the need to get drunk after knitting or requiring blood pressure medication.  I am using the lifeline as I go and I feel much better about the project now.


I'm not that very far along, but at least I actually want to keep working on it, rather than ditching it and looking for another project to knit with my boutique yarn.

Sunday, August 25, 2013

Bata Blanket #2

Yes, I am making the Marble Baby Throw from Lion Brand Yarn again.  This time for Vince's sister, who is having a boy.  I have made it twice now, they are listed below:
 
I named these blankets for the language of the recipients.  Bebe for my girlfriend who has Spanish spoken in her house and Bata for my Filipino boyfriend, whose these blankets went/will go to his Filipino friend and sister.  Bebe and Bata mean baby.

I am using the same yarn I used for the Bata Blanket: Berroco Comfort (50% Cotton, 50% Acrylic).  The colors I chose this time are Seedling (green) and Coffeeberry Heather (dark brown).


I checked out her gift registry and she had lime green and dark brown bedding as her color theme.  So, I did my best, even though Seedling is a bit darker than the lime green of the bedding.

I am crocheting, mainly at night, while TV watching.  But during the week, it is hard to have more than 30 minutes to work on it, so I have been reading.  I am crocheting the bulk of it on the weekends.  I have to finish by the beginning of September, for she is due September 12. Plenty of time.

Famous last words....


It is more than half complete.  This blanket takes a total of 4 skeins of yarn.  Since it is only 2 colors, 2 skeins each of Comfort color.  I am on my second set of skeins = more than half done.


In search of some natural lighting and background, I may have chosen poorly because the bushes are almost camouflaging the blanket!  You get the idea and this picture accurately portrays the colors of the yarn.


Think of this pattern as one big Granny Square.  I love how it is so easy. 
 
I have a feeling that this will not be the last Marbled Baby throw I crochet this year.  There is always someone having a baby and off the top of my head I can think of two women I know that I could crochet this for.  So much for knitting for myself...better warm up the crochet hook.

Sunday, August 18, 2013

Palm Scrap Afghan

I think I have more unfinished projects right now than I have ever had in my life.  I am not even going to count them, I'm embarrassed!  Today I am writing to show off my newest project:

Palm Scrap Afghan
 
This project is an idea from a pullover/tunic project found in a new magazine I bought at my LYS.  The magazine is Interweave Crochet, Summer 2013:
 
Interweave Crochet Summer 2013
 
This issue has tons of cute things!  My gosh, I wish I had more time for crafts!  Anyway, back to my idea.  Thumbing through the magazine, there is a pattern Palm Tunic that I love love.  Here is a pic:
 
Palm Tunic

You crochet each triangle motif separately, but as you do your last set of stitches around the triangle motif, you connect it to the motif you crocheted before it...makes less ends to weave in.
 
I got this idea to do these motifs but make a scrap afghan out of it.  It will be eclectic, no doubt.  I started off with the blue yarn first.  Then added the light purple yarn.
 
 
I mainly started it just to see if I can read a pattern and actually crochet something that looks hard.  Although, it is a bit tight and the center part puckers...I am really liking it.
 
I added a few more a few weeks ago:
 
 
I do need more dark colors.  I am a very pink yarn collector, I have a ton of it, actually.  Which is why I want to use up the scraps so I can buy more yarn and be to justify it with a straight face.
 
My favorite motif is the darker pink one on the left.  It is a cotton/silk blend.  The stitches pop out more with this yarn.  I have a decent amount of this yarn left, but I have to save it to spread it out.  Mix it up a bit.
 
 
It has been awhile since I made a motif, it will be like learning the stitches all over again.  But it takes a good 30-40 min just to crochet one, so I don't know when this will actually get done.  I will just chip away at it as the days go by. 

Sunday, June 16, 2013

Bata Blanket - Finish

Bata Blanket is done!!  I only used up about 1 skein of each color.  If I wanted to make it bigger, I could have bought another of each color, but when I measured it, it was already larger than the recommended size of 30" x 30".  

I started the project on May 19th and finished on June 1st.  I first posted it here:


The pic of the yarn above is all that was left.  Not too shabby.


The finished blanket was so cozy once it was done.  I had draped it over my legs while Vince I watched a movie.  Perfect-o!


I think the color combo is really nice together.  The light and dark makes it a girl blanket, but not strictly a baby blanket.  I will ship it off to baby Kaitlyn next week.  I hope she will enjoy it for years to come.

Monday, May 27, 2013

Bata Blanket - Part 1

Happy Memorial Day!

Bata, in the Filipino language, means Baby.  I have decided to crochet a baby blanket and give it to Vince's best friend who just had a baby girl in February and call it my Bata Blanket.  It is a pattern that I have crocheted in the past, so I will not be reinventing the wheel on this one.

The pattern is the Marbled Baby Throw from the huge selection at Lion Brand Yarns.  I had crocheted this for my friend's baby last summer, the CB Bebe Throw.  Here is a photo from that project:

Oliver's Blankie

I hear from Crissta and Oliver loves the blanket and sleeps with it every night!  I love it!!!

So, since it was a hit with one baby, let's go for two!  Vince's friend lives out in California and just had his second child.  Way back in 2010, I crocheted the same baby blanket pattern, like, 4 times.  His son got one of them.

Mateo's Blankie

Ok, let's get down to the details of this blanket.  I am using Berroco Comfort (50% Nylon, 50% Acrylic), worsted weight.  I am using two different purples (Raspberry Coulis & Grape Fizz), a teal blue (Dutch Teal) and a pink (Ballet Pink) bought at the Brandon Yarn Boutique.  I am using a size I hook. 

The Ballet Pink and Grape Fizz are light colors and the Rasperry and Dutch Teal are darker, more saturated.  The mix of them together area great! 

Berroco Comfort

The pattern is your basic granny square.  Just one big square that you change colors after two rounds.  I started this blanket last Sat, May 19.

The START!!

The above pic is what the start looks like, with all of the colors being used once.  From the middle, the colors are Dutch Teal, Raspberry Coulis, Grape Fizz and then Ballet Pink.  Once the pattern is established, you don't even need to lug around the pattern anymore and the colors start to come together.

Love this color combo!

I chose these colors over the Comfort Baby colors because the saturated colors give it such a pop, that I'm sure the bata will enjoy it as a toddler, too.

Vince and I have a plan that is being worked on for the sewing room!  I'm so excited to be moving forward with something in that room.  Once I had unpacked everything, it looked just as worse as when the stuff was in boxes!  Preview: I helped cut wood on a compound miter saw, I sanded with a belt sander and I am an expert on wood stain.......

Sunday, May 19, 2013

Weekend Shrug - Finished

Okay, let's call this the Two-Weekend Shrug!  I did mainly work on this on the weekend days, so it is safe to say that it was a quick knit.  I bought two hanks of Berroco Weekend and I ended up only needing less than 1-1/2 hanks.

My last post, explained the source of the pattern and a bit about why I chose this to knit:
Continuing with the open weave pattern, I need to knit to a length of about 15 inches.


Once I had 15 inches knit, then I knitted the ribbing again, like in the start.  I have essentially knit a rectangle, with ribbing at the top and bottom of the long sides of the rectangle.


There was a special bind-off method that was needed to mimic a cast-on edge, called Elizabeth Zimmermann's sewn bind-off.  Elizabeth Zimmermann was a British-born knitter that revolutionized the modern practice of kntting, so essentially she is the Mother of Knitting.  What she says goes. :-)

So, this is how it is done.  First, when you are ready to bind-off, you cut the yarn really long; put it on a sewing needle.  Thread the yarn from right to left through the first two sts, purlwise.


Second, thread the yarn from left to right into the first st, knitwise.


Third, pop the first st off the needle.


Repeat, threading the needle in this fashion until you have threaded through the last st on the needle.


The bound-off edge looks like the cast-on edge.  Yippee!  Even if it doesn't, who is going to know??


Then I sewed the ribbed edges together for 3-1/4 inches on each side; folded the ribbed edge that will be on my neck and I was DONE

I went by Brandon Yarn Boutique to show off how much I had done (I was at the final ribbing part at the time I stopped by the shop).  There were other people there and enjoyed looking at my project.  I loved hearing their praise and comments.


How neat is this little shrug?  I can't wait to wear it!  This will be my newest favorite article of clothing.


I am vowing to make only practical pieces.  I have several items that I have knit and barely wear because it's too warm out or it only goes with one thing.  That is a good-intention statement, but in my UFO pile there are wool items and long-sleeved pullovers. Sigh.... 

Sunday, May 12, 2013

Weekend Shrug - Part 1

Hooray!  

I'm back to knitting and blogging.  This is a good thing!

My newest project (yeah, yeah, I know I have a few UFO's hanging out there) is called my Weekend Shrug.  It was a free pattern on Ravelry called Ribbed Lace Bolero by Kelly Maher published in her blog: 10 feet high.

Kelly Maher's pic of bolero - Front

Kelly Maher's pic of bolero - Back

Isn't that cute?  I wanted something that I can do in cotton or cotton blend, versatile with my spaghetti strap and sleeveless blouses, and will be a quick-knit.

I went to my local yarn shop (LYS): Brandon Yarn Boutique to find the perfect yarn.  I knew if I went to Joann's or Michael's, I'd end up not liking the yarn I chose or something, so I decided to splurge and do it right.  My time is worth it!

Anyway, I chose Berrocco Weekend (75% Acrylic, 25% Cotton) in Pitch Black.  I am using size 8 and 10.5 knitting needles.


Weekend is a nice acrylic/cotton blend that feels and acts more like cotton than acrylic.  It is not springy like acrylic, but true to form like cotton (aka, no give).  Just what I wanted...something that can get thrown in the wash; carefree.

First you start out by ribbing a k2, p2 on the 8's.  I would use my 8 circs, but they are tied up with my UFO Cabled Cardi KAL.  Oh well, I have so many straights, that is what I used.  It was a little awkward because I used the 14" ones, which gave me arm fatigue holding them up.  I did not realize how spoiled I had gotten with the circs!

Little ribbing

Next you start the lace or open weave on the 10.5's.  These were even more awkward to work with at the 14" length.  How did our foremothers knit all day with these things?!

Kathy, my sister, talked my into buying the 10.5 circs.  Her convincing argument was that you only have to buy them once and you will always have them.  So true...consider me convinced.  I printed out a Michael's coupon and bought them at 40% off.  Yeah me!

Once the open weave portion is done, then you knit the ribbing again, back on the 8's, and connect the corners which meet under the arm and sew.  Right now, I would consider myself only about 25% done.  I have about 6" of the open weave knitted and I need about 18".


I will not let this shrug stay a UFO for long.  I have been wanting a black short-sleeved shrug for awhile and have been too cheap and lazy to go shopping for one.  I figured that I would be crafty and just knit the darn thing myself.

Cheers to a quick knit!


Saturday, March 9, 2013

Relay For Life - Knitted Donations

Our work is involved in a charity, Relay for Life.  It is an American Cancer Society event and we are putting up a tent and walking a track on April 5th from 6 pm to the next morning.  We are getting excited to do this because this is the first time our company is having their own team there.  We have a monetary goal of $5000.  Which sounds like a lot and we are doing all that we can to raise this money.


If you would like to donate, please follow this link [Relay For Life] and click the orange DONATE button.  Then choose the blue Search For an Individual link.  Type in Nancy Victorino.  Any donation is greatly appreciated!

One of the fundraising events we are having is called a Silent Auction.  We asked the employees to donate a new or gently used item and on a designated day, they will be displayed for everyone to go around and place a bid by recording your bid on a sheet of paper for that item.  At the end of the bidding (We gave 2 days), the person with the last and highest bid wins.

So, I have donated a few items and two of the items are knitted items that I never got around to finishing them in time for the baby there were originally intended for.  I won't mention who they were supposed to be for (I feel too bad about it).

First up is a baby sweater knit in Berroco Touche (50% cotton, 50% rayon) in a raspberry pink.  The yarn has since been discontinued.  


All I needed to do was sew up the side and arm and weave in ends.  This was a UFO, so I am happy to be completing it and giving it to charity. 


I don't even remember what size I was making.  Probably a 6 month old or 1 year.  I can't tell!  I don't have kids, so I really have no clue how big or small babies are.  I know, for shame!!

Next up is a pair of baby booties knit in Berroco Suede (100% nylon) in a tan color they called Butch Cassidy.   This yarn has also been discontinued.  The name was cute, so I remembered it all these years.  I would consider this yarn a novelty yarn.


These were actually already complete, just sitting in my yarn stash and UFO bin.  They have little fringe going around the top edge.  So cute!

I am glad to have brought these two out so that some baby may enjoy them.  I've been wanting to knit for charity, so since I have not yet, here is my chance.

The auction is coming up on March 12th and 13th.  I'll update everyone if they sell! 

Sunday, January 6, 2013

Origami Sweater Finale - Part 3

Happy New Year!!

I have been working on this sweater since October and I was working steady on it for a good month and then my elbow/arm started to hurt from knitting nonstop that I slowed way down.  Here are my past two posts related to this sweater:
Just a quick overview:  This sweater pattern is from Berroco called Buzios.  I don't know who comes up with these names at Berroco, but typical is not an adjective I would use.  I enjoy that about them, though.  I knitted this with Berroco Origami.


During my weekends knitting, my cat Julie would occasionally nap on my project.  I would get up to get something or do a chore and I would often come back to that pic above.  Too cute!  She's literally face down in the yarn!  Here is another one:


I did have two resolves before the end of the year, 2012, and that was 1) To finish a book that I had been reading since Thanksgiving (have you noticed that I have not been posting about books lately??) and 2) to finish this sweater.  Well, I am happy to report that there are checks in each of those boxes!!


I was definitely going down to the wire with that second resolve!  The microwave clock read 9:59pm on New Year's Eve.  Phew, with two hours to spare!  That was finishing, binding off and weaving in ends.  I used a total of 6-1/2 hanks of Origami.  I had to run down to the Brandon Yarn Boutique to buy that 7th hank on Monday.  Unreal!


A few things about this sweater...The neck is way too big.  I needed to decrease more stitches.  Since I am not going to unravel it, I made a braided string with the extra yarn and laced the V up a bit.


I also replaced the tank underneath with a short-sleeved shirt, so that there is fabric for the sweater to "grab" onto.


I am very pleased with the final product that this sweater became to be.  This can be worn with jeans, leggings or even pajama pants!  I'm actually wearing pj/yoga pants in the above pic, so this can be worn with pretty much everything.

I'm loving it and I hope that you enjoyed my Origami Sweater journey. 

Have a great 2013!

Sunday, December 2, 2012

Origami Sweater - Part 2

I have been knitting like crazy all throughout November, and I'm still not done with my Origami Sweater.  I have been knitting the lace stripe then knitting the seed stitch like a robot.  That seed stitch is enough to drive anyone mad!

I started the Origami Sweater in the middle of October; the first post is here:
Now, I can positively say that I can see the light at the end of the tunnel.  Like I said, I'm still not done, but it's close.  I brought it with me when I visited Mass over Thanksgiving and got a good portion done.

I knitted the rest of the body, then left that on those needles.  I took a second set of longer size 7 circs and did the Magic Loop method to knit the sleeves in the round, rather than using double pointed needles.  My double points were metal and this yarn is like string, so it kept slipping off of them.  I knitted both sleeves and put a contrasting yellow yarn on the live loops to hold them until I was ready to attach them to the body.

Once I was ready with that I would knit a bit from the body, then knit from the yellow holding yarn from the sleeve, knit more body, then attach the second sleeve in the same manner.  It was a bit weird knitting from a piece of yarn, but it worked.


That yellow yarn in the pic is my left hand "needle".  The work on the right handed needle is the body of the sweater.

I got to attach the sleeves while I was on the plane.  I read a bit, then wanted to attach the sleeves before I forgot what I was supposed to do.  Then I went back to reading.


Can you believe that it is starting to look like a real sweater!  Although, it does look a bit shrunken; I'm expecting that once complete, I will stretch it this way and that way to get the stitches settled in and it will fit fine.  Keep your fingers crossed!

One bad thing about all this knitting is that I sort of injured myself.  Yes, a knitting injury, if you will.  My sister calls it epicondylitis, which is pretty much like tennis elbow in my left forearm.  When I knit, I keep my left hand and arm in a bent clenching position for long periods of time holding the left hand needle and that has made my arm very sore.


In the above pic, it is my extensor carpi radialis brevis that hurts!  When my elbow is bent for a period of time, it is very stiff when I extend it straight.  Ugh!  I do running, cross-fit, and the occasional bike ride...I don't get hurt doing any of those activities, no, I get hurt KNITTING!  Like, could it be any more ridiculous?

As a result of that, I have been slowing down on my knitting.  I'm not even done with my holiday gift knitting either.  I may have to forgo those other gifts and start mixing reading and sewing in between my knit projects.

On that note, let me put a warm compress on my arm so I may finish this sweater!