Okay, let's call this the Two-Weekend Shrug! I did mainly work on this on the weekend days, so it is safe to say that it was a quick knit. I bought two hanks of Berroco Weekend and I ended up only needing less than 1-1/2 hanks.
My last post, explained the source of the pattern and a bit about why I chose this to knit:
Continuing with the open weave pattern, I need to knit to a length of about 15 inches.
Once I had 15 inches knit, then I knitted the ribbing again, like in the start. I have essentially knit a rectangle, with ribbing at the top and bottom of the long sides of the rectangle.
There was a special bind-off method that was needed to mimic a cast-on edge, called Elizabeth Zimmermann's sewn bind-off. Elizabeth Zimmermann was a British-born knitter that revolutionized the modern practice of kntting, so essentially she is the Mother of Knitting. What she says goes. :-)
So, this is how it is done. First, when you are ready to bind-off, you cut the yarn really long; put it on a sewing needle. Thread the yarn from right to left through the first two sts, purlwise.
Second, thread the yarn from left to right into the first st, knitwise.
Third, pop the first st off the needle.
Repeat, threading the needle in this fashion until you have threaded through the last st on the needle.
The bound-off edge looks like the cast-on edge. Yippee! Even if it doesn't, who is going to know??
Then I sewed the ribbed edges together for 3-1/4 inches on each side; folded the ribbed edge that will be on my neck and I was DONE!
I went by Brandon Yarn Boutique to show off how much I had done (I was at the final ribbing part at the time I stopped by the shop). There were other people there and enjoyed looking at my project. I loved hearing their praise and comments.
How neat is this little shrug? I can't wait to wear it! This will be my newest favorite article of clothing.
I am vowing to make only practical pieces. I have several items that I have knit and barely wear because it's too warm out or it only goes with one thing. That is a good-intention statement, but in my UFO pile there are wool items and long-sleeved pullovers. Sigh....
A blog dedicated to completing those unfinished craft projects and reading books...
Showing posts with label bolero. Show all posts
Sunday, May 19, 2013
Weekend Shrug - Finished
Sunday, May 12, 2013
Weekend Shrug - Part 1
Hooray!
I'm back to knitting and blogging. This is a good thing!
My newest project (yeah, yeah, I know I have a few UFO's hanging out there) is called my Weekend Shrug. It was a free pattern on Ravelry called Ribbed Lace Bolero by Kelly Maher published in her blog: 10 feet high.
![]() |
Kelly Maher's pic of bolero - Front |
![]() |
Kelly Maher's pic of bolero - Back |
Isn't that cute? I wanted something that I can do in cotton or cotton blend, versatile with my spaghetti strap and sleeveless blouses, and will be a quick-knit.
I went to my local yarn shop (LYS): Brandon Yarn Boutique to find the perfect yarn. I knew if I went to Joann's or Michael's, I'd end up not liking the yarn I chose or something, so I decided to splurge and do it right. My time is worth it!
Anyway, I chose Berrocco Weekend (75% Acrylic, 25% Cotton) in Pitch Black. I am using size 8 and 10.5 knitting needles.
Weekend is a nice acrylic/cotton blend that feels and acts more like cotton than acrylic. It is not springy like acrylic, but true to form like cotton (aka, no give). Just what I wanted...something that can get thrown in the wash; carefree.
First you start out by ribbing a k2, p2 on the 8's. I would use my 8 circs, but they are tied up with my UFO Cabled Cardi KAL. Oh well, I have so many straights, that is what I used. It was a little awkward because I used the 14" ones, which gave me arm fatigue holding them up. I did not realize how spoiled I had gotten with the circs!
Little ribbing |
Next you start the lace or open weave on the 10.5's. These were even more awkward to work with at the 14" length. How did our foremothers knit all day with these things?!
Kathy, my sister, talked my into buying the 10.5 circs. Her convincing argument was that you only have to buy them once and you will always have them. So true...consider me convinced. I printed out a Michael's coupon and bought them at 40% off. Yeah me!
Once the open weave portion is done, then you knit the ribbing again, back on the 8's, and connect the corners which meet under the arm and sew. Right now, I would consider myself only about 25% done. I have about 6" of the open weave knitted and I need about 18".
I will not let this shrug stay a UFO for long. I have been wanting a black short-sleeved shrug for awhile and have been too cheap and lazy to go shopping for one. I figured that I would be crafty and just knit the darn thing myself.
Cheers to a quick knit!
Labels:
acrylic,
Berroco,
black,
bolero,
circular needles,
cotton,
craft,
feminine,
knit,
lace,
open weave,
ribbing,
shrug,
UFO,
unfinished project
Location:
Lithia, FL, USA
Sunday, June 3, 2012
Cotton Wrap
I'm doing what we knitters call "stash-busting" with this weeks project. Stash-busting is taking yarn that you already own and making something with it. It could be yarn that was bought but never used or it may be leftover yarn from a completed project.
In this case, it was leftover yarn. I made a sweater with it back in 2007 and had a lot leftover. I always buy too much. The sweater had it's issues, but it came out nice enough that I do wear it.
This yarn is a hand-dyed cotton that I bought when I visited Mass one winter season. It is a cotton yarn that when it was spun, it was done in a way that makes the strand thick in some places and thin in others; very cool.
I chose to knit a small shawl that I am calling a wrap. It came from the Holiday 2011 issue of Knit Simple. This is not the suggested yarn, so I had to wing it a bit. The original pattern called for a silk yarn that had beads and sequins attached to it. That sounds very pretty, but not within my budget for this week.
The wrap is knitted by casting on 3 sts and increasing at the beginning of each row to create a triangle. I used a size 13 circular needle to accommodate the large number of sts it will have when finished.
The yarn is a purple/brown/pink variegated yarn, which you can see a bit better in the above pic. This worked up pretty quick because it was just knit and purl back and forth.
Since the original pattern with the beaded and sequined yarn was a fancy idea, I knew I had to put a bit of pizazz into this one. She's a bit of a plain Jane. What I decided to do was to make fringe.
I cut strands about 12" long, held two together and placed it at every end-of-row hole. It came out very chic, in my opinion. My new summer cotton wrap:
Stash-busting was fun. You can stash-bust too, by seeing what supplies you have on-hand (which could be fabric, beads, ribbon or anything that is leftover) and make something nice for yourself. Go ahead - Stash-bust!
Labels:
bolero,
circular needles,
cotton,
cozy,
craft,
DIY,
fashionista,
fringe,
handmade,
knit,
magazine,
purple,
stash yarn,
stash-bust,
yarn
Location:
Lithia, FL, USA
Sunday, March 11, 2012
Unbiased Cardi
I've read that you can convert a sweater into a cardigan with some bias tape. So, on one of my trips to Goodwill, I bought this cute Aeropostale, cabled, lime green sweater, with the intention of converting it.
I figured this would be a cute one because it was a bit snug on me. I took the scissors, bias tape and chose a pink button to sew to the top to match the pink embroidered butterfly on the front.
I cut up the middle and got my biased tape prepared (ironed it). I pinned the bias tape to the raw edge of the sweater.
I started sewing the bias tape to the sweater edge. I only got a few inches in and I already was seeing crooked sewing and even the biased tape was off the sweater. Not good. I hate bias tape. I never liked it. I had a project once where I was sewing bias tape around the entire perimeter of this baby bathrobe. Ugh! I couldn't do it; I had to have my friend Kj finish it.
This project is not coming out any better (and I don't have Kj near me to finish this for me)! I just cut off a little more of the sweater to cut off the bad bias sew job.
I then decided to chuck the bias tape and just fold over the raw edge and sew.
This came out much better. Next was the arms. They were so long and monkey-like. I figured I would shorten them, similar to what I did for the Silk Tissue Tee a few weeks ago.
I cut a section out from the arms, keeping the wrist cuff portion. I used the same technique where I reattached the cuff to the arm. This was about where the elbow was.
It does not lay smooth like it was seamless, but when I have it on, it is at my elbow, so the crook of my elbow bunches it up; you can't tell something is amiss.
Yeah, I took this pic on Saturday morning, please excuse my bed-head. Anyway, here it is, my unbiased cardi. It is a cute little thing to just throw on when you're feeling a bit chilled. I did not use the pink button because this is way snugger than I remembered. It would not have looked nice with the button. I can't close this cardi any more than you see in the pic.
That's fine by me...I like it for the arms and a splash of color. I feel good about rescuing something from Goodwill or a yard sale and putting my own pizazz into it.
Sunday, February 19, 2012
5K Shrug
This weekend I ran my first official 5K in Fishhawk Ranch in Lithia, FL (where I live). It was called the 15th Annual Fishhawk Ranch Road Race. There were just under 800 total runners either participating in the 5K or the 10K.
When we woke up on Saturday morning, it was overcast, in the high 60's and a bit drizzily. Normally, that would've been considered a dull day in Florida, but for a day that you will be running, it was a perfect day.
On a day like Saturday, you arrive at the race with a few layers of clothing on, like wind pants and/or long sleeve shirt or a fleece, but then you get to running and you definitely don't want to be wearing all those layers. It's a pain to have to keep running back to your car (esp if the parking is not near where the race starts) or tying a bulky shirt to your waist.
That's where I got the idea of a 5K shrug. Basically it is a long sleeved t-shirt cut up so you are wearing only the sleeves, like a regular shrug that you wear with tanks or dresses. This means a lot less bulk when you are running. Here's what I did:
Take an old long sleeved t-shirt or athletic nylon/quick-dry/whatever shirt you have. This one came from my I-want-to-donate-but-I-might-wear-it-one-day pile. Then cut the bottom straight off just below the armpits.
Cut it up the middle. (Or not, it won't really be a shrug, but it can be your 5K I Love the 80's Half Shirt)
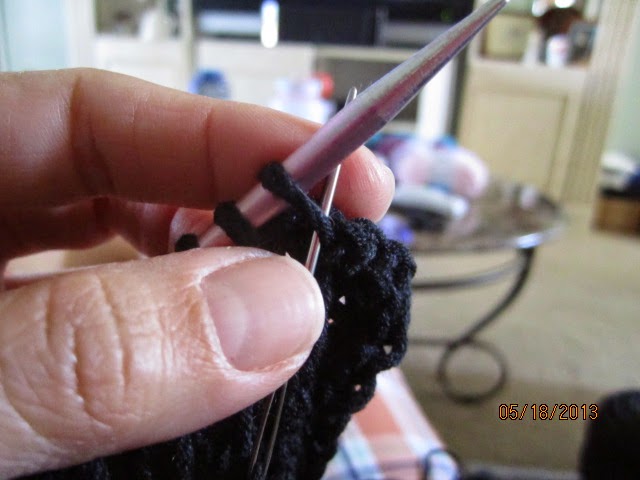
I then matched up the two fronts, wrong-sides together.
I took chalk and drew where I wanted to cut so that it is rounded in the front.
I did the same for the neck area.
Here we are...a 5K shrug. This t-shirt was a loose one, so you can choose to add a button or a pin to the front to keep it closed, in case it is windy or you might actually want to run with it on.
It's now tied around my waist with very little bulk. Since it's all cut up, you may even be able to place the shrug somewhere in the race start area or by a bush or something until the race is done. The likelihood of a cut up t-shirt still being on the ground when you get back is pretty good. I would advise doing this to a shirt that you won't be sad if someone else thought your idea was fabulous and really did take it (junk pile/Goodwill/yard sale/gift from old boyfriend that you forgot to burn).
Back to the race. This was a chip-timed race, which is nice, but they still took the guntime as your official time, so I don't really see the point of the chip. I also timed it with my heart rate monitor watch.
I did a thorough job of stretching out before the race. Vince and I had been running at least 3 times a week for months now, and we recently added a boot camp style training workout 2 times a week (so awesome, its right after work and work pays for it - how can you say no?). The boot camp has improved my running measurably. I'm also sticking to the My Fitness Pal calorie counter and a healthy diet. That has to be helping too.
My public goal was to run the 5K in under 33 minutes. That is about an 11 minute mile. During our practice runs, I would be able to run 2 miles at a 10 min/mile pace, then the last mile it would drop down to 13 minutes. It just took practice and pushing to get a more steady pace.
My personal, more private goal was to run the 5K in under 30 minutes (less than 10 min/mile pace). I have not run that distance in that amount of time since running a weekly 5K running series in Mass in 2005. That's a long time ago!!
I was able to run the 5K in 30:12 (30 minutes and 12 seconds)! I'm so excited. My watch time was actually 29:32, but I will just stick with the official guntime of 30:12. So, I can positively state that I beat my goal. Whoo-hoo!
A perk of running the race, you get free stuff at the end. They had hot dogs, bagels, pumpernickel rolls, chic-fil-a breakfast biscuit sandwiches, Gatorade, water, energy bars, granola bars, water bottles, towels, Beef O'Brady's refillable sippy cups and best of all...booze. They had hard iced tea (Mike's Lite) and Sam Adam's beer.
Even though I did not win a medal for my running efforts (I came in 202nd overall out of 519 runners, 65th out of 285 women and lastly, 9th out of 40 women in my age group of 35-40 yo), I had a great time!
Labels:
5K,
80's,
bolero,
boot camp,
buttons,
craft,
DIY,
garage sale,
goals,
Goodwill,
myfitnesspal,
shirt,
shrug,
t-shirt,
thrift,
yard sale
Location:
Lithia, Fish Hawk, FL 33547, USA
Sunday, November 20, 2011
Shapeshifter Shrug - Part 3
This is the final chapter of the Shapeshifter Shrug project. Here are the other two parts:
I was waiting on my buttons to come from Hong Kong (an eBay purchase). They came in last month, so I finally sewed them on.
Here is the completed shrug, sans buttons:
Here are my buttons (they are just as they looked in the eBay pictures):
These are mother-of-pearl flower-shaped buttons. When you look at the reverse side, you see the outside shell striations. Very neat and natural looking.
The thread I used to sew on each button was embroidery thread. I have a ton of it, even though I don't do much cross stitch or embroidery..
One container I've had since I was a teenager (friendship bracelets) and the other two are from a yard sale. I bought the two bottoms ones for a total of $5. Awesome deal. They really do come in handy, so it was a good purchase, even if I'm not cross stitching.
I chose a dark green and started sewing. I had 18 buttonholes, so it took me a bit to sew them all on. But once I finished I was happy with the results:
Here is a close-up of the ends with the buttons:
That is the sleeve of the shrug above. You can wear this a few different ways, but I could only think of two ways. I looked on the internet for some help and here is a montage of the different ways (not all ways are feasible, but funny none-the-less):
Here are the funny ones:
The shrug is really the best and normal way to wear it, but it was funny trying to come up with alternate ways to do it. The Little Green Riding Hood (aka the Hoodie) is my favorite funny way to wear it.
It was a bit disappointing that there aren't more ways to wear it. I spent awhile knitting it and it's like a convertible car that you really can't put the top down. Anyway, I am proud of, even if I can wear it one way.
I have a few handmade items on the horizon that I am making for Christmas, so stayed tuned!
I was waiting on my buttons to come from Hong Kong (an eBay purchase). They came in last month, so I finally sewed them on.
Here is the completed shrug, sans buttons:
Finally Seeing the Light Again |
Here are my buttons (they are just as they looked in the eBay pictures):
Asian Buttons |
These are mother-of-pearl flower-shaped buttons. When you look at the reverse side, you see the outside shell striations. Very neat and natural looking.
The thread I used to sew on each button was embroidery thread. I have a ton of it, even though I don't do much cross stitch or embroidery..
I Said There Were a Ton! |
One container I've had since I was a teenager (friendship bracelets) and the other two are from a yard sale. I bought the two bottoms ones for a total of $5. Awesome deal. They really do come in handy, so it was a good purchase, even if I'm not cross stitching.
I chose a dark green and started sewing. I had 18 buttonholes, so it took me a bit to sew them all on. But once I finished I was happy with the results:
So, What'cha Think? |
Here is a close-up of the ends with the buttons:
Perfect-o! |
That is the sleeve of the shrug above. You can wear this a few different ways, but I could only think of two ways. I looked on the internet for some help and here is a montage of the different ways (not all ways are feasible, but funny none-the-less):
As a Shrug |
As a Scarf |
As a Shawl |
Here are the funny ones:
As A Neckwarmer (if you were a giraffe) |
As a Torso Warmer (Vince's favorite) |
As a Hoodie |
Back of the Hoodie |
The shrug is really the best and normal way to wear it, but it was funny trying to come up with alternate ways to do it. The Little Green Riding Hood (aka the Hoodie) is my favorite funny way to wear it.
It was a bit disappointing that there aren't more ways to wear it. I spent awhile knitting it and it's like a convertible car that you really can't put the top down. Anyway, I am proud of, even if I can wear it one way.
I have a few handmade items on the horizon that I am making for Christmas, so stayed tuned!
Labels:
bolero,
buttons,
cables,
circular needles,
cozy,
craft,
DIY,
ebay,
flower,
handmade,
kitchener st,
knit,
Lion Brand,
scarf,
shrug,
Vampire Knits,
wool,
yarn
Location:
Plant City, FL, USA
Subscribe to:
Posts (Atom)