Showing posts with label thrift. Show all posts

Sunday, February 17, 2013

Fix It - Miss Me Sweater

I bought this sweater at a thrift store ages ago and just never did anything with it.  I bought it because it is Miss Me brand.  Vane, I know.  I recently looked up sweaters from Miss Me and, of course, they do not have this style anymore but the cheapest sweater on the website was $54.  This sweater at the thrift store was $4.  Yes, $4.

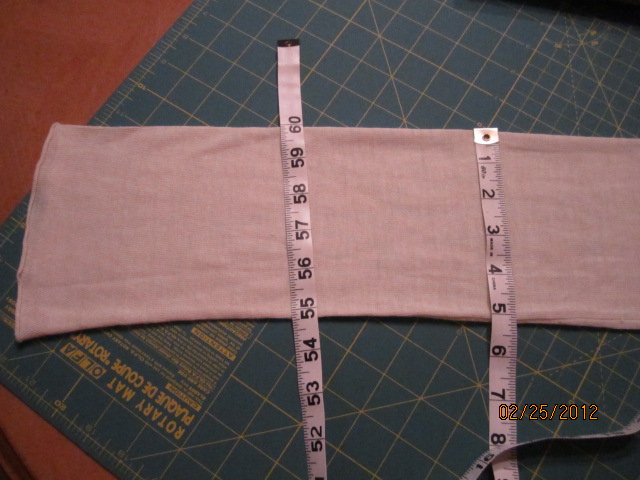
But....there is a catch.  The sleeves were waaaaay too long.  Who has arms this long?


So, you know what I'm going to do?!?!  I'm going to shorten them and reknit the cuff.  Yeeha!  I can't wait!

This is such a cute sweater, albeit a bit itchy, but cute.  Funny how when you look at the construction of a garment, you see how cheaply it was made.  First, this sweater is a mix of wool and acrylic.  Yuck, very itchy.  I will have to wear a long-sleeved T-shirt or blouse under this.  Second, the buttons on the front are the same shell buttons that I bought on eBay when I made the Shapeshifter Shrug.  They were $7 for a big bag of them.  Point proven.

First, I figured out where I wanted the new cuff to end; marked it.  Then unstitched the seam that held the arms together a few inches beyond the place I marked.  Then I found where I marked and made a little snip on a stitch at the very edge.  I carefully pulled that stitch out across the width of the sleeve.


Once the sleeve was detached from the main sweater, I unraveled the detached part of the sleeve and balled it up.  I will use this very yarn to reknit the cuff.


I tried to gauge what knitting needle I was going to use to reknit.  I have at least one of each size in my organizer.


I figured that I needed a 9.  I put the loose stitches from the real sleeve onto this size 9 needle.


I then knitted the ribbing again: k2, p2.


I tried blocking the sleeves in order to align the stitches neat, by wetting the cuffs and placing a towel on it.


In addition to putting heavy weight on it to smoosh them into submission.


But, it did not really work.  I think the reason why it did not work is because it was an acrylic blend.  Damn those acrylic blends.  They ruin everything!


Once I accepted this, I seamed up the arms again with the tails of the yarn that were hanging out still.  I weaved in the rest of the ends.


The seam are in-line with how it looked originally and the cuffs back together.


Not too shabby....


I wore it to work a few weeks back and got tons of compliments.  Thank you Miss Me, but move over for Miss Nancy!

Sunday, February 26, 2012

Fix It: Silk Tissue Tee

I bought this fine, gauzy, long-sleeved tissue tee at Goodwill a month or two ago and put it aside for a rainy day.  Well, it wasn't raining this weekend, but I was at a loss for what to do.  I went through my To-Do pile and saw it and thought, "I forgot I bought this.  This should be an easy fix."


The reason why I put this aside was because the sleeves were too long.  I'm petite and the sleeves are always long on me.  The challenge with these were that the edge (cuff) of the them were slightly rolled, having no hem.  The sleeves matched the bottom edge, so I wanted to keep the roll.  It makes the tee have a feminine look.  

This tee reminded me of the Elizabethan period clothing, with the bell sleeves.  This does not have bell sleeves, but they have a nice drape that looks bell-like.


I surfed the web to see if someone else had already been down this road before and, unfortunately, since this was not a real-knitted item, my search came up short.  One clever way I saw to shorten sleeves was by unstitching the shoulder/arm seam, cutting at the shoulder and then reattach.  Very clever!  But, again, this would not work for me because this tee had raglan sleeves, not a sleeve that was simply sewed in.   This meant I had to come up with something on my own.  

The measurements above show that the sleeve has the same width from the elbow to the cuff, which will make hemming them easier.  My thought on altering the sleeves were to cut a portion from this section out and reattaching the cuff part to the arm.


To do this I figured out how much I needed to shorten them, less the seam allowance, then made pink chalk marks where I wanted to cut out the section.  Measure twice, cut once.  


The cut is shown above and I am praying that this idea does not ruin this tee.  I then took the cuff portion, turned it inside out and fitted it over the outside of the cut sleeve edge, matching raw cuts, right-sides together.  Pinned.


I got matching off-white thread, chose a ball-point needle, and sewed a seam.  I then pressed the seam to one side (sort of hard, because the material is silk and you cannot have the iron on high heat, so sometimes ironing silk is a waste of time).


Here it is, done.  The sleeves are the proper length now and the arm seam looks a bit funny, but not too bad.  I figured that it would match with the line seam that is around the empire waist.  The Elizabethan clothes I was talking about earlier, was where I got my inspiration.


Vince did not like it, but I don't think it looks too bad.  It's better than never wearing it, right?  It is very comfortable, so I will make good use of it.

Let's weight in: Was this a nice look, or did I ruin it?  (Use the comments to let me know your opinion).

P.S.
I wore my Tee to work the next day (Monday) and I got 3 compliments from people who do not read the blog and one from one that does and wanted to see the seam close-up.  The summary: Everyone liked it and thought that the seam looked like it belonged there.

Mission Accomplished!
 

Sunday, February 19, 2012

5K Shrug

This weekend I ran my first official 5K in Fishhawk Ranch in Lithia, FL (where I live).  It was called the 15th Annual Fishhawk Ranch Road Race.  There were just under 800 total runners either participating in the 5K or the 10K. 


When we woke up on Saturday morning, it was overcast, in the high 60's and a bit drizzily.  Normally, that would've been considered a dull day in Florida, but for a day that you will be running, it was a perfect day.

On a day like Saturday, you arrive at the race with a few layers of clothing on, like wind pants and/or long sleeve shirt or a fleece, but then you get to running and you definitely don't want to be wearing all those layers.  It's a pain to have to keep running back to your car (esp if the parking is not near where the race starts) or tying a bulky shirt to your waist.

That's where I got the idea of a 5K shrug.  Basically it is a long sleeved t-shirt cut up so you are wearing only the sleeves, like a regular shrug that you wear with tanks or dresses.  This means a lot less bulk when you are running.  Here's what I did:


Take an old long sleeved t-shirt or athletic nylon/quick-dry/whatever shirt you have.  This one came from my I-want-to-donate-but-I-might-wear-it-one-day pile.  Then cut the bottom straight off just below the armpits.


Cut it up the middle.  (Or not, it won't really be a shrug, but it can be your 5K I Love the 80's Half Shirt)


I then matched up the two fronts, wrong-sides together.


I took chalk and drew where I wanted to cut so that it is rounded in the front.


I did the same for the neck area.


Here we are...a 5K shrug.  This t-shirt was a loose one, so you can choose to add a button or a pin to the front to keep it closed, in case it is windy or you might actually want to run with it on.


It's now tied around my waist with very little bulk.  Since it's all cut up, you may even be able to place the shrug somewhere in the race start area or by a bush or something until the race is done.  The likelihood of a cut up t-shirt still being on the ground when you get back is pretty good.  I would advise doing this to a shirt that you won't be sad if someone else thought your idea was fabulous and really did take it (junk pile/Goodwill/yard sale/gift from old boyfriend that you forgot to burn).

Back to the race.  This was a chip-timed race, which is nice, but they still took the guntime as your official time, so I don't really see the point of the chip.  I also timed it with my heart rate monitor watch.


I did a thorough job of stretching out before the race.  Vince and I had been running at least 3 times a week for months now, and we recently added a boot camp style training workout 2 times a week (so awesome, its right after work and work pays for it - how can you say no?).  The boot camp has improved my running measurably.  I'm also sticking to the My Fitness Pal calorie counter and a healthy diet.  That has to be helping too.

My public goal was to run the 5K in under 33 minutes.  That is about an 11 minute mile.  During our practice runs, I would be able to run 2 miles at a 10 min/mile pace, then the last mile it would drop down to 13 minutes.  It just took practice and pushing to get a more steady pace.

My personal, more private goal was to run the 5K in under 30 minutes (less than 10 min/mile pace).  I have not run that distance in that amount of time since running a weekly 5K running series in Mass in 2005.  That's a long time ago!!

I was able to run the 5K in 30:12 (30 minutes and 12 seconds)!  I'm so excited.  My watch time was actually 29:32, but I will just stick with the official guntime of 30:12.  So, I can positively state that I beat my goal.  Whoo-hoo!


A perk of running the race, you get free stuff at the end.  They had hot dogs, bagels, pumpernickel rolls, chic-fil-a breakfast biscuit sandwiches, Gatorade, water, energy bars, granola bars, water bottles, towels, Beef O'Brady's refillable sippy cups and best of all...booze.  They had hard iced tea (Mike's Lite) and Sam Adam's beer.

Even though I did not win a medal for my running efforts (I came in 202nd overall out of 519 runners, 65th out of 285 women and lastly, 9th out of 40 women in my age group of 35-40 yo), I had a great time!

Sunday, January 15, 2012

Tangerine Tango

Each year the color matching system company, Pantone, announces a "Color of the Year."  This color is used in many industries to shape the upcoming trends in color (home decor and fashion, being a few).  This year, Pantone announce Tangerine Tango as the latest color.


It is a cross between a coral and and orange.  I like it, but not sure how it should fit in my wardrobe.  I went searching last week for a shirt or something that was this color or similar to wear to my work's holiday party.

Our holiday party was this weekend (yes, an after-holiday party) on the Starship Yacht.  It is fairly nice weather in the winter in Florida, but unfortunately, was not the case this weekend.  It was and still is in the 50's.  Yikes!  Cold weather on a boat did not seem good.

Back to shopping: my search was rewarded with a sequined-trimmed tank top.  It has that crumpled look like it was knotted-up and not ironed.


But, as you can see below, the straps were too long.  Not a problem.

 
All I did was fold down the strap in the back were it was connected and resewed it.


I trimmed the excess fabric and I was done.  Pretty easy.  I don't usually let something minor like like persuade me from not buying it.  The only extra thing I needed for it was matching thread, that I bought on sale at Joann's.


With this tank, I also bought a sheer, light turquoise blouse with tangerine colored flowers on it.  Since I figured it may be a bit chilly, I chose the dress pants option rather than the dress or skirt.  I also bought a light turquoise fitted jacket to wear over it.  

I painted my nails to match my tank top with a nail color that I already owned (an old color from Mary Kay called Mango Spice):


 In the end, we all had a great time.  Here is me dancing with a broom:


For some reason, someone grabbed a broom and each person had to dance in the middle of the floor with the broom.  Whatever, I did it, it was hilarious!

Here is me and my sweetie :


The outfit was comfortable, the night's festivities were fun and being with my sweetie completed the night.

Sunday, November 13, 2011

Fix It - Ribfest Tank

This weekend in St Pete at Vinoy Park was Ribfest.  I love Ribfest; so much good food.  I recently have been trying a gluten-free diet (no wheat, so like anything made with flour is out) and cutting out carbonated drinks (like beer and soda).  I knew I could not control how the ribmasters make up their BBQ sauce (yes, they may add flour or modified food starch to thicken or use soy sauce which has flour), so I said that I was forgoing the gluten-free and carbonation-free diet for one day. 

That being said, I need a shirt that was not too tight.  My belly gets really bloated when I eat wheat and carbonated drinks, so I wanted to be worry-free on how my belly was looking during Ribfest.

I recently went around to yard sales on a past weekend, and bought this really cute halter top for 50 cents.

Holy Polka Dot, Batman!

Yeah, it's polka dotted but I really liked it.  I liked the flow and the twirly-wrapped straps.  The only thing is that I did not really like that it was a halter top.  I'm constantly picking up the back to make sure it's covering my bra and I have to wear a strapless bra.  Halters are supposed to be cute and fun, why so much hassle to wear one?  

Since the twirly-wrapped straps were really long, I decided to make regular straps out of them and use the extra length to make loops in the back to hold up the back from sagging.

Twirly Loops, Coming  Right Up!

Next, I took the small length I just cut and attached them to the back of the shirt.

Easy-Peasy

Then I threaded the twirly-wrapped straps through the new loops and had Vince make a square knot in the back middle.

Really, That Simple!

Here is a close-up of the loops and knot:

No More Saggy Back

I will model my new shirt:

Project Runway, Here I Come!

Remember I fixed up a few blazers?  Well, I paired my new shirt with one of them to attend Ribfest (It got a bit chilly in the evening):

And Now the Red Carpet...

Let's say I won't be quitting my day job to model. :-)

We enjoyed ourselves so much at Ribfest.  It was a perfect day and the ribs and pulled pork were delicious!  We met some friends there.  Here is a pic of their daughter and I reading a Dora book:

So Cute!

Now for Rib Pictures:

Ravaging a Rib

A few more:

Yum, So Worth It!

The daughter let me borrow her bib so I could finish up without a mess:

I'm Such a Princess When I Eat!

All in all, we had a good time.  Can't wait until Ribfest 2012! 

Sunday, November 6, 2011

Blazers

While I made my Halloween Prom Dress, I also fixed up a few blazer jackets that I bought at a thrift store.  Two of them were just hemming the sleeves, but one I modernized.  So, here are the three:

The Navy Suit Jacket
The Brown Linen Blazer
The Khaki Green Blazer

I will save the Navy one for last, because I worked the most on that one and will start with the Brown one.  All I did with the brown one was hem the sleeve about 1".  

Just Cut, Press & Sew

I was also thinking of making a cinch in the back to form fit it a bit, but I thought that it may look sloppy.  I just left it as is.

One Down...Two to Go

For my second blazer, I also only hemmed the sleeve length.  This one had buttons on it so I copied the button look.

Original Sleeve

I unstitched the buttons and measured where to cut and resew.

Markings with Chalk

I then marked with chalk where I was going to stitch to match what I just cut off.  I also made dots so I would know where to reattach the buttons.

Two Down...One to Go

Now the last one.  This looks like it was a suit jacket that once had matching pants from the 80's or something.  It was wool with a liner.  

Some great points:
  • Premium tailoring
  • Awesome vintage button 
  • Cropped (hit at the low waist, rather than hip)
  • Sleeves length fit
Some not so great points:
  • Shoulder pads (It was like a box on me)
  • Lapels that were unfolded and a bit claustrophobic
  • Liner was totally unstitched at the bottom hem
So, there are more pros than cons, so when I tried it on at the store, I decided to take a chance.

My first item of business were the shoulder pads.  If I can't get those right, then I wasn't going to work on the rest of it.  I unstitched the inside liner at the arm holes and this is what I saw in there:

Ick!  I don't even have words for this...

So, I cut the shoulder stuffing out and promptly threw it in the trash, never to look at it again.  For some reason, that grossed me out.  It was like looking at a couch cushion foam under the upholstery.  My advice:  Do Not Ever Look At Couch Cushion Foam (or the padding under rugs).  Enough said.

I then had to fit the shoulder seams.  Once the padding was out, they were deflated boxy shoulders - not a good thing.  This was a bit trial and error.  I pinned as best I could, crossed my fingers and sewed a new seam (meaning I didn't unstitch the old seam, just sewed in about an inch).

Shoulder Seaming

I then cut off the excess, once I was happy with the fit.  I had to try it on and tweak the seams a few times, but did finally get it good enough.

Next was the liner.  It was all unstitched.  With the liners to these sort of pieces, it must be done all by hand.  Good 'ole fashion needle and thread using the slip stitch.  

Ugh, Unstitched Little Devil!

Once my DVR'd episode of Danicing with the Stars was done, so was I with the handstitching.  Phew.  Go Ricki Lake!!  Who knew she was so good?

Next and last were the lapels.  I wanted to keep the vintage feel of this jacket and was thinking Audrey Hepburn in Breakfast at Tiffany's: Elegant.  I went to Joann's and bought a button card with a white rhinestone in a black plastic bezel with a shank buttons.  The existing closure button also was a black shank button.

I folded down the lapels as you would normally see them and pinned in place.  I chalked my dots to affix my new rhinestone buttons to.

'Ole Navy is Getting a Make-Over

I then handstitched the buttons onto where the dots were.  This is how the lapels will stay folded.  Since the jacket is wool, there really is no other way than stitching them down to keep them in place.  Now that the buttons are in place, it looks like the lapels are buttoned down.

Fabulous, or What?

Here is a closer look at the lapels and shoulder shaping:

I Love It!

The Navy one took the longest, but the three in total cost me about $3 each and about an afternoon of sewing.  Not too shabby.  

Now that it is getting a bit cooler here (Florida), I am looking forward to wearing them.  If you have a bit of sewing talent, you really can fix up anything.  You just need your imagination and some thread.  Oh, scissors help too.

Happy Thrifting!