Showing posts with label buttons. Show all posts

Sunday, February 17, 2013

Fix It - Miss Me Sweater

I bought this sweater at a thrift store ages ago and just never did anything with it.  I bought it because it is Miss Me brand.  Vane, I know.  I recently looked up sweaters from Miss Me and, of course, they do not have this style anymore but the cheapest sweater on the website was $54.  This sweater at the thrift store was $4.  Yes, $4.

But....there is a catch.  The sleeves were waaaaay too long.  Who has arms this long?


So, you know what I'm going to do?!?!  I'm going to shorten them and reknit the cuff.  Yeeha!  I can't wait!

This is such a cute sweater, albeit a bit itchy, but cute.  Funny how when you look at the construction of a garment, you see how cheaply it was made.  First, this sweater is a mix of wool and acrylic.  Yuck, very itchy.  I will have to wear a long-sleeved T-shirt or blouse under this.  Second, the buttons on the front are the same shell buttons that I bought on eBay when I made the Shapeshifter Shrug.  They were $7 for a big bag of them.  Point proven.

First, I figured out where I wanted the new cuff to end; marked it.  Then unstitched the seam that held the arms together a few inches beyond the place I marked.  Then I found where I marked and made a little snip on a stitch at the very edge.  I carefully pulled that stitch out across the width of the sleeve.


Once the sleeve was detached from the main sweater, I unraveled the detached part of the sleeve and balled it up.  I will use this very yarn to reknit the cuff.


I tried to gauge what knitting needle I was going to use to reknit.  I have at least one of each size in my organizer.


I figured that I needed a 9.  I put the loose stitches from the real sleeve onto this size 9 needle.


I then knitted the ribbing again: k2, p2.


I tried blocking the sleeves in order to align the stitches neat, by wetting the cuffs and placing a towel on it.


In addition to putting heavy weight on it to smoosh them into submission.


But, it did not really work.  I think the reason why it did not work is because it was an acrylic blend.  Damn those acrylic blends.  They ruin everything!


Once I accepted this, I seamed up the arms again with the tails of the yarn that were hanging out still.  I weaved in the rest of the ends.


The seam are in-line with how it looked originally and the cuffs back together.


Not too shabby....


I wore it to work a few weeks back and got tons of compliments.  Thank you Miss Me, but move over for Miss Nancy!

Sunday, November 18, 2012

Kathy's New Cardigan

During the summer, my sister Kathy came to visit and brought about 5 pullover sweaters that she wanted me to convert to cardigans.  She said she liked what I did for the Unbiased Cardi back in March.  I assume she wanted these for the upcoming fall and winter months (she lives in MA).  I also thought: It's still summer, I have plenty of time to get to them.

Well, here we are, November, and I have not worked on any of them!  Ugh, I always do this.  So, I am currently in MA now visiting the family for Thanksgiving, and I really had to get a move on with at least one of them.  Here is what I did for a v-neck green cabled pullover from Old Navy:


As you can see, she used to roll the sleeves.  I know this because there were dents at the arms, and I also tried it on and we are similar sizes, and it was too long for me.  So, you know I had to take my new skill and shorten the sleeves, like I did in Pink Cashmere


Basically, I snipped one stitch about where I wanted to add onto, and unraveled and detached the cuff of the sleeve.  I then unraveled it and with that very yarn, reknit a cuff.


Last time, I used straight needles to do this and then seamed up the arm again, this time I tried using double points so that I can knit in the round and not have to worry about seaming.  It worked great.


This is how much I shortened the sleeve.  That's a lot, huh?  I did the same to the other sleeve and then seamed up the small hole that remained from opening up the sleeve to unravel.


Alright, here comes the "cardigan" part.  Since there was a centrally placed cable, I simple cut up the middle of the cable.


Before I cut, with a sewing machine I stitched stitches on either side of where I was going to cut, just to hold the stitches in place so that they do not unravel as I'm trying to work with it later.  Then I cut.


So, it was cut all the way up.


I pinned the edges in.  I intended on sewing right down the middle of this cable half.


Next, I went out and bought toggle buttons.  This is a perfect sweater for toggle buttons! 


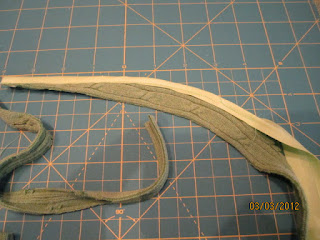
With the yarn that was left over from unraveling, I made loops.


I cut three strands and braided them.  I made a total of 4 loops.


I stitched the toggle buttons to one side and lined up the cables and figured out where the loops would go.  I poked through the ends of the braided loop and knotted them together on the back side.


I then trimmed the long strands.


Ladies and Gentlemen:  I am done!  Above and below is my sister modeling the new cardigan.


It fit her so well!  The length of the sleeves were just right.  She also just got her hair cut, so it was so sassy to have her new 'do with the new cardi.


I love it and she did, too!  She told me later that she wanted to ask me about all the sweaters that she left with me.  I'm sure glad that I was able to deliver at least one to her.  Although, not sure how long this one can keep her at bay from wanting the other ones.

Last thing, since I am on vacation in MA, freezing my butt off in 32-40 degree weather (FL is still in the 70's), I'm not sure if next week's blog will get written.  Just saying....

Sunday, October 21, 2012

NY City Cowls

One of my friends is going to NY City to visit her sister and her husband.  I was invited to go, but other financial commitments (ahem, a sick cat) has prevented me from going; this has made me very sad because it was going to be a Sex in the City sort of weekend (minus the sex, hehe).  In other words, a girls weekend in New York City.

When you live in Florida, you tend to get rid of your warm weather clothing a little bit each season.  It comes to a point where you barely own a jacket.  As a "Sorry-I-Can't-Go-But-Thanks-For-Asking-Me" gift, I thought I would knit up a snuggly cowl for her to wear while she is up in NY.

The pattern comes from the Knit Simple Holiday 2011 issue designed by Vickie Howell.  I then chose chunky baby yarn.  Never underestimate the greatness of baby yarn!  I chose Patons Beehive Baby Chunky in a light green called Quicker Clover (70% Acrylic/30% Nylon).


I used size 10 straight knitting needles and about 1.25 balls of yarn.  I knitted several rows of a k2, p2 ribbing to start.


Then I started to cable.  I had never done a cable quite like this and I thought something was wrong at first, but once you do a few, it starts to look very nice.


Here is a close-up of the cabling:


The pattern instructs you to either sew adornments on the folded cowl or make buttonholes and sew buttons on.  I chose the button route.


I chose some nice bling buttons for the NY girl in her.  I situated the cowl and figured out the placement of the buttons and sewed them on.


I buttoned it up and it is complete!


I had to try it on and test drive it for a bit while watching TV.  In the words of TV Guide: I Cheer it!


This should keep her warm as she sees the sights with her sister...Have fun, Cathy!

I thought this came out so nice that knitted up a second one to give to another friend for her birthday.  I chose black bling buttons for her.  Happy Birthday, Kj!


Send me pics of you guys wearing them...I'll post the pics!

Sunday, March 11, 2012

Unbiased Cardi

I've read that you can convert a sweater into a cardigan with some bias tape.  So, on one of my trips to Goodwill, I bought this cute Aeropostale, cabled, lime green sweater, with the intention of converting it.


I figured this would be a cute one because it was a bit snug on me.  I took the scissors, bias tape and chose a pink button to sew to the top to match the pink embroidered butterfly on the front.


I cut up the middle and got my biased tape prepared (ironed it).  I pinned the bias tape to the raw edge of the sweater.


I started sewing the bias tape to the sweater edge.  I only got a few inches in and I already was seeing crooked sewing and even the biased tape was off the sweater.  Not good.  I hate bias tape.  I never liked it.  I had a project once where I was sewing bias tape around the entire perimeter of this baby bathrobe.  Ugh!  I couldn't do it; I had to have my friend Kj finish it.

This project is not coming out any better (and I don't have Kj near me to finish this for me)!  I just cut off a little more of the sweater to cut off the bad bias sew job.


I then decided to chuck the bias tape and just fold over the raw edge and sew.


This came out much better.  Next was the arms.  They were so long and monkey-like.  I figured I would shorten them, similar to what I did for the Silk Tissue Tee a few weeks ago.


I cut a section out from the arms, keeping the wrist cuff portion.  I used the same technique where I reattached the cuff to the arm.  This was about where the elbow was.


It does not lay smooth like it was seamless, but when I have it on, it is at my elbow, so the crook of my elbow bunches it up; you can't tell something is amiss.


Yeah, I took this pic on Saturday morning, please excuse my bed-head.  Anyway, here it is, my unbiased cardi.  It is a cute little thing to just throw on when you're feeling a bit chilled.  I did not use the pink button because this is way snugger than I remembered.  It would not have looked nice with the button.  I can't close this cardi any more than you see in the pic.

That's fine by me...I like it for the arms and a splash of color.  I feel good about rescuing something from Goodwill or a yard sale and putting my own pizazz into it.

Sunday, February 19, 2012

5K Shrug

This weekend I ran my first official 5K in Fishhawk Ranch in Lithia, FL (where I live).  It was called the 15th Annual Fishhawk Ranch Road Race.  There were just under 800 total runners either participating in the 5K or the 10K. 


When we woke up on Saturday morning, it was overcast, in the high 60's and a bit drizzily.  Normally, that would've been considered a dull day in Florida, but for a day that you will be running, it was a perfect day.

On a day like Saturday, you arrive at the race with a few layers of clothing on, like wind pants and/or long sleeve shirt or a fleece, but then you get to running and you definitely don't want to be wearing all those layers.  It's a pain to have to keep running back to your car (esp if the parking is not near where the race starts) or tying a bulky shirt to your waist.

That's where I got the idea of a 5K shrug.  Basically it is a long sleeved t-shirt cut up so you are wearing only the sleeves, like a regular shrug that you wear with tanks or dresses.  This means a lot less bulk when you are running.  Here's what I did:


Take an old long sleeved t-shirt or athletic nylon/quick-dry/whatever shirt you have.  This one came from my I-want-to-donate-but-I-might-wear-it-one-day pile.  Then cut the bottom straight off just below the armpits.


Cut it up the middle.  (Or not, it won't really be a shrug, but it can be your 5K I Love the 80's Half Shirt)


I then matched up the two fronts, wrong-sides together.


I took chalk and drew where I wanted to cut so that it is rounded in the front.


I did the same for the neck area.


Here we are...a 5K shrug.  This t-shirt was a loose one, so you can choose to add a button or a pin to the front to keep it closed, in case it is windy or you might actually want to run with it on.


It's now tied around my waist with very little bulk.  Since it's all cut up, you may even be able to place the shrug somewhere in the race start area or by a bush or something until the race is done.  The likelihood of a cut up t-shirt still being on the ground when you get back is pretty good.  I would advise doing this to a shirt that you won't be sad if someone else thought your idea was fabulous and really did take it (junk pile/Goodwill/yard sale/gift from old boyfriend that you forgot to burn).

Back to the race.  This was a chip-timed race, which is nice, but they still took the guntime as your official time, so I don't really see the point of the chip.  I also timed it with my heart rate monitor watch.


I did a thorough job of stretching out before the race.  Vince and I had been running at least 3 times a week for months now, and we recently added a boot camp style training workout 2 times a week (so awesome, its right after work and work pays for it - how can you say no?).  The boot camp has improved my running measurably.  I'm also sticking to the My Fitness Pal calorie counter and a healthy diet.  That has to be helping too.

My public goal was to run the 5K in under 33 minutes.  That is about an 11 minute mile.  During our practice runs, I would be able to run 2 miles at a 10 min/mile pace, then the last mile it would drop down to 13 minutes.  It just took practice and pushing to get a more steady pace.

My personal, more private goal was to run the 5K in under 30 minutes (less than 10 min/mile pace).  I have not run that distance in that amount of time since running a weekly 5K running series in Mass in 2005.  That's a long time ago!!

I was able to run the 5K in 30:12 (30 minutes and 12 seconds)!  I'm so excited.  My watch time was actually 29:32, but I will just stick with the official guntime of 30:12.  So, I can positively state that I beat my goal.  Whoo-hoo!


A perk of running the race, you get free stuff at the end.  They had hot dogs, bagels, pumpernickel rolls, chic-fil-a breakfast biscuit sandwiches, Gatorade, water, energy bars, granola bars, water bottles, towels, Beef O'Brady's refillable sippy cups and best of all...booze.  They had hard iced tea (Mike's Lite) and Sam Adam's beer.

Even though I did not win a medal for my running efforts (I came in 202nd overall out of 519 runners, 65th out of 285 women and lastly, 9th out of 40 women in my age group of 35-40 yo), I had a great time!