Showing posts with label Goodwill. Show all posts

Sunday, March 3, 2013

Hawaiian Halter Top

This was a quick and fun one to do.  My friend was having a murder mystery birthday party where we were the participants.  It was a lot of fun, even though none of us really knew what to do or say to each other.  It was sort of scripted, where you got clues and questions to ask each other.  It was to take place at a hotel luau in Maui, Hawaii.

My character was name Poni and I was the star of the luau.  My character was to dress in a grass skirt and a tropical top.

I was not going to wear a coconut bra, that was for certain.  Yea, I've been working out, but I do draw the line somewhere!  Instead I decided to make a chic top from a kitchy hawaiian shirt that I bought at Goodwill.


I bought it oversized, because I did not really know what I was going to do with it.  I did some internet surfing and found a blog that made a halter top out of a button-up blouse.  The blog was called In-Perfection and she gives a step-by-step on how to do it.

I will be brief on it, because it did not really go according to plan and I had to make all sorts of corrections.  But the basics are here.

My shirt had a pocket, so I took that off.


What you want to end up with is keeping the collar and cutting away the sleeves and the top of the back.  So I marked with white chalk, where I was going to cut away the arms.


I cut around the neck/collar and shaped the front.  I cut straight across the back.


That was where I should have taken more care in cutting across the back.  I cut way to low.

I then sewed the raw edges just one fold all the way around.  It was big around the body, so I tucked it in the back and sewed a new seam.  I should have taken in the sides, not the back.


I sewed the lapels down, they were all over!  As you can see, I did not cut even on both sides.  Granted this was for a costume party, so I was not that sad about doing a sloppy job.


Here is me and my $4.99 grass skirt.  The grass skirt did not hide much, so I wore the halter tucked in, which barely covered the booty and wore my black running spandex.

The conclusion: no one noticed my sloppy alterations and we all had a great time.  Even though my character was the annoying miss-goody-goody that told on everyone, I was not the murderer!  Ha ha!

Sunday, April 15, 2012

Black Denim Dress & Bow Earrings

I have a par-tay that I will be attending soon, so I wanted to get something new for it.  I've recently lost a few pounds, so some of my cute clothes do not fit right anymore.  This is the perfect time to get something new or new-to-me.  Which in this case, it was new-to-me.  Don't knock Goodwill, it really has some great stuff!

Anyway, I bought this blackish/steel gray denim strappy dress that is a mix between casual and dressy.  I like the top: it is fitted to the waist with adjustable straps; then it is full in the skirt.  I don't mind the fullness, it is just too long.  I will be hemming this.

Bad hair morning...look at the dress not my hair!!

I'm simply going to cut about 6 inches off the bottom.  The rest fits fine.

Major chop-off

I calculated that the hem will be 1" so I will need a 3/4" fold and then another fold that is 1".  This is so the raw edge is folded away.  Subtract those lengths from 6", I will actually cut 4 1/4" off the bottom.  I used chalk to mark my cut line.

Time to fold and press

Once pressed and pinned, I sewed around the edge with black thread.  That's it for the dress.  I told you it was easy.

Now, I wanted to make matching earrings.  I found this pic in a magazine of bow earrings that I pinned to my Pintrest board so I could do a designer knockoff on it someday.


These earrings are from Delfina Delettrez  and they retail for $1300 - way out of my price range (c'mon, $1300??) so I will have to improvise.  I gathered some jewelry supplies and I was off.

Black ribbon & pearls

I had thin black ribbon, a strand of pearls (that was me practicing my bending wire technique), a few flat-head pins and a pair of fishhooks.  My idea is to make bows with the ribbon and place them in line with pearls.

First, I had to learn how to tie a bow prettily.  Eh, just a minor obstacle.  I Googled "tying a bow" and I found a tutorial from It's in the Details blog from Lisa Pace that made it a snap.

Second, I tied four bows; I took a flat-head pin and placed a pearl on it and poked the other end through the bow from the bottom.

Nancy's way of beading

I'm sure there could've been a better way of doing this, but I don't know enough about beading to care.  After the bow was threaded on it, I trimmed the pin down and made a loop for the link.  This will be the bottom segment of the earring.  From the bottom, I linked one of the pearls, a link to thread another bow on, then another pearl.  I then finished it off with the fishhook.

Black bow earrings: Priceless!

I think they came out cute!  To make sure my bow stays tied, I dotted glue on the backs of each of the knots.  Vince then wielded his mini torch to sear the ribbon edges to prevent fraying.

Much better (dress, not the hair) lol

The dress does look much better as a short dress.  I have the earrings on too, but it's sort of hard to see in the pic.  I will post a pic or two when I'm at the party, so you can see the dress and earrings in action.

Have a great week!

UPDATE: Here is Vince and  I at the party on Friday night.  We were supposed to have our mean face on...oh well. 

Ribbons and pearls

You can see I am wearing the earrings and I added a necklace that I used the same black ribbon but I took a pearl bracelet and tied the ribbon at the ends so it hung in the middle.  Accessories made easy!


Sunday, March 11, 2012

Unbiased Cardi

I've read that you can convert a sweater into a cardigan with some bias tape.  So, on one of my trips to Goodwill, I bought this cute Aeropostale, cabled, lime green sweater, with the intention of converting it.


I figured this would be a cute one because it was a bit snug on me.  I took the scissors, bias tape and chose a pink button to sew to the top to match the pink embroidered butterfly on the front.


I cut up the middle and got my biased tape prepared (ironed it).  I pinned the bias tape to the raw edge of the sweater.


I started sewing the bias tape to the sweater edge.  I only got a few inches in and I already was seeing crooked sewing and even the biased tape was off the sweater.  Not good.  I hate bias tape.  I never liked it.  I had a project once where I was sewing bias tape around the entire perimeter of this baby bathrobe.  Ugh!  I couldn't do it; I had to have my friend Kj finish it.

This project is not coming out any better (and I don't have Kj near me to finish this for me)!  I just cut off a little more of the sweater to cut off the bad bias sew job.


I then decided to chuck the bias tape and just fold over the raw edge and sew.


This came out much better.  Next was the arms.  They were so long and monkey-like.  I figured I would shorten them, similar to what I did for the Silk Tissue Tee a few weeks ago.


I cut a section out from the arms, keeping the wrist cuff portion.  I used the same technique where I reattached the cuff to the arm.  This was about where the elbow was.


It does not lay smooth like it was seamless, but when I have it on, it is at my elbow, so the crook of my elbow bunches it up; you can't tell something is amiss.


Yeah, I took this pic on Saturday morning, please excuse my bed-head.  Anyway, here it is, my unbiased cardi.  It is a cute little thing to just throw on when you're feeling a bit chilled.  I did not use the pink button because this is way snugger than I remembered.  It would not have looked nice with the button.  I can't close this cardi any more than you see in the pic.

That's fine by me...I like it for the arms and a splash of color.  I feel good about rescuing something from Goodwill or a yard sale and putting my own pizazz into it.

Sunday, February 26, 2012

Fix It: Silk Tissue Tee

I bought this fine, gauzy, long-sleeved tissue tee at Goodwill a month or two ago and put it aside for a rainy day.  Well, it wasn't raining this weekend, but I was at a loss for what to do.  I went through my To-Do pile and saw it and thought, "I forgot I bought this.  This should be an easy fix."


The reason why I put this aside was because the sleeves were too long.  I'm petite and the sleeves are always long on me.  The challenge with these were that the edge (cuff) of the them were slightly rolled, having no hem.  The sleeves matched the bottom edge, so I wanted to keep the roll.  It makes the tee have a feminine look.  

This tee reminded me of the Elizabethan period clothing, with the bell sleeves.  This does not have bell sleeves, but they have a nice drape that looks bell-like.


I surfed the web to see if someone else had already been down this road before and, unfortunately, since this was not a real-knitted item, my search came up short.  One clever way I saw to shorten sleeves was by unstitching the shoulder/arm seam, cutting at the shoulder and then reattach.  Very clever!  But, again, this would not work for me because this tee had raglan sleeves, not a sleeve that was simply sewed in.   This meant I had to come up with something on my own.  

The measurements above show that the sleeve has the same width from the elbow to the cuff, which will make hemming them easier.  My thought on altering the sleeves were to cut a portion from this section out and reattaching the cuff part to the arm.


To do this I figured out how much I needed to shorten them, less the seam allowance, then made pink chalk marks where I wanted to cut out the section.  Measure twice, cut once.  


The cut is shown above and I am praying that this idea does not ruin this tee.  I then took the cuff portion, turned it inside out and fitted it over the outside of the cut sleeve edge, matching raw cuts, right-sides together.  Pinned.


I got matching off-white thread, chose a ball-point needle, and sewed a seam.  I then pressed the seam to one side (sort of hard, because the material is silk and you cannot have the iron on high heat, so sometimes ironing silk is a waste of time).


Here it is, done.  The sleeves are the proper length now and the arm seam looks a bit funny, but not too bad.  I figured that it would match with the line seam that is around the empire waist.  The Elizabethan clothes I was talking about earlier, was where I got my inspiration.


Vince did not like it, but I don't think it looks too bad.  It's better than never wearing it, right?  It is very comfortable, so I will make good use of it.

Let's weight in: Was this a nice look, or did I ruin it?  (Use the comments to let me know your opinion).

P.S.
I wore my Tee to work the next day (Monday) and I got 3 compliments from people who do not read the blog and one from one that does and wanted to see the seam close-up.  The summary: Everyone liked it and thought that the seam looked like it belonged there.

Mission Accomplished!
 

Sunday, February 19, 2012

5K Shrug

This weekend I ran my first official 5K in Fishhawk Ranch in Lithia, FL (where I live).  It was called the 15th Annual Fishhawk Ranch Road Race.  There were just under 800 total runners either participating in the 5K or the 10K. 


When we woke up on Saturday morning, it was overcast, in the high 60's and a bit drizzily.  Normally, that would've been considered a dull day in Florida, but for a day that you will be running, it was a perfect day.

On a day like Saturday, you arrive at the race with a few layers of clothing on, like wind pants and/or long sleeve shirt or a fleece, but then you get to running and you definitely don't want to be wearing all those layers.  It's a pain to have to keep running back to your car (esp if the parking is not near where the race starts) or tying a bulky shirt to your waist.

That's where I got the idea of a 5K shrug.  Basically it is a long sleeved t-shirt cut up so you are wearing only the sleeves, like a regular shrug that you wear with tanks or dresses.  This means a lot less bulk when you are running.  Here's what I did:


Take an old long sleeved t-shirt or athletic nylon/quick-dry/whatever shirt you have.  This one came from my I-want-to-donate-but-I-might-wear-it-one-day pile.  Then cut the bottom straight off just below the armpits.


Cut it up the middle.  (Or not, it won't really be a shrug, but it can be your 5K I Love the 80's Half Shirt)


I then matched up the two fronts, wrong-sides together.


I took chalk and drew where I wanted to cut so that it is rounded in the front.


I did the same for the neck area.


Here we are...a 5K shrug.  This t-shirt was a loose one, so you can choose to add a button or a pin to the front to keep it closed, in case it is windy or you might actually want to run with it on.


It's now tied around my waist with very little bulk.  Since it's all cut up, you may even be able to place the shrug somewhere in the race start area or by a bush or something until the race is done.  The likelihood of a cut up t-shirt still being on the ground when you get back is pretty good.  I would advise doing this to a shirt that you won't be sad if someone else thought your idea was fabulous and really did take it (junk pile/Goodwill/yard sale/gift from old boyfriend that you forgot to burn).

Back to the race.  This was a chip-timed race, which is nice, but they still took the guntime as your official time, so I don't really see the point of the chip.  I also timed it with my heart rate monitor watch.


I did a thorough job of stretching out before the race.  Vince and I had been running at least 3 times a week for months now, and we recently added a boot camp style training workout 2 times a week (so awesome, its right after work and work pays for it - how can you say no?).  The boot camp has improved my running measurably.  I'm also sticking to the My Fitness Pal calorie counter and a healthy diet.  That has to be helping too.

My public goal was to run the 5K in under 33 minutes.  That is about an 11 minute mile.  During our practice runs, I would be able to run 2 miles at a 10 min/mile pace, then the last mile it would drop down to 13 minutes.  It just took practice and pushing to get a more steady pace.

My personal, more private goal was to run the 5K in under 30 minutes (less than 10 min/mile pace).  I have not run that distance in that amount of time since running a weekly 5K running series in Mass in 2005.  That's a long time ago!!

I was able to run the 5K in 30:12 (30 minutes and 12 seconds)!  I'm so excited.  My watch time was actually 29:32, but I will just stick with the official guntime of 30:12.  So, I can positively state that I beat my goal.  Whoo-hoo!


A perk of running the race, you get free stuff at the end.  They had hot dogs, bagels, pumpernickel rolls, chic-fil-a breakfast biscuit sandwiches, Gatorade, water, energy bars, granola bars, water bottles, towels, Beef O'Brady's refillable sippy cups and best of all...booze.  They had hard iced tea (Mike's Lite) and Sam Adam's beer.

Even though I did not win a medal for my running efforts (I came in 202nd overall out of 519 runners, 65th out of 285 women and lastly, 9th out of 40 women in my age group of 35-40 yo), I had a great time!

Sunday, January 15, 2012

Tangerine Tango

Each year the color matching system company, Pantone, announces a "Color of the Year."  This color is used in many industries to shape the upcoming trends in color (home decor and fashion, being a few).  This year, Pantone announce Tangerine Tango as the latest color.


It is a cross between a coral and and orange.  I like it, but not sure how it should fit in my wardrobe.  I went searching last week for a shirt or something that was this color or similar to wear to my work's holiday party.

Our holiday party was this weekend (yes, an after-holiday party) on the Starship Yacht.  It is fairly nice weather in the winter in Florida, but unfortunately, was not the case this weekend.  It was and still is in the 50's.  Yikes!  Cold weather on a boat did not seem good.

Back to shopping: my search was rewarded with a sequined-trimmed tank top.  It has that crumpled look like it was knotted-up and not ironed.


But, as you can see below, the straps were too long.  Not a problem.

 
All I did was fold down the strap in the back were it was connected and resewed it.


I trimmed the excess fabric and I was done.  Pretty easy.  I don't usually let something minor like like persuade me from not buying it.  The only extra thing I needed for it was matching thread, that I bought on sale at Joann's.


With this tank, I also bought a sheer, light turquoise blouse with tangerine colored flowers on it.  Since I figured it may be a bit chilly, I chose the dress pants option rather than the dress or skirt.  I also bought a light turquoise fitted jacket to wear over it.  

I painted my nails to match my tank top with a nail color that I already owned (an old color from Mary Kay called Mango Spice):


 In the end, we all had a great time.  Here is me dancing with a broom:


For some reason, someone grabbed a broom and each person had to dance in the middle of the floor with the broom.  Whatever, I did it, it was hilarious!

Here is me and my sweetie :


The outfit was comfortable, the night's festivities were fun and being with my sweetie completed the night.

Sunday, October 30, 2011

Halloween 2011

Happy Halloween!

This Halloween, Vince and I were invited to a house party with the theme "2011 Bates Senior Prom".  Bates being from the movie Carrie (which was the Hostess costume).  So, with that being said, I went as a prom teenager.  I went to Prom in the early 90s, so the styles were not quite as strange as the 80s, but strange enough.  My reconstructed dress might have more like a late 80s/early 90s feel to it, with elements spanning 3 decades (70s through the 90s) rather than straight 90s.  To my original prom, I wore a knee-length fitted purple sequined dress with a white rhinestone halter strap.  I LOVED it.  I may have asked my mom to keep that one, but there was no way in this decade that I was fitting back into it (ah, size 2, 90 lbs) so I must improvise with a dress from Goodwill.

Vince was my date, but he went as Don Johnson from Miami Vice (aka Detective James Crockett).  I played it off as the "boyfriend that went to college."  You all had that friend that had the older boyfriend that no one ever saw because he either lived in another city/state or was older than they were and went to another school;  whether they were totally lying or not, you may never have found out the real story.  That was my story last night.

I bought my dress at Goodwill, which was a bridesmaid's dress made of satin and organza in GOLD.  Yes, that is my throwback to the 70's decade.  Oh, and it had BIG boobs.


I think saying that it had big boobs was an understatement.  It had really big boobs.  This dress had an organza attached skirt with the satin top extending below the waist in an asymmetrical hem. Underneath was a petticoat to make it pouf a bit.


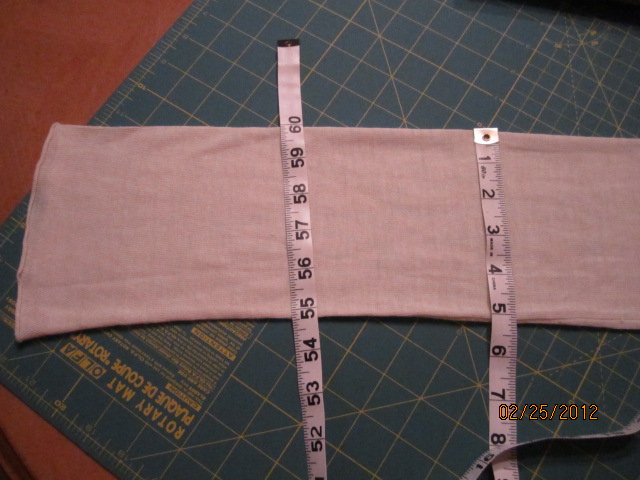
To reconstruct this dress to be Prom-worthy, I first had to cut the length.  A selling point for me was the asymmetrical hem of the satin top.  My prom had asymmetrical hems all over the place, so I am playing them up to the max.  I pinned up the organza and petticoat and just had the liner hanging down.  I trimmed 12 inches down from the satin hem.


Once that was trimmed away, I sewed a hem.  I then unpinned the organza and gathered it in little bunches along the new hemline of the liner.  Once the bunches were made, I took needle and thread and tacked the bunches in place.  I trimmed the remaining organza to follow the liner hemline.


I pinned up the liner and organza layer to reveal only the petticoat.  The petticoat part was really only at the bottom of the dress, so I just pinned it up and sewed to match the same asymmetrical hem.  This allowed the petticoat to have the pouf effect and stick out the bottom (in a Madonna/tacky 80s way).


I took in the sides at the top.  Just so you know, I'm keeping the big boobs.  I took it in so it's not falling off, but those boobs will be back.

You can't have a fun dress without the one-shoulder-poufy sleeve.  I cut one strap completely off.  I then unstitched the remaining one in the back only.  I needed to reposition this strap to hold my new boobs up effectively.

I took some leftover liner fabric and made a tube.  I affixed one tube end onto the front part of the dress encompassing the strap.  I then stuffed the tube sleeve with leftover organza.  I scrunched up the tube and sewed the strap back onto the back of the dress, but more towards the center zipper.  I then sewed the loose tube end onto the back of the dress.


It's hard to tell, but that is the makings of the poufy sleeve in the above pic.

I still had more leftover liner.  This is where my new boobs come into the story.  I made another tube, but larger.  I took leftover quilting batting and stuffed the tube.  With some arranging, I made a nice set of C's for myself. (With my own boobs, they must add up to D's, right??)  I put the dress on and adjusted the fill and evened it out.  I just tied the boobs on like a bandeau top.  Since they are not real, they don't weigh anything.  I took the strap I cut off earlier and tied it in the middle of the boobs to give a bit more definition, rather than a uniboob.


Here is the finished dress:


The dress actually is not too bad.  It's starting to grow on me.  Vince then spray painted with gold, my shoes and the white petticoat.


These shoes rock!  Who knew a can of spray paint can do such a transformation?

I then put on some finishing touches like black hose and teased my hair and I'm ready for the Prom!  I did my hair just like I used to do it back in the day: banana clip with the hair wall for the bangs with a long tendril.


I had to take the picture by the hedge, just like my parents would have done it.  Not only did I dress up, but Vince did as well, as I said above.  Here is us taking a "professional portrait" at the prom (notice my new rack):


I have to say, no offense to my high school friends out there, but I had so much fun at this prom, more than at my real prom (no teenage boy drama).  If anyone is looking for a party to throw, throw a theme party.  They are a huge amount of fun. (You'll have to check my Facebook to get a hint of how it went) :-)

I also am dressing up for work, but instead of a prom teenager, I will be going as something else.  You'll have to check back later in the week to see my Monday costume!

Happy Trick or Treating!