Showing posts with label flower. Show all posts

Sunday, November 20, 2011

Shapeshifter Shrug - Part 3

This is the final chapter of the Shapeshifter Shrug project.  Here are the other two parts:
I was waiting on my buttons to come from Hong Kong (an eBay purchase).  They came in last month, so I finally sewed them on.

Here is the completed shrug, sans buttons:

Finally Seeing the Light Again

Here are my buttons (they are just as they looked in the eBay pictures):

Asian Buttons

These are mother-of-pearl flower-shaped buttons.  When you look at the reverse side, you see the outside shell striations.  Very neat and natural looking.

The thread I used to sew on each button was embroidery thread.  I have a ton of it, even though I don't do much cross stitch or embroidery..

I Said There Were a Ton!

 One container I've had since I was a teenager (friendship bracelets) and the other two are from a yard sale.  I bought the two bottoms ones for a total of $5.  Awesome deal.  They really do come in handy, so it was a good purchase, even if I'm not cross stitching.

I chose a dark green and started sewing.  I had 18 buttonholes, so it took me a bit to sew them all on.  But once I finished I was happy with the results:

So, What'cha Think?

Here is a close-up of the ends with the buttons:


Perfect-o!

That is the sleeve of the shrug above.  You can wear this a few different ways, but I could only think of two ways.  I looked on the internet for some help and here is a montage of the different ways (not all ways are feasible, but funny none-the-less):

As a Shrug
As a Scarf
As a Shawl

Here are the funny ones:

As A Neckwarmer (if you were a giraffe)
As a Torso Warmer (Vince's favorite)
As a Hoodie
Back of the Hoodie

The shrug is really the best and normal way to wear it, but it was funny trying to come up with alternate ways to do it.  The Little Green Riding Hood (aka the Hoodie) is my favorite funny way to wear it.

It was a bit disappointing that there aren't more ways to wear it.  I spent awhile knitting it and it's like a convertible car that you really can't put the top down.  Anyway, I am proud of, even if I can wear it one way.

I have a few handmade items on the horizon that I am making for Christmas, so stayed tuned!

Sunday, September 18, 2011

Black Diamond Necklace

I'm not one to flip through fashion magazines and say, "Ooh, I have to have that!"  I do enjoy thumbing through and getting inspiration, but I won't spend the money on any of it.  I guess I'm just too cheap!  

So, when I last looked through one, I saw this necklace that was pretty pretentious.  This necklace was a black diamond necklace with a black diamond "frog prince" as a pendant.  This necklace was so expensive that a price must be requested.  I went to the website, aaronbasha.com, you can view Mr. Frog Prince as an enamel pendant or diamond encrusted one.  And they still don't give a price.


I thought, I got something at home that would look just as nice, and I can save about $15K. Does anyone remember my Tickled Pink Necklace from last year?  Well, I know now that I could have made that necklace so much easier if I just asked someone how to do it.  I work with a few ladies that know how to piece jewelry together so they told me what I "could have done".  Well, better late than never.

I decided to deconstruct the Tickled Pink Necklace to make my new one.  I bought some almost black eye pins, took out my tool kit and went to work.


I first took all the pink nugget stones off of the existing necklace.  I was going to only place two stones on each pin and make a chain of those.


I had to buy pins that were really long, so I ended up using one pin to make two links.  As you can see, I may have learned what to do, but not really how to do it.  My final link has some pretty crazy looking eyes and the post is no longer straight.  Hey, good thing I'm not charging admission for this!

I made a length of this before I really thought about how I was going to affix my centerpiece onto the necklace.  


Ok, so Step 1 is done; necklace links are complete.  Step 2 is to attach or hang my new pendant.  Kj, don't kill me, but I took the bracelet you gave me for my birthday and took it apart.  It was a black diamond [rhinestone] flower on a hinged bangle bracelet.  It was a bit top-heavy and rotated around my wrist when I wore it.  I loved it, though, and knew that was going to be my centerpiece.


Isn't that the perfect flower?  Ok, so I had Vince take this task on.  I said, "Here, take this flower off the bracelet, but don't harm the flower." He came back having used some serious wire cutters with the flower off and the bangle detached.  There was no saving the bangle, though.


The backside of the flower had some gnarly jagged edges from where it was soldered to the bangle, so he took my Dremel tool (that Kj gave me one year) and ground them down to a smooth surface.

I made a bail out of a short piece of coated wire and two crimp beads.  As you can see in the pics of the back of the flower, there are holes.  I threaded the coated wire through the holes to make the bail.


From the front, you can't see the wire.  I then found the middle of the necklace and opened it up so it was two strands of links.  I removed a few links from each side and attached each side to the wire bail.


I will wear it to work or bring in it so the jewelry chicks can see it.  Maybe they can give me a better idea for the bail.  Otherwise, I love it.


All it takes is a magazine pic and the motivation to create a designer knockoff on a dime to have something "new to you".  Aaron Basha, you can keep your Frog Prince!

Sunday, April 10, 2011

Afternoon Tea

My birthday continues for one more weekend!  I'm so lucky!

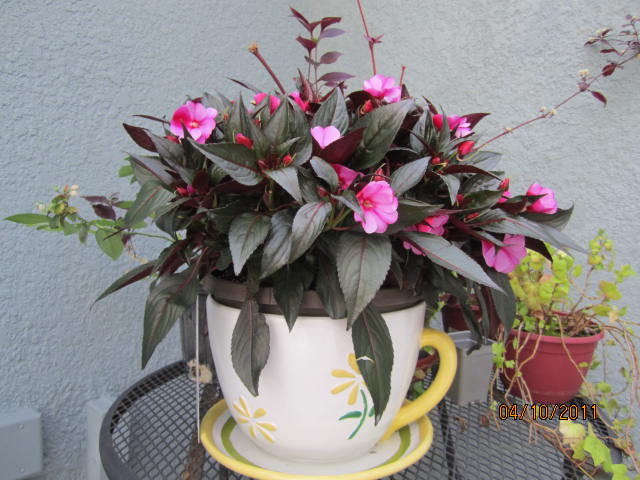
Actually, during the week my bowling team, the Odd Balls,  threw me a mini party on our Wednesday bowling night.  They had a carrot cake, caramel hershey kisses, seven layer mexican dip, crackers and mini hot dog weiners.  It was great!  They got me a teacup planter with pink impatiens and a Fire King hobnail milkglass planter that the kisses were in.

Love it!!

Vintage glassware; I could do a whole post on Fire King! 

Then this weekend, there was High Tea served in my honor at the Royal Tea Room in Tampa.  Myself and seven of my girlfriends gathered and sipped tea served with scones, finger sandwiches, savory pastries, mini cupcakes and fruit-filled chocolate cups. 

Yummy in my tummy!

There is an order that you are supposed to eat this delicious food in and it is from the bottom up.  First the tea was poured, which the first type was an apricot tea and then we chose a strawberry-chocolate tea.  Normally they only serve one tea type a day, but we insisted on the strawberry-chocolate tea too.  We pushed politey. :-)

We first ate a blueberry scone with jam and clotted cream.  From the second tier we ate cucumber sandwiches and a black bean quesadilla pastry pocket.  Finally, the top and third tier, were vanilla cupcakes with frosting and chocolate cups filled with a bit of kiwi, strawberry, blueberry and raspberry, anchored in the cup with a bit of whipped cream.  It was delicious!

The Tea Tables

It was a lovely time and after all of that tea and scrumpets, my friend that set-up the tea party had a cake for me to blow out candles that were teacups and a teapot!

Finishing touch!

Yes, they even sang to me!  We were the loudest group in the tea room, as if we wouldn't be.  We acted like we were the only ones in that place.  Where were our manners?!

The look of just being sung to!

After tea we headed to this deli called Datz, that is also a restaurant/bar where they have 20 plus beers on tap and wine galore!  Instead of having a beer or wine after all of that caffeine, I chose to have gelato!

Strawberry Gelato!

I really did not need to eat this and this did put me over the edge, but it was soooo good.  We hung out just for a bit and then we all went our separate ways for the rest of the evening (by this time it was after 5pm).  But, we took one last pic before we left:

The Ladies of the Tea Party (at the bar) hehe

It did seem a bit incongruent to attend a tea party and then go and have a beer!  But, it was a great time; one that I would love to do again.

To end the evening festivities, one of gals and I went thrift store shopping.  Yes, even more incongruency going on, but I enjoy thrift store shopping for cool glassware and odds and ends.  My motto is you just never know what you are going to find!  That is what I enjoy the most, seeing something new each time I go.

I do believe that that was my last birthday party of the year.  I do still have lots more Cheesecake Factory carrotcake cheesecake in the freezer, so I can still celebrate anytime!  Thank you to everyone who helped me ring in my 35th year!  Let's do it again next April!

Sunday, March 13, 2011

Sweater Purse 4.0

This is my fourth installment of the Sweater Purse.  For those of you that have not read a Sweater Purse post yet, I took regular wool sweaters and washed them in hot, soapy water until they shrank.  This created an impermeable fabric that can be cut without fraying.  The technique is called felting.  It seems like I have made a hundred of them, but I think I have made only about eight (8) of them so far.  Each one takes on a character all their own.  See Sweater Purse 1.0 to see how I did the actual felting.

This purse will be made from a sleeve from a gray J. Crew sweater.  I know, it seems like a sin to cut up a J. Crew sweater, but you make whatever sacrifices are needed to get the job done!  I think I got this sweater at a thrift store in Tampa for about $1, so I don't feel so bad cutting it up.

Cut off sleeve - one purse coming up!

So, for this purse, I will use a sleeve, my chic lining, a ring I took off an old purse and a purple zipper.  I did not use the entire sleeve, just a portion of it.  My chic lining is lining that I got at a yard sale for cheap and I'm using it on everything.  The ring I got from a purse that I tore apart for the hardware, see Chunky Cuff Bangles post, and finally a purple zipper that I had in my craft stash.

Rotary cut the sweater

I will use the left portion of the sleeve that you see in the above pic.  I also will use one of the little strips for something that is coming up.  The rest went back into the sweater scraps bag.

I squared-up the sleeve part but left it sewn as it was.  I turned it inside-out and sewed the bottom closed.

Sweater and lining

Then I measured the sweater part and sewed a matching lining section.  I turned the sweater back so the right side was out and then turned the lining inside-out and fitted it into the sweater.  I then used a zig-zag stitch to attach the lining to the sweater.  I then hand stitched a stitch in each corner from the inside of the purse to anchor the lining inside the purse; to keep it in place.

The lining is in!

I figured I would adorn this purse with a zipper rosette.  Using zippers for fashion and not for zipping has been in trend lately so I wanted to try something with it.  I went searching online and came across a tutorial on the zipper rosette.  There are several blogs out there dedicated to crafting, so I chose to make mine look like the one from Scraps to Beauty by Zandra.  My zipper was not that long so I took it apart and sewed the two parts to form one long zipper half.  (Technically one whole zipper could make two zipper rosettes).

This is where my little sweater strip comes into play.  By following Zandra's tutorial, it actually started looking like a rosette!

Stitch each step

I had a brain freeze a few times trying to ensure that the zipper teeth were facing the right way.  But, I ended up finishing it up so it looked nice.

How cute!!  Thanks Zandra!

Now, the large ring is going to be the handle on my purse.  I folded over the front edge to cover a portion of the ring and pinned it down.  I hand sewn the flap down.  This sounded easier than it was, trust me!

Ring, ring...who's there?

Once I attached the flap over the ring, I needed to figure out how to close this purse.  As it currently was, it was flapping wide open.  I ended up using a large eye-hook.  At first I put it on backwards, so I unstitched it then did it right.  I then trimmed the gray sweater strip that held my rosette and hand stitched the rosette onto the front of the purse.

Completed sweater purse

The closure on this purse may need to be reconsidered.  I was sober and was having a hard time latching it, so if I was inebriated in anyway, there is no way this was closing.  I will work on that with my friend to see what she wants to do.  She sews too, so she may have already fixed it.

Modeling the purse

Here is a pic of the sweater purse being modeled at the birthday/housewarming party.  This is also the party where I wore my diamond studded Chunky Cuff Bracelet that got some attention (I'm the one in green).  I cheated on my no-booze diet and had a few appletinis to celebrate.  We had a blast!!

Saturday, February 19, 2011

Sweater Purse 2.0

Here is another addition of the Sweater Purse.  This purse was made for a friend that has everything.  I knew that this purse had to be special.  I decided to down-size the large purses I made in my last Sweater Purse 1.0 post to: 1. Accommodate more purses out of one sweater and 2. Make it easier for me to handle.

I certainly will get more purses out of one sweater, but I did not make it easier on myself!  First, I took a hot pink sweater that was previously felted from my first Sweater Purse 1.0 post.


This one dd not shrink too much
 
Then I cut the sweater across the chest just below the armpit and then cut that bottom section in half.

Use a rotary cutter - it makes life a piece of cake

Instead of sewing the bottom waist/ribbed area closed to make it the purse bottom, I'm turning these around and making the ribbing the top.  My goal is to make two separate drawstring wristlets.  I am only demonstrating how I made one, because the second one will be the same except for the embellishment on the front, which you will see later.

I'm also trying something new this time and I am going to line the purse.  The liner I chose is a length of fabric that I bought at a yard sale for 50 cents.  It was at least a 3/4 yard length.  I get so stoked when I find something fab like this for cheap.

Very chic 50 cent liner!!

I utilized the side seam in the sweater and turned it inside-out and sewed up the other side, leaving the ribbed end open and then sewed the cut end for the bottom closed.  I then attempted to sew a gusset seam so that the purse would have more body.  I sewed this so that the seams from the bottom of the purse looked like a plus symbol. I did not take a pic of this specifically, but you will see it in a below pic. 

I cut the liner slightly larger than the purse, to allow the purse to stretch a bit when something is placed inside it.  This was a bit of a challenge, because at first I sewed it too big, then unstitched and sewed it too small.  I also was trying to be professional about it (sewing like how a pattern would have you sew in a liner) but that did not work.  Phooey on patterns!  I sewed it just like I did for the outer purse but then placed it aside to insert later.

I wanted to make a flower applique to affix to the outside of the purse.  I cannot draw for the life of me, so I found a applique picture from an old knit magazine and had Vince's teenage daughter draw it out for me on a piece of scrap paper.  With this I took some sweater scraps from past projects and drew the flower on the scraps with washable magic marker.  I also cut a strip of the liner.

Homemade applique flowers

Once the daughter cut out the flowers for me, there was marker residue on the edges.  I took them to the sink and ran them under cool water and rubbed the edges until the marker was gone.  I then pressed the flower pieces between a towel.  They are wool, so they dried in no time.

While I was doing my purse project, Vince's daughter was having fun with my sweater and liner scraps.  She was tying little bits end to end and made a bracelet.  Then she made a bracelet for her dog, Maggie, a miniature pekingese.

What a good sport, Maggie was!

Meanwhile, I attempt a rosette with the liner scrap with a needle and thread.  I don't bother to look it up, it seemed easy enough.  Ha, well, when I was done, it did not quite come out like a rosette, but it was cool enough.  I layered the two flowers on top of each other, a bit skewed so the pedals were off-lined and then sewed my liner rosette in the middle.  I then affixed my new flower applique to the purse.

Is it cute or what? I amaze myself sometimes!

I'm not trying to brag, but I do not consider myself a very creative person.  I am crafty, but creative?  Creativity to me is something unique coming out of your own brain.  When something does come out of it, I am amazed, usually I just copy someone else's idea.  I do not claim the idea my own, but I try to do a decent job of mimicking something I see.  Oh, also, can see the seam in the front of the purse?  That is my gusset.  Eh, who knows if will help.

I then took the liner I set aside and turned it righside-out.  I inserted it inside the sweater purse and folded down the top edge so that the raw edges are not exposed.  I used a zig-zag stitch to sew the liner to the purse to allow it some stretch when the purse it opened.

Liner material is the worst with fraying.  It will fray the second you cut it.  That is why I thought that it would look cute as the rosette on the flower, the strip was quite frayed by the time I was done stitching it.

Fray no more, Liner!

As you can see, I sewed the liner about where the sweater started to rib, so about a 2" section was unlined.  In this section I inserted grommets.  This will be where my drawstring with be threaded through.

Make a hole with the tool and punch the grommet in.

Since this sweater was not very heavily felted, the ribbing was a bit delicate and I really only needed to make a hole one punch wide, but did two because it looked too small.  Once I put my finger in it to place the grommet in, I realized that one would have been enough.  Oh well, live and learn.

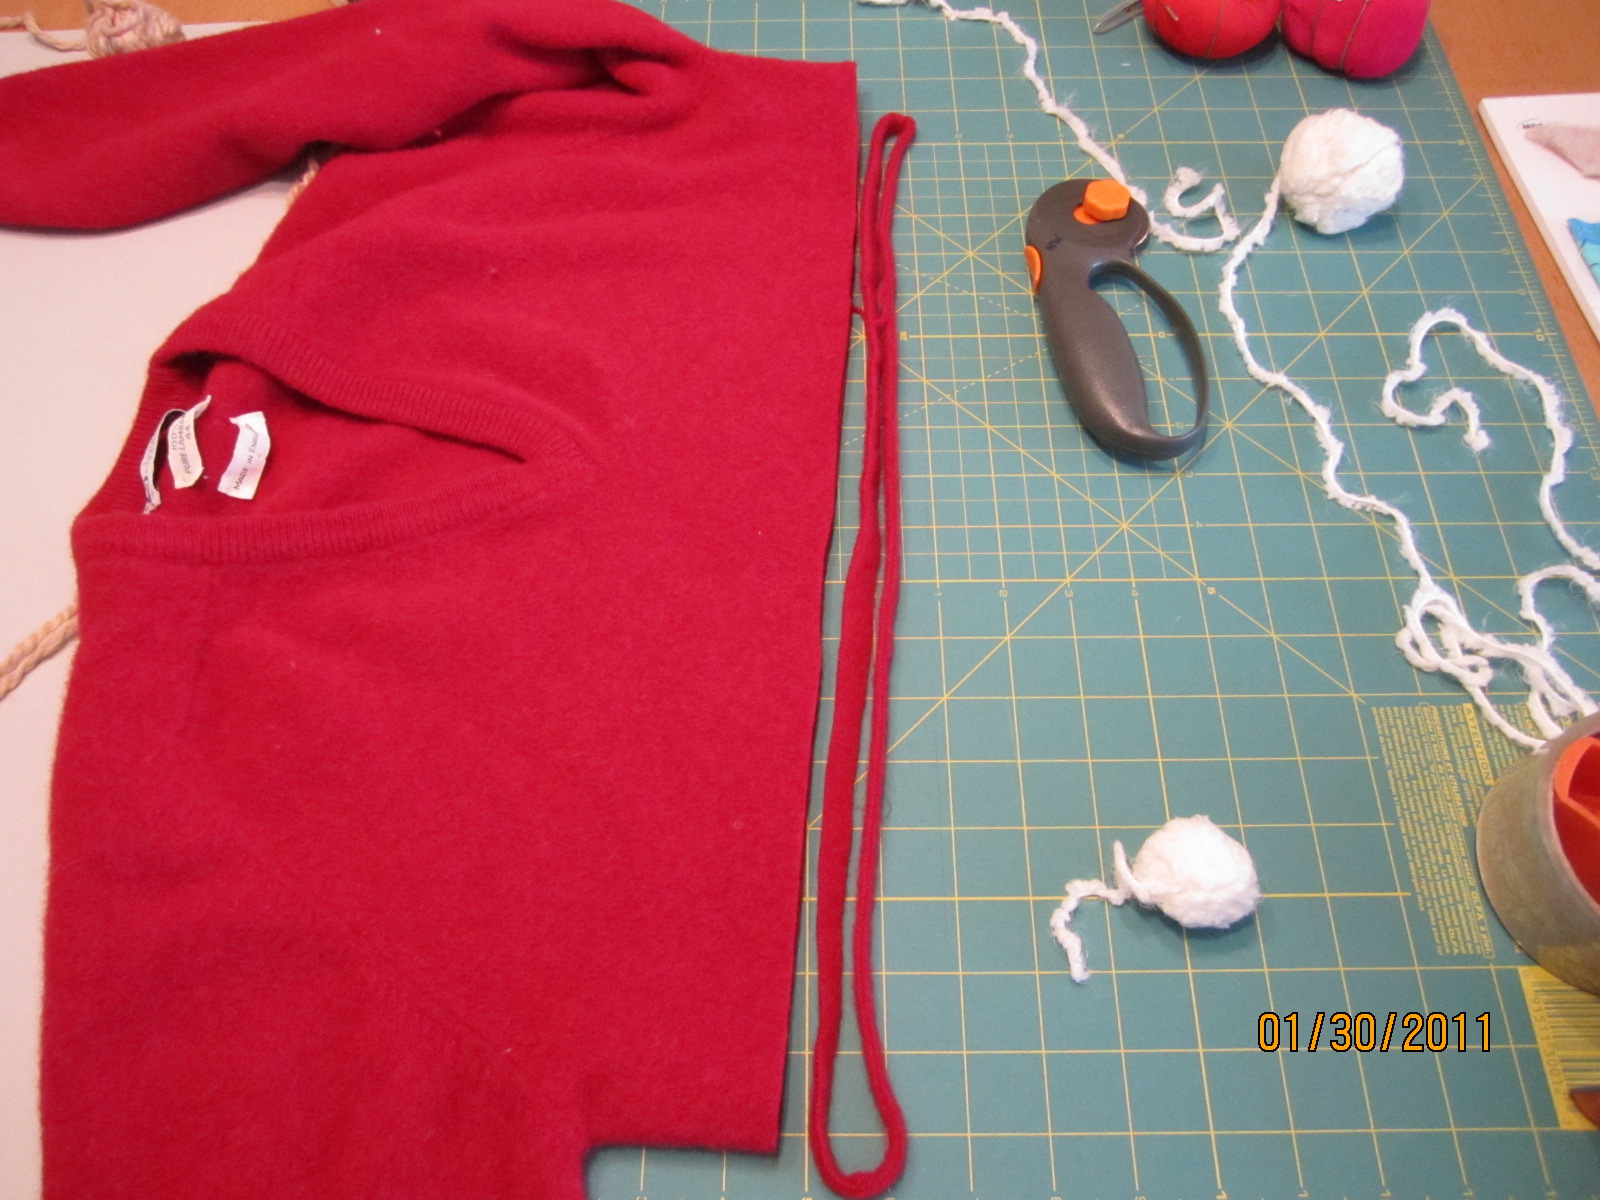
Now, I was having a hard time coming up with what to use as a drawstring.  Ribbon seemed too thin, but the sweater seemed like it might work.  So, I cut a strip of the sweater to test my theory.
Strip that sweater!

When I pulled on the sweater strip, it did not react well.  I thought that it may rip if pulled too tight.  As you see in the above pic, I raided my yarn stash to see what I had in there that would match.  I found some white Berocco Plush from when I made a lamb baby blanket.  That is a story all on it's own.  The blanket came out awesome, but it was challenging.  Anyway, Plush is like yarn spun from a cloud.  Soooo soft.  I also had some tan Plymouth Baby Alpaca Grande leftover from the same lamb baby blanket.  This was just as soft as the Plush, but it was spun from a baby alpaca.  What a treat that was to work with!

Anyway, I took strands about a yard long of the Plush, Grande and sweater and braided it.  I taped it down with duct tape like you did when you made friendship bracelets out of embroidery thread.  I only accomplished the herringbone style once and I kept it; so much for making friends! Ha ha!

I held the yarn strands together to equal one sweater strand

Now, threading this braid through the tiny grommets proved to be a challenge.  Vince helped, as usual, when I started to get frustrated.  It was threaded through so that the ends came out on the side.  I opened the purse to determine where the the knot was to go on the drawstring then knotted it so that the strands all hung together like fringe.

Yea, it's done!

I really liked the way this came out.  On the second one, I will make only one hole for the grommets and will do a different applique.  The second one does not have to be done until March, so I have some time to work on it still (I love burning the candle at both ends).  I don't have much of this pink sweater left, so I may come up with a different drawstring as well.  Here is the close-up of the applique that I am so proud of:

The fray gives it charm

If you have any ideas of other styles I could try using my felted sweaters, then I'm all ears!  I have a few more ideas up my sleeve, but I am always receptive to what you guys have to say!