Showing posts with label lining. Show all posts

Monday, December 26, 2011

Sock Project Bag

Merry Christmas!  Well, the day after, anyway.  My sister has been knitting socks like they are going out of style.  I believe she started knitting socks for everyone for Christmas in the summer.  Smart thinking, Lady!

She may have been sick of socks by the time I gave this to her, but I sewed her a Sock Project Bag.  What is that? you say.  It is a mini drawstring bag that holds one ball of yarn and the in-process socks with needles so you can carry it wherever you go.

I saw an ad for it on the Lion Brand website:

Original Bag from Lion Brand

Yes, the socks-on-the-clothes-line pattern is very cute, but it was sold out when I looked into buying it.  Like everything else, I thought, "I can make that, no problem!" 

It has a round-bottom, a drawstring and a wrist strap.  Oh and the retail one is reversible.  Bring it on, Lion Brand!

Fabric on the Right is for the Sock Bag

I made this over Thanksgiving weekend, the same day I made the Knitting Needle Wrap.  This will be for my sister's birthday, which is right after Christmas, but I gave it to her early, while I was visiting this month.  She can never wait until her birthday to open her presents.

I will try and condense this into a tutorial.  I took a ton of pics, so I hope that it is helpful.

Materials:
  • Half yard of two different fabrics, Color 1 (C1) and Color 2 (C2)
  • Matching Thread
  • About 1 yard of Grosgrain Ribbon, 5/8" wide 
  • Toggle
  • Scissors / Rotary Cutter & Mat
  • Ruler
  • Marker or Pen
  • Calculator (Yes, there is Math involved)
  • Iron & Ironing Board
Start by ironing the fabric.  Take a ball of sock yarn to use as a guide in determining how round the bottom needs to be.  I used my flour canister lid and traced it onto a corner of both fabrics.

Tracing Isn't Just For Kindergarten

Cut out each circle.  I will call the olive green fabric C1 and the brown/aqua fabric C2.  It really doesn't matter which is which, since it's reversible, but for the sake of it, they are labeled.

Measure the diameter of the circle (from one edge to the opposite edge).  To calculate the circumference, multiply the diameter by pi.  Yes, pi.  (Isn't this exciting, using math while sewing)?!  My calculator has a pi button, but if yours doesn't, then take the diameter and multiply it by 3.14.  

My diameter was 7".  So 7 x 3.14 = 21.98".  Let's round up to 22" and add another half inch for the seam allowance (22.5").  This is the width of the tube needed to fit your round bottom.  Don't you feel smart now?

Perfectly Calculated Pieces

Once the width is cut to what your circumference worked out to be, cut the height to about 11.5".  It only needs to fit a ball of yarn, needles and the working socks.

Now, the retail bag has pockets on one of the fabric sides.  Since there is extra fabric, take a scrap piece and use it as a pocket.  I chose to use C1 as the pocketed fabric.  Fold and press a 1/4" edge on the wrong side, along the top.  Sew.  Then press another edge on the flanking sides. 

Pocket Action

Line up the bottom edge that was not folded, along the bottom raw edge of the fabric in the middle (like in above pic).  Sew just the pocket down along the 2 sides and bottom.  I also sewed a line up the middle, bisecting the pocket.  Put aside.

Bottom Pinned

Take C2 fabric and attach the round bottom to the tube.  Place right sides together and work your way around the circle, pinning the tube.  When you get to the end, you have extra fabric for the tube.  This is so you can sew the side seam so it fits the bottom exactly.  (Just in case your math was a bit off, the added extra half inch seam allowance is here to save the day).  Pin the tube side and sew the whole length.  Now pin that last section onto the circle.

This is the tough part: sew the bottom to the tube, using about a 1/4" seam allowance.  A little story here (going off on a tangent) is that I tried making a wine gift bag out of fabric when I was about 19 years old.  I had no idea what I was doing, using my mom's sewing machine.  I was Miss Know-It-All back then, so I  didn't ask for help.  Well, the bag was pretty sad looking and I had not sewn a round bottom bag since then.  I feel pretty good that I did it well this time.

Phew, My Round Bottom Phobia Has Been Cured!

Turn the tube right side out.  Yea, one bag down, one more to go.

Take the fabric with the pocket, C1, and do the same thing as you did for C2.  One exception, when sewing the side of the tube, leave about a 2" hole for turning.  Trust me.

Turning Hole - A Fabric Miracle

For the drawstring, we need to make a hole on one of the fabric top edges.  I chose C1 to have the hole.  Find the middle of the top edge, opposite of the side seam.  Measure about 1" from top edge and place a mark.

Button Hole Mark

Make a button hole at the mark, going horizontal.

Now the fun part:  take both bags and turn C1 inside out and C2 right side out, if they are not already like that.  Place C2 inside C1; the right sides of the fabric should be facing each other.  Line up the side seams.  Just to check yourself, the one with the pocket, turning hole and button hole is on the outside and the other bag is on the inside as in the below pic.

Make Sure It Looks Like This

Pin the top raw edges together and sew a 1/4" seam allowance.  Turn this beauty out with the turning hole.  It will look like the bags are end to end.

Nothing Is Wrong, Really!

Now, fit C2 into C1.  Press the top seam.  From this top edge, sew 1" down.  This will be the casing for the drawstring.  

Take the ribbon and make a loose bracelet around your wrist, big enough to easily slide off.  Add 1" to that length.  On the outside, top edge, on the side seam, topstitch the ribbon in place at the very top edge and where the bottom of the drawstring casing.

Wrist Strap - For the On-The-Go Knitter

Once sewn, take the remaining length of ribbon and thread it through the button hole (safety pin works well).

Or Use a Handy Threader

Once the ribbon is in place, thread the ends through the toggle.  With the drawstring at it's loosest, adjust the ribbon.  Make a knot a few inches from the toggle.  Cut the ribbon near the knot.  Sear the edges of the ribbon edges with a lighter or flame, being very careful (you don't want your project to literally go up in flames).

Believe it or not, the project is done!

Side With Pocket Out

Or turn it the other way:

Pocket Is On the Inside

I'll admit, this took awhile, but it came out so cute, that I really did not mind.  It was worth the time to make my sister something useful for her birthday.

Not Too Shabby!

My sister did, in fact, teach me how to knit socks, maybe I can get her to follow my tutorial to make me a Sock Project Bag for my birthday.  What'cha think, Kathy??

Sunday, April 24, 2011

Sweater Purse 5.0

Happy Easter!  Even though this is not an Easter inspired project, it is a project that I did back in February.  Guess what it is?  Yes, another Sweater Purse!  You will never escape this project!  Well, maybe once this year is over, then I will move on to a new obsession for 2012!  Anyway, this is a purse that came from the same J. Crew sweater as my last Sweater Purse.  I took that sweater and some odds and ends that I thought may spice up the purse a bit and went to work.

A little bit of this and a little bit of that...

I have Santana featuring Michelle Branch's song Game of Love in my head when I was typing this.  I love that song! 

I had made this purse for my friend that I went to The Melting Pot for in one of my previous posts.  Her favorite color is purple, when I thought it was blue.  So, I had to dig around for the purple tulle you see above.  I also had bought a box-o-ties from an estate sale a while back, not sure what I was going to use them for, but when they are only $1, you gotta go for it!  So, I will use one of them for this purse.

First, I cut out a rectangle section of sweater, utilizing the side seam.


I have scaled down my sweater purse size from what I did over Christmas, because I thought it would be easier to handle, but it takes just as much time.  But, scaling it down has allowed me to make more than one purse from a sweater.

Next, I sewed the side seam and the bottom seam.

Upside Down Purse!

I actually flipped the material upside-down so the ribbing that is normally at the bottom of the sweater will be the top of the purse.  I then cut out a section of purple lining to match my purple tulle.  Those purple items were remnants from a dress I made to attend the Sex and the City II movie with my Ladies.  It was a fun night and I wore the dress at least one additional time since, so it was worth it.

Drinking Cosmos before we left the hotel room!!

Anyway, back to the purse.  Always save remnants, you never know when you will need them.  Here is the cut section of the lining:

They should make a no-fray lining-I'd buy it!

I folded it and inserted it into the sweater purse to get a good fit.  I pinned it and then sewed the lining like I did the purse.  I put that aside and tried to come up with some creative idea to do with the tulle.  I already made a rosette for the last one, so not that.  I knew that the tulle would not make a good handle...so I was stumped.  I finally decided to bunch it up going around the circumference of the purse.  I then realized that I would need to unstitch a little of one of the side seams so that I could tuck it in to secure it good.

Unstitching...


I pinned the tulle to the inside of the purse at the seam I unstitched, then periodically scrunched the tulle together with purple thread and anchored to the purse.  I did the same on the other side.  Then turned it inside-out and sewed up the side seam again.

I pinned before I scrunched.


Once I was happy with that I took the lining and folded down the top until it lined up with the purse.  I then iron the lining at that fold, wrong sides together.


Fold and Press.

Then I inserted the lining in the purse and pinned it in place.  Now comes the tie.  I ironed the tie a million times and used startch, but could not get all of the wrinkles out.  I measured a decent length of the tie for a handle/shoulder strap so that it would fit right under the armpit when worn on the shoulder.  I then measured a "closure", using the tie bottom/front (where the V is in the tie) so that would be the closure front.  I pinned those to the purse between the purse and the lining.  

Tie ends-strap and closure.

I then sewed the lining to the purse with a zig-zag stitch along the top edge ensuring that I sewed through the tie handle and closure end.  Since the edge was finished already, no more needed to be done.


Finally coming together.

Once I sewed the lining in, the purse was complete!

Black-tie Purse!

With each purse I do, I like them even more!  See how I scrunched the tulle at the right places so the tie closure could be threaded though?  Nice, touch, if I do say so myself! 

From the top

While I was on a break, thinking of what to do, my cat Julie decided to warm up the purse before I got started.

Roo-girl!  I can't walk away for a minute! 

How can you be mad at a fuzzy face like that!  So, Sheri, if you find some white cat hairs on the sweater, this is why!  I figured she would not mind too much, she has a cat of her own (fellow cat-owners know you can never get away from cat hair)!

I do have more Sweater Purses in my queue to blog about, so stay tuned!

Saturday, February 19, 2011

Sweater Purse 2.0

Here is another addition of the Sweater Purse.  This purse was made for a friend that has everything.  I knew that this purse had to be special.  I decided to down-size the large purses I made in my last Sweater Purse 1.0 post to: 1. Accommodate more purses out of one sweater and 2. Make it easier for me to handle.

I certainly will get more purses out of one sweater, but I did not make it easier on myself!  First, I took a hot pink sweater that was previously felted from my first Sweater Purse 1.0 post.


This one dd not shrink too much
 
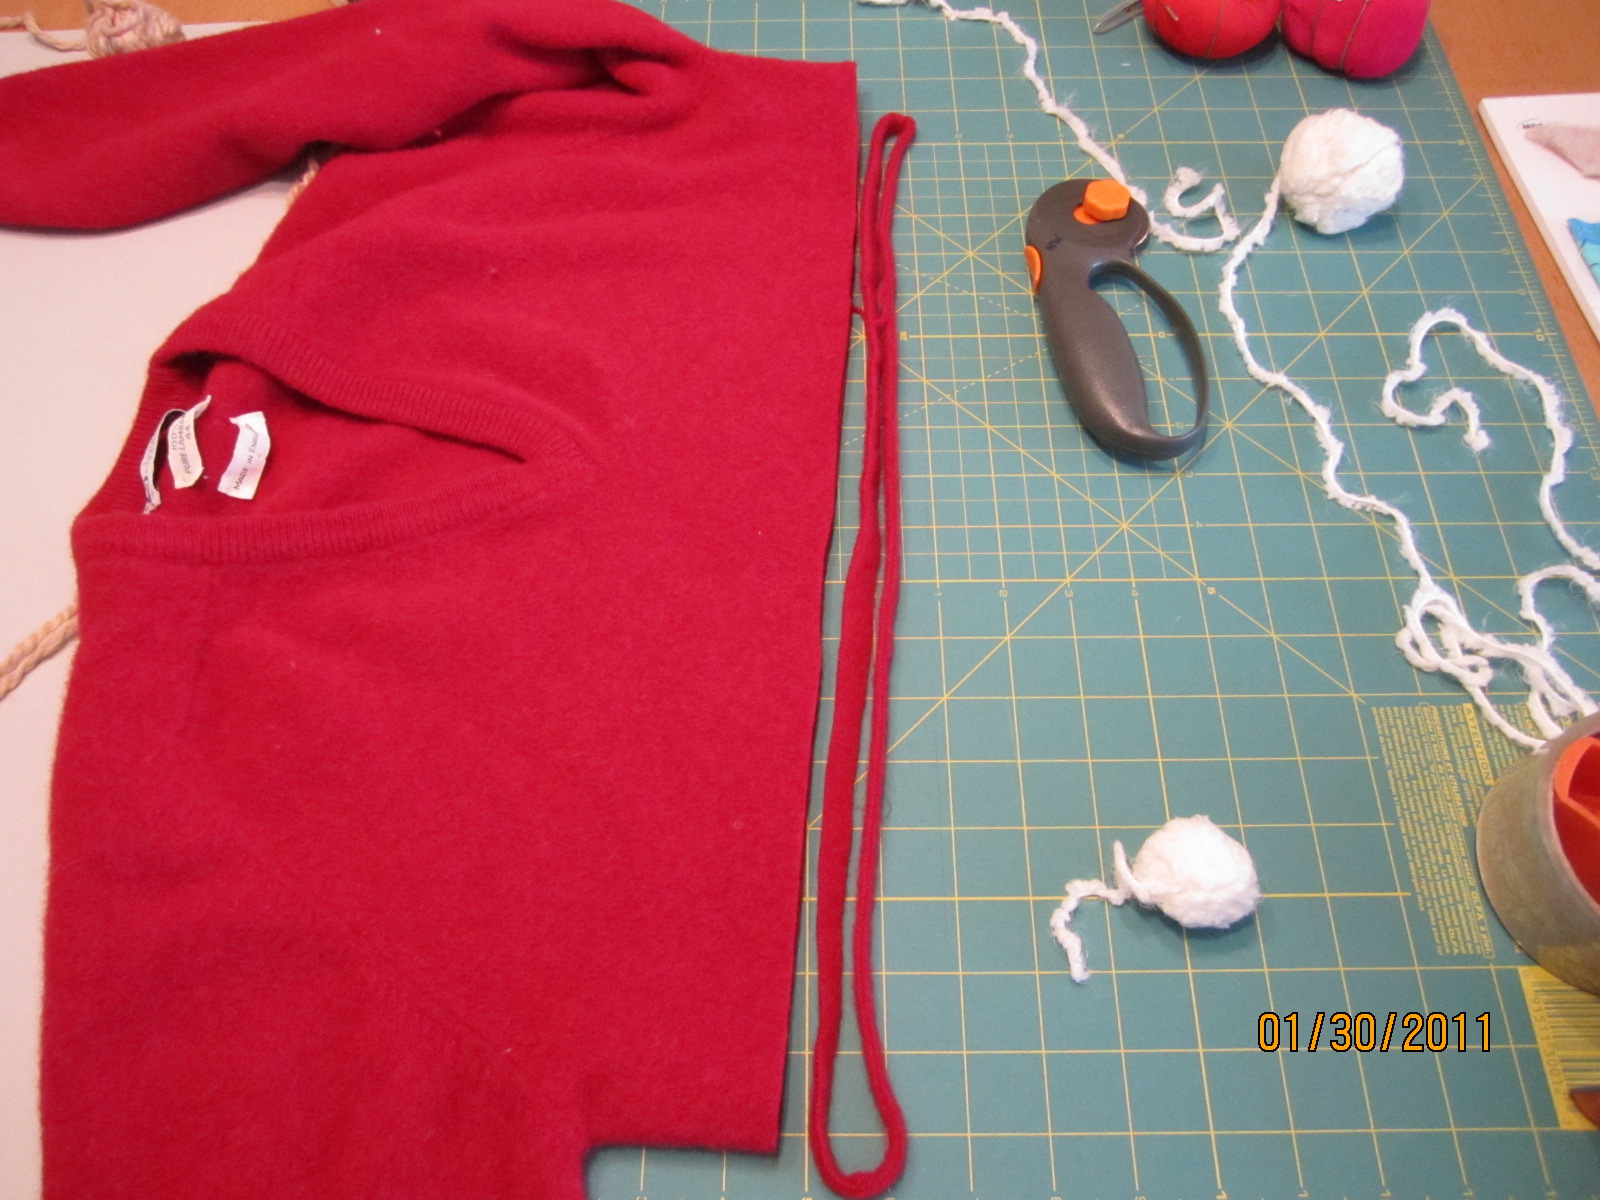
Then I cut the sweater across the chest just below the armpit and then cut that bottom section in half.

Use a rotary cutter - it makes life a piece of cake

Instead of sewing the bottom waist/ribbed area closed to make it the purse bottom, I'm turning these around and making the ribbing the top.  My goal is to make two separate drawstring wristlets.  I am only demonstrating how I made one, because the second one will be the same except for the embellishment on the front, which you will see later.

I'm also trying something new this time and I am going to line the purse.  The liner I chose is a length of fabric that I bought at a yard sale for 50 cents.  It was at least a 3/4 yard length.  I get so stoked when I find something fab like this for cheap.

Very chic 50 cent liner!!

I utilized the side seam in the sweater and turned it inside-out and sewed up the other side, leaving the ribbed end open and then sewed the cut end for the bottom closed.  I then attempted to sew a gusset seam so that the purse would have more body.  I sewed this so that the seams from the bottom of the purse looked like a plus symbol. I did not take a pic of this specifically, but you will see it in a below pic. 

I cut the liner slightly larger than the purse, to allow the purse to stretch a bit when something is placed inside it.  This was a bit of a challenge, because at first I sewed it too big, then unstitched and sewed it too small.  I also was trying to be professional about it (sewing like how a pattern would have you sew in a liner) but that did not work.  Phooey on patterns!  I sewed it just like I did for the outer purse but then placed it aside to insert later.

I wanted to make a flower applique to affix to the outside of the purse.  I cannot draw for the life of me, so I found a applique picture from an old knit magazine and had Vince's teenage daughter draw it out for me on a piece of scrap paper.  With this I took some sweater scraps from past projects and drew the flower on the scraps with washable magic marker.  I also cut a strip of the liner.

Homemade applique flowers

Once the daughter cut out the flowers for me, there was marker residue on the edges.  I took them to the sink and ran them under cool water and rubbed the edges until the marker was gone.  I then pressed the flower pieces between a towel.  They are wool, so they dried in no time.

While I was doing my purse project, Vince's daughter was having fun with my sweater and liner scraps.  She was tying little bits end to end and made a bracelet.  Then she made a bracelet for her dog, Maggie, a miniature pekingese.

What a good sport, Maggie was!

Meanwhile, I attempt a rosette with the liner scrap with a needle and thread.  I don't bother to look it up, it seemed easy enough.  Ha, well, when I was done, it did not quite come out like a rosette, but it was cool enough.  I layered the two flowers on top of each other, a bit skewed so the pedals were off-lined and then sewed my liner rosette in the middle.  I then affixed my new flower applique to the purse.

Is it cute or what? I amaze myself sometimes!

I'm not trying to brag, but I do not consider myself a very creative person.  I am crafty, but creative?  Creativity to me is something unique coming out of your own brain.  When something does come out of it, I am amazed, usually I just copy someone else's idea.  I do not claim the idea my own, but I try to do a decent job of mimicking something I see.  Oh, also, can see the seam in the front of the purse?  That is my gusset.  Eh, who knows if will help.

I then took the liner I set aside and turned it righside-out.  I inserted it inside the sweater purse and folded down the top edge so that the raw edges are not exposed.  I used a zig-zag stitch to sew the liner to the purse to allow it some stretch when the purse it opened.

Liner material is the worst with fraying.  It will fray the second you cut it.  That is why I thought that it would look cute as the rosette on the flower, the strip was quite frayed by the time I was done stitching it.

Fray no more, Liner!

As you can see, I sewed the liner about where the sweater started to rib, so about a 2" section was unlined.  In this section I inserted grommets.  This will be where my drawstring with be threaded through.

Make a hole with the tool and punch the grommet in.

Since this sweater was not very heavily felted, the ribbing was a bit delicate and I really only needed to make a hole one punch wide, but did two because it looked too small.  Once I put my finger in it to place the grommet in, I realized that one would have been enough.  Oh well, live and learn.

Now, I was having a hard time coming up with what to use as a drawstring.  Ribbon seemed too thin, but the sweater seemed like it might work.  So, I cut a strip of the sweater to test my theory.

Strip that sweater!

When I pulled on the sweater strip, it did not react well.  I thought that it may rip if pulled too tight.  As you see in the above pic, I raided my yarn stash to see what I had in there that would match.  I found some white Berocco Plush from when I made a lamb baby blanket.  That is a story all on it's own.  The blanket came out awesome, but it was challenging.  Anyway, Plush is like yarn spun from a cloud.  Soooo soft.  I also had some tan Plymouth Baby Alpaca Grande leftover from the same lamb baby blanket.  This was just as soft as the Plush, but it was spun from a baby alpaca.  What a treat that was to work with!

Anyway, I took strands about a yard long of the Plush, Grande and sweater and braided it.  I taped it down with duct tape like you did when you made friendship bracelets out of embroidery thread.  I only accomplished the herringbone style once and I kept it; so much for making friends! Ha ha!

I held the yarn strands together to equal one sweater strand

Now, threading this braid through the tiny grommets proved to be a challenge.  Vince helped, as usual, when I started to get frustrated.  It was threaded through so that the ends came out on the side.  I opened the purse to determine where the the knot was to go on the drawstring then knotted it so that the strands all hung together like fringe.

Yea, it's done!

I really liked the way this came out.  On the second one, I will make only one hole for the grommets and will do a different applique.  The second one does not have to be done until March, so I have some time to work on it still (I love burning the candle at both ends).  I don't have much of this pink sweater left, so I may come up with a different drawstring as well.  Here is the close-up of the applique that I am so proud of:

The fray gives it charm

If you have any ideas of other styles I could try using my felted sweaters, then I'm all ears!  I have a few more ideas up my sleeve, but I am always receptive to what you guys have to say!