Sunday, November 28, 2010

Quintet Scarf

This is basically the Trio Scarf, but with, guess how many different yarns....five.  This installment of the scarves will be about attaching the fringe.  Another thing I loathe about knit or crochet patterns is that the pattern assumes that you know something about knitting or crocheting beyond your nose.  But sometimes, you just don't.  You just see something you like and want to pick up a pair of needles or a hook and start!  Practice is something that comes with time, how can you practice if you don't work on patterns?  So, in the Trio Scarf post, I simply stated "attach fringe" as a step to complete the scarf, but if you don't know how that is done, then the pattern is just dumb.  Trust me, I get it!

Let me start by explaining why this is not the Trio Scarf, but the Quintet Scarf.  The five yarns I used were out of necessity, not want, but I made the best of it (and my yarn stash).  First my MC (Main Color) was the wool that I mentioned in the Trio Scarf, with the all purple hues from South Company Rio de la Plata.  Did I mention that the Rio de la Plata is hand-dyed in Uruguay?  !Es fabuloso!  Then the second yarn was the rest of the Berroco Opulent FX.   I did not have enough of the Opulent FX to knit all the way through, so I knit it in the beginning then at the end.  My third yarn was Katia Sevilla in a silver color.  I said cream in my last post, but upon further inspection, it really is silver.  My fourth and fifth yarns were also novelty yarns.  The fourth yarn was leftover Berroco Jewel FX which is 94% Rayon and 6% Metallic.  It has a silver thread, purple thread with nubs and a blue thread with nubs all twisted together.  I used it in a felted purse project years ago.  Finally, my fifth yarn was a purple eyelash yarn.  I no longer had the wrapper label, so no clue of the brand.

If not "nubs" then what are they?

The eyelash yarn, I do remember, I bought at a yarn shop in Middleboro, MA called The Wool Patch.  It is the cutest shop built on the same property as the owners home, built like a rustic cabin.  The yarns are in wooden cubbies, baskets on the floor, hanks hanging from the wooden rafters and in an antique wooden hutch with the yarns popping out of the drawers and cabinet shelves.  In addition to the knit shop is a llama corral.  She only has a few, I believe, more as pets than shearing them for profit.  But I could be wrong.  Definitely check out The Wool Patch if you are in the area.  I don't see that they have a website, but they are on Facebook.  I included the link above. 

Like in the pattern in Trio Scarf, I alternated between these five yarns.  It gave a slightly different look than the Trio Scarf, but just as pleasing.  Ok, so now for the fringe lesson:

1. Cut fringe twice the desired length.  It will eventually be folded in half, hence twice the length.  I organized it by laying each set out because I knew I did not have enough Opulent FX to have two strands per fringe.  In the pattern, I used 11 sets of fringe for each end of the scarf.  You may add more or less, depending on how full you want it.  I put one strand of Rio (MC), one strand of Katia, and one strand of Opulent.  Then cut a few lengths of Eyelash (not too much, this can overpower the look), and a few strands of Jewel and randomly selected sets to add these to.  Not every set had an eyelash or a Jewel.

Eleven sets, organized in the order I will use them

2. Work on a flat surface and put project right side up (knit sts up).  Examine and plan out where the fringe will be attached by looking at the spaces at the end of the scarf.  This is usually the cast-on edge (alternately, bind-off edge).  I started with the very side-edge loop with the tail of the MC hanging.  The stitches may elongate as you attach, that is fine and will blend in once done.  I was able to count every other space/hole, using the knit sts space.  It doesn't matter where you put the fringe, as long as you are consistent, it will come out beautifully.  Insert the crochet hook from underneath into the hole you want the fringe to go.

Be consistent when choosing the placement

3.  While holding the crochet hook in one hand, take the first set of fringe in your other hand and find the center of the length.  The center, place in the crochet hook.  Use a big hook, it will give you the deepest notch to hold all the strands.  You may have to hold the yarn tight in the hook to prevent from losing it.  Move the crochet hook with all the strands from the front to the back until it is about half through (called, "pulling it through").  Once through, maintain the center, drop the crochet hood and place your fingers through the hole/loop that you have created (where the crochet hook was).

Make sure all the strands have made it through the space

4.  Once your fingers are in the loop you have created, take the tail of the fringe with the fingers that are in the loop and pull through.  Now with both hands, tighten and adjust the fringe so it fits snug against the scarf hole.  One fringe has been added.

Hooray!  Only 20 more to go!

5. Add the remaining fringe evenly across the edge.  You have the freedom to add as much as you want or as little as you want.  I wanted a full look, sort of chunky looking.  If you feel like it needs more bling, then in the spaces in between the existing fringe, add a few Katia strands or other shiny yarn.  I added extra teal Katia to the Trio Scarf.  I felt like the silver shows up very well and did not think more bling was needed.

I love the mixed look!

Now that you are an expert on fringe, repeat on the other end of the scarf.  You can leave the ends a little ragged, with the fringe uneven, or you can choose to snip them all the the same length.  Just be careful if you are the straight-edge type and make sure that you are cutting an even amount off.  You don't want what happened when you tried to cut your bangs when you were a tween and one side ends-up shorter than the other side, then you try to cut the longer side to match the short side and then that side is shorter and then you go back and forth before you realize you need a stylist to cut your bangs even again, now that there is only two-inches left.  But in this case, you can always "grow" new fringe, unlike your poor bangs, which will take a month to grow out.

Ragged-Edge all the way, baby!

So there it is, the Quintet Scarf.  I did not measure the full length of this scarf, but I'm sure that it is taller than I am.  What else in the world can you wear that is taller than you?  That is why I love the scarf and I hope that you love knitting them too.

Sunday, November 21, 2010

Trio Scarf

I am starting to think of Christmas.  Yes, I want to actually complete Christmas shopping / making homemade gifts before Christmas this year.  For my homemade gifts I always have the greatest intentions, but I either bite off more than I can chew or start too late to finish them.  There are countless projects that I have thought of but could not get the materials in time or projects that I have started only to determine that it was a flop.  Don't get me wrong, I do get to complete a few homemade gifts each year, just not all the ones I think up.

This year I want to accomplish homemade gifts within my skill set.  Oh c'mon, you're saying, where's the fun in that?  There is plenty of fun in that because it will be me actually finishing projects and giving them as gifts to wow the recipient.  I'm sure you have found by making a homemade gift yourself that when someone realizes that it was homemade, they have a new appreciation for it, and for you for taking the time to make something for them.  I intend on not going crazy with large or expensive, but with something simple and under $20.  Although, I do have to admit, I don't think I am making anything for the men on my Chistmas list.  It is a bit much to make something for everyone.  So, it will just be the women/girls on my list this year.

The first thing that I have completed is a trio scarf.  This scarf is knit with three different types of yarn for a mixed textured look.  I got the idea when searching through the free patterns on the Berroco website.  They have hundreds of free patterns and you can download them without having to give your email address.  The pattern is a simple 4" wide, 6' long scarf with long fringe.  I went to my local yarn store, Knit 'n Knibble, and found some really cool yarn.


Yarn Elements


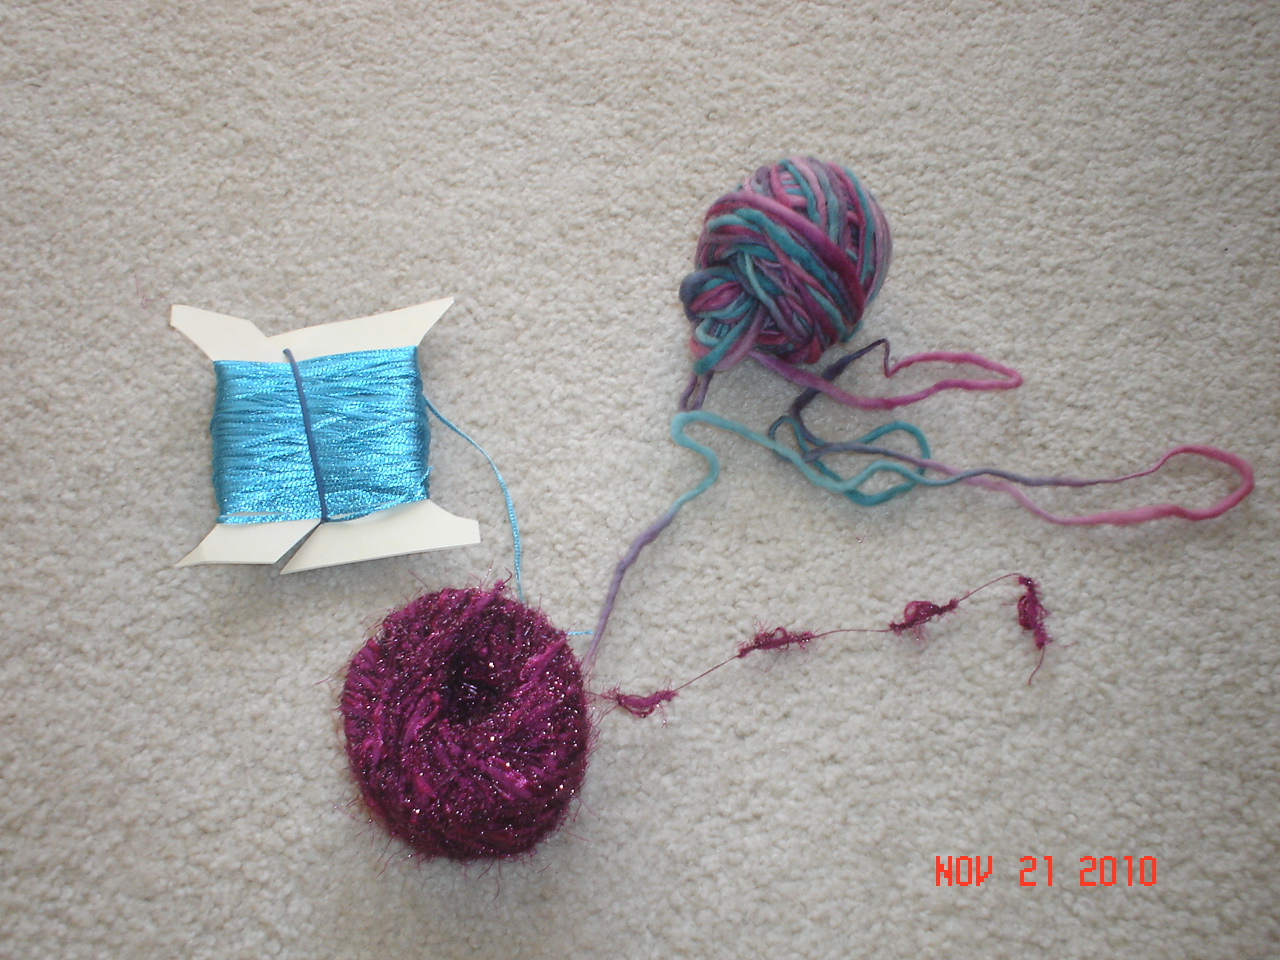
The teal colored yarn is Katia Sevilla, it is 100% nylon.  This yarn came on a cardboard cylinder like the purple one, but it was so slippery, that I had to wrap it on a makeshift spool or it would get tangled on itself.  The purple metallic yarn is Berroco Opulent FX and that is also 100% nylon.  Those yarns are considered 'novelty yarn.'  You normally mix these types in with another yarn, they are not normally worked up on their own.  They are what give plain cotton or wool yarn a pop.  The main yarn is South Company Rio de la Plata, it is a thick-thin kettle-dyed 100% wool.  This yarn I selected first and then the novelty yarn to match.

I tried the pattern as written and did not like it.  It left huge ladders on either side and it rolled alot.  I also was not achieving the recommended gauge on size 13 needles.  This is just a scarf and gauge is not a deal-breaker, but it will affect the look of the scarf.  I ended up using size 17. 

Too skinny!  Needs more fat!

This should be 4" wide and I was getting 3" on a 13, then 3.5" on a 15, then finally 4" on a 17.  Geesh.  After all that, I knitted several inches was when I saw the ladders and the rolling.  So I changed the pattern a bit to:

Cut fringe by measuring out 22, 18" length set of the main color (MC; cotton or wool) and another set of 22, 18" lenghts of the novelty yarn (B) (I did the teal as B)
Cut additional fringe by measuring out 42, 18" lengths of the other novelty yarn (C) (I did the purple one as C, since the purple yarn is not uniform, I cut double the amount)
Cast on (CO) 12 sts with the main color (MC) on a size that will give you a width of 4"
R1: k1, p1, repeat to end
R2: p1, k1, repeat to end (this is a seed st or moss st)
Repeat R1 & R2 one more time for a total of 4 rows
R5: k1, p1, k1, k6, p1, k1, p1
R6: p1, k1, p1, p6, k1, p2, k1
Repeat R5 & R6 until about 4" has been knitted
Pick-up one of the novelty yarns (B) by hold both the MC and B tog and repeat R5 & R6 until about 4" has been knitted
Drop B and pick-up the other novelty yarn (C) and hold with MC and repeat R5 & R6 until about 4" has been knitted
Switch between holding B with MC and holding C with MC until it is the desired length.
Repeat R1 and R2 for a total of 4 rows
Bind off
Applying the fringe: Take one length each of MC & B and two lengths of C
Evenly attach these four strands as one to the end of the scarf with a large crochet hook.  I put 11 sets of fringe on each end.  I also left the tail of the CO so it will mix in with the fringe.


Cut fringe before you start knitting


Yes, this still had a roll, but not as bad as the original design.  Maybe that was the charm of the original design.  I added the seed st in hopes of avoiding the roll, but it didn't work.  I did avoid the ladders, though.

Shimmering in the light

This scarf worked-up quick.  I knitted while watching tv, carpooling, and waiting to leave work.  You can literally knit this scarf for miles!  I ended it after 6 feet (not including fringe).   Here it is complete:


I love the colors!

I am pleased on how this came out.  I still have yarn left-over.  Maybe in my free time I will knit up a child scarf with the extra [insert biting-off-more-than-I-can-chew statement here].  We will see.  I plan on knitting one more scarf like this but the MC has all purple hues.  Instead of the teal, I have a cream from Katia and will use the left-over purple novelty from Berroco.  These will be given as gifts, even though I am loving this scarf.

Can someone make me one?!?

Maybe I can put this on my Christmas list and get one too!  I gave you the pattern, so get knitting!  I have lots of extra yarn from past projects, maybe I will make another mixed scarf, but when I do that, I will keep it.  Yeah, right!  No, I mean, of course!  This blog is about completing projects, so, yes, I will make one for myself.  It just might not be until next winter. 

It is worth learning how to knit or crochet.  Even if all you make are scarves or potholders, it is something to be proud of!

Friday, November 12, 2010

Summer Reading List

Yes, the summer reading list.  I posted on Facebook in June, that I was setting a goal to read nine (9) books this summer.  I got some thumbs-up and was excited to meet and possibly even exceed my goal.  Well, it is almost mid November and I am still reading...I do have to say I did read eight books during the summer months.  I am stuck on my ninth book and I don't know why it is taking me so long.  I love to read, I guess I am in a reading funk.  Let me share the books I read this summer along with a cheers rating (5 thumbs-up is the highest rating):


1. I picked this first book up at a yard sale.  This is a romance, but I think they called it 'paranormal romance'.  I never heard of that before, but I have read Heather Graham before and enjoyed her, so I figured this would be good too.  I was right, but I put it in the beach-read category.  A woman is a performer at a Las Vegas casino when someone is murdered and falls on top of her at the craps table (think opening scene from CSI Las Vegas).  There is a PI trying to solve this murder before too much info hits the press.  Paranormal part: The woman can see dead people that are in limbo after they die.  Interesting, but hectic ending with lots of ghosts coming out in an abandoned western town for a shoot-out.  I give it 3 thumbs-up.


 2. I got this book from a friend who reads avidly.  Jennifer Weiner has written tons and I have read at least two of them, one being Good in Bed and the other being In Her Shoes.  I enjoyed both of them; so I gave this one a try.  Right off the bat, someone is murdered in her perfect Conn surburban kitchen.  The main character is new to the area and is a stay-at-home mother that is not as perfect as her neighbors.  She is the only one that seems to care who killed this woman.  The book is filled with detail, suspense, chic-lit humor and real-life emotion.  I have recommended this book to several people and will continue to.  I loved how it matched up the good parts of chic-lit with a murder mystery.  I give it 5 thumbs-up.


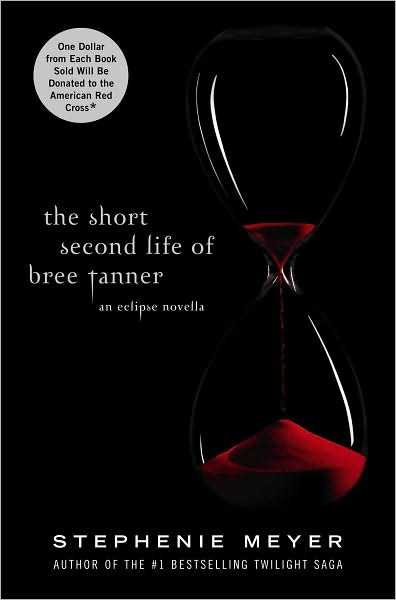
3. The summer before last, I finally read the Twilight saga.  I enjoyed it, but I will only read them once.  I know, what kind of Twilighter am I?  Well, I did not choose a 'team' so everyone will have to live with it!  This novella came out and I actually bought it new and read it before some of the biggest fans I know at work.  Along with it being about the short second life, it was also a very short story.  Although short, it was just as addicting as the other four books.  I don't need to sum up the book, if you are a Twilighter, but for you non-believers, it takes a minor character and tells a portion of Eclipse through her eyes.  I give it 5 thumbs-up.


4.  I bought this book at a library book sale.  This is a local author from Tampa and this book is from in a series.  I had not read any of the other books in the series, and I don't think that I will either.  This book's main character is this vigilante guy that appears dumb but goes around killing 'bad guys'.  I think this book is suppose to inject humor while killing the bad guys, but it was lost on me.  I found it too annoying to like any of the characters.  I only give this 1 thumb-up.


5. Nevada Barr is one of my favorite authors.  Her book series is about a National Park Ranger, Anna Pigeon.  This one takes place in California where a firestorm breaks out and she and several other park employees/firefighters are stranded on a mountainside.  A murder takes place and it was done by one of the people stranded alongside Anna.  She is trying to figure it out, while keeping the peace until they are rescued.  There were a few boring parts, so I give this 3.5 thumbs-up.


6. Here is another Stephanie Plum book.  In my earlier post Ten Big Ones, I wrote about the numbered series from Janet Evanovich.  I read To the Nines in July, while I wrote about Ten Big Ones in September.  So, I am backtracking a bit.  As always, this book was a funny one.  She is looking for a skip and the angle in this one is that someone is leaving her flowers with devious messages that make Morelli a bit nervous.  A great addition to the Plum family.  I give it 4 thumbs-up.


7. I borrowed this book from a co-worker.  I was very eager to read this much-anticipated novel featuring Michael Landon.  I heard some mixed reviews, but if you are a fan of The Da Vinci Code,  then you will enjoy this next adventure.  Micheal is tricked into going to Washington DC by a Free Mason poser.  The history of the monuments in the Capital are covered in this book.  This book is suspensful and keeps you guessing who is on Micheal's side.  I give this 5 thumbs-up.


8. Like I said before, I read this one in September and covered the Stephanie Plum series.  This segment of Ms. Plum's life deals with a gang in Trenton, NJ.  She has Lula helping her and in the meantime, she gets to stay in Rangers 'Bat Cave'.  This one is hilarious and has to be read in order to get the full appreciation of the situations she encounters.  I give this a 4.5 thumbs-up.


9. This book I am still reading.  It has taken me over a month to read only half the book.  It is enjoyable, but I guess I've been really busy.  The preceding book, The Friday Night Knitting Club, was an excellent read for knitters and non-knitters.  This continuation of the Club is how they are dealing without one of their close members, having babies, and I'm not sure what else because I am only half-way done!  I can say that there is not a lot of knitting going on, so that is a bit disappointing.  That could be why it is taking so long.

Well, that was my summer reading list.  I like to keep track of the books that I read so that I can: 1. Not read the same book again, 2. Try to correlate the genre of book to my mood throughout the year and 3. To try and read at least one more book each year. 

So, in looking back on 2009, I read 14 books (this included the Twilight series).  This year the total is already at 15.  Technically, I could stop stressing and take the rest of the year to read Knit Two.  I think that I am funny sometimes, where I make-up these 'rules' in my head, only to try and find a way around them.  For example, if I read more than one additional book this year than last year, then in the year 2011, I will have to read 2010's number, plus one!  If I just coast the rest of the year, then it will only be 16 books.  I don't know why I need to organize something leasurely like reading books, into a schedule and stress over it.  How do I not think like this? Does anyone else do this or something like this with leasurely hobbies?

Anyway, I enjoy reading mysteries, some chic-lit (not all, some are just too typical and unreal) and non-depressing drama.  I have read a few Oprah Book Club selection books and wanted to dig a hole and not come out, they made me feel so depressed.  So, if a book boasts the Oprah Book Club seal, I don't touch it!  I think, "thank you for already determining that I don't want to read it."  I would ask for reading recommendations, but I have two book shelves stuffed with books that are on my To-Do list.  Let me finish those, then I will ask!  

Get outside and enjoy the weather, or if the weather is not enjoyable, then curl-up inside with a good book!  Happy reading! 

Sunday, November 7, 2010

Baby's First 2.0

I had committed to having my fourth baby blanket done by the end of October.  I technically missed my deadline, but it's only a few days into November and I am finally done!  This act simply could not have been completed without a mishap.  The story goes that I was happily crocheting and was changing colors and realized that I used way less yarn than I did for the last blanket.  If you have been following my blog, I pretty much was repeaing the last blanket I made, but with different colors as in post Baby's First 1.1.  My crochet bag had the other blanket in there still, so I pulled it out and compared the two:

Hmmmmm...

When I looked at the two next to each other, I was thinking, "How the hell did this happen?"  What I did was not chain enough, but it was enough that the v-stitch pattern worked out evenly (do I even wonder what the odds are when you mess up your foundation chain, but it works out anyway, so you continue?).  It does work out that the width of the new blanket matches with the height of the last blanket, when viewed as in the above pic (again, the odds?).

I tend to be a perfectionist and when I realized my mistake, I wanted to rip it out!  At this stage, ripping it out did cross my mind.  Can a sane person have a moment of insanity?  Absolutely!  Once I got my head back, I knew that there was no way I was ripping this out.  I figured, they will end up being the same size dimensions, if I just continue with the last color.  Once I was done with the green, my original idea was to do the border in pink, but I did not have enough, so I did it in green.

Friday night, I finished.  The last step in every yarn project is weaving in the ends.  This is a task that I loathe, but you have to do it or your project that you spent hours, days, weeks, or even months on stays hidden in a bag in the closet for a year. 

Last weave, right there!

Once it was completed, I pulled out the last one and was looking them over.  Of course, throughout this whole time, my cats have been coming around and playing with the yarn or laying on my lap as if the blanket was there just waiting for them to lay on.  So, as predicted, Jasmine came by a few times, investigating.  She is the cat that does not like to be held or picked up and hugged; I tried sandwiching her inbetween the two blankets.  Here is how I made out with that:

See ya!

Yeah, she did not stay, but it is always fun to try.  :-)

Nothing wrong with being different!

This blanket, even though I did it wrong, is my favorite!  I am giving this blanket and the pink and yellow one to the same person, because my friend's sister had twins.  So, normally nobody would ever be the wiser of my mistake, but since they are going to the same family, I feel like I wish I had more time to make another pink and yellow to match the direction of this one.  But, I do not have the luxury of being a quick crafter, so I must give them like this.  I hope that they are received well, and liked equally!  Am I the only one that puts feelings on inanimate objects?  Probably not, but no one will be insane enough to admit it!

Saturday, October 30, 2010

Halloween 2010

I love Halloween.  It is one of my favorite holidays because you get to dress up in something ridiculous or be bolder than you would be on a normal day.  I think of it as a challenge each year because I am putting my creativity out there for people to see.  This year is my year to become a cartoon character.  For my character, I need a brown or black bob wig, black-rimmed glasses, orange sweater, red skirt, orange knee-high socks and loafer shoes.....can you figure out who I will be?  Well, I'm not telling you yet, you will have to wait and see.  This costume took a few weeks to prepare, so here was my journey:

Part I - The Skirt

I started with the skirt.  I knew I was not going to find a skirt that was plain enough and had the pleats I desired.  So, about a month ago I started looking in the Joann's flyers (sale circulars, for those of you that are not from Mass) for when McCalls, Butterick, or Simplicity patterns go on sale for $2 or less.  By doing this you save SO much money because the patterns retail for $15 or more.  The pattern I chose was $0.99 (sweet!!) and I used a coupon for the fabric.  I did buy the thread and elastic for the waist, but the total for the skirt was still under $8.

Sewing the hem on the skirt

I just followed the pattern, so I will not bore you with the steps.  It is an elastic waisted full pleated skirt made out of lightweight corduroy fabric.

I'm loving elastic!

Next on the checklist was an orange sweater and knee-high socks.  Now, it is Halloween and one could possibly find the orange knee-high socks, but an orange sweater???  Doubtful.  I was keeping an open mind when I went yard saleing these past weeks.  I was looking for anything that I could somehow make into this orange sweater.  I found this:

Part II - The Orange Sweater and Socks

This is a cream-colored cotton men's crew neck sweater with Dr. Scholl's therapeutic knee-highs.  I bought the sweater at a yard sale for $0.50 and the socks new for about $4 (twin pack).  If you have never tried on circulatory socks before, I encourage it.  They are SO comfortable and soft; I just had to "break them in" before moving on to the next step.  I may have looked funny lounging around the house with socks up to my knees, but they were cozy!  Let me know if anyone wants a pair for Christmas...I'm definitely bringing these to Mass when I go up for a visit in December.

Since the sweater is cream-colored, I thought this is the perfect opportunity to try out RIT dye!  I had never dyed anything before in my life and I always like a challenge, so I went for it.  I have a front-loading washing machine and I am renting, so I decided that dying the items in the machine was not an option.  The package gave a few options: 1. Washing Machine, 2. Stovetop Method, and 3. Bucket Method.  I chose the bucket method because this sweater was not fitting in my stockpot!

Cat Litter Bucket-O-Fun

The directions were to add hot water to a bucket, add the powder packet to about 2 cup of hot water in a separate container, then add the dye to the bucket.  Then soak the garment(s) in water then add to the bucket with the dye and agitate for 10 to 30 minutes.  After about 5 minutes, I felt like I had been standing there forever.  My beau was helping me with this part of the project because he knows I have no patience.  God love him!  The sweater was done in about 15 minutes, but the socks took a second packet of dye and another 20 minutes.  This is because RIT recommends natural materials like cotton; the socks are polyester.  After this step, then you rinse the garment in cool water until the rinse water is clear.  After about 12 buckets of rinse water, the water was still a light peach color, but considerably lighter then the first few rinses.  Then the sweater and socks were put in the washing machine with detergent and dried normally.

How awesome is this sweater??!!

I was very pleased with the sweater, but a bit dimayed with the socks.  I got over it quickly.  This is only for Halloween and nobody will even notice once everything is on.  Now that the sweater is orange, I am not stopping there.  This is not the style of my cartoon charater's sweater; she wears a turtleneck.  I want to stay in character, but this is Florida and I don't want to wear a long-sleeved t-neck in 80+ degree weather.  I decided to have a little fun with the scissors.

Cut and Butterflied

I left about 3 inches to the sleeve on the sweater and then cut up the length of the arm to open it.  I will use one of the sleeves to make my mock cowl-neck.  As for the existing sleeves, I took some leftover elastic and made the sleeves gathered and puffy.

Puffy-sleeve action

I used a ball-point needle and a zig-zag stitch since this is knit and wanted to maintain a bit of the stretch that the knit ribbing gives.  Once the sleeves were done I had to be creative in how to finish the neck.  A t-neck would be too hot, but I did not want to necessarily do anything to the back of the neck area either.  I decided to attempt a cowl-neck.  I pinned and re-pinned several times and did not like it.  I then decided to try an 80's neck style.  Since I already had the puffy sleeves, might as well go for gold.

Had to bring in the big guns - Quilting pins!

I cut off the cuff of the sleeve (did you see how long and tight they were?  I could not figure out how to work with those).  I unstitched the neck and shoulder seam on one side and pinned in the cuffless end, folded.  I resewed the shoulder and neck seam.  So, the sleeve was hanging out of the shoulder, in a way.  I then pinned the length of the arm to the front neck area, as seen above.  I had to break out my flat-head pins I use for quilting; these pins are long.  I gathered it at the neck so the end of the sleeve would meet up with the other shoulder seam. 

Orange you jealous of this classic nugget?!

Anyway, the look I was going for was cowl-neck with the side buttons.  I did not have three buttons, or even two, for that matter, that matched to pull that off.  I was going to leave it like this, with the raw edge, but when I modeled it for my beau, he asked me if it was finished.  Ack!  So, I had to do something with it.  I had a large skirt pin that I gathered the raw end with.  What do guys know about 80's fashion anyway?  This was coming from a guy who admits to wearing MC Hammer pants in the late 80's...

I purchased the bob wig for $6 and black-rimmed glasses for $5, new at the store.  For the shoes, I had a pair of weathered chunky heel loafers that I had in mind for this costume.  Here it is all laid out:

Jinkies!  Any guesses?

We are allowed to dress up in costume at work for Halloween.  So, this past Friday, I donned my costume and grabbed my prop and went to work.  Everyone had a good laugh...

I'm Velma Dinkley, Gang!

I won for Best Costume...Yeah me!  I would like to thank the lady at the yard sale for parting with her husband's old sweater, the little girl who sold me her Scooby Doo stuffed animal at another yard sale, also Dr Scholl's for making a comfortable sock, and .....

The total cost for this costume was under $25!  So, what do you think?  Also, let me know what you are going to be or were for Halloween.  Send me pics!!

Sunday, October 24, 2010

Matchy Headband

I am going to make full use of the blue and orange plaid button shirt I bought at a yard sale a few weeks back.  If you remember, I made the shirt skirt from it, so the top part of the shirt still has lots of fabric.  What has inspired me was a simple cloth headband I recently bought at Walgreens.  Inspried may not be the proper term...I'm going to shamelessly copy the Walgreens headband.  In the pic below, it is the white and green headband.

Saturday morning project

I made a template from a manila folder of the purchased headband.  I will place this template on a folded section of cloth and cut.  This is done twice to get a top-facing and bottom piece of cloth.  I also took off the rest of the buttons and the label from the shirt.  I love collecting buttons.  I have a jar of buttons on my dresser.

I heart button jars!

The jar was something I got at a thrift store years ago.  It is an old spice jar; I've never seen anything so quaint before.  Then one day I went to an estate sale and there was a whole 20-piece jar set with wall mounted wire shelf of the exact jar I had.  At first I was excited, then, because there was so many, I felt like it lost its charm somehow.  I decided not to buy any and just keep my lone one on my dresser.

Back to finishing the headband.  Once I got the two pieces cut out, I cut a length of elastic about 6" long and pinned it in between the two layers of fabric.

Sewing is so backwards, sometimes!

I stitched along the edge with a ball-point needle on my sewing machine.  I did not want to run the risk of the thread bunching when I got to the elastic.  I'm not sure if it would have, but I did not want to rip out rat nests this morning.  I sewed around the elastic end and 90% of one side.  This is where it got a bit tricky, I  then found the other end of the elastic between the fabric and pinned it to the other end.  The fabric bunched up and I had to keep it smooth so I could sew the end and the other side.

Almost there...

I left a small opening and then turned it right-side out. This left a hole where I did the transformation from scrunchie to headband.  The purchased headband had topstitching around the entire edge; so I chose to do that too.  I am not always a straight sewer, even when I try to line it up with the guidelines on the sewing machine.  The fabrics have a mind of their own and do what they want, even if you are feeding it through straight.  My sewing sistas, I'm sure, would back me up on that fact. 

See ya, hole!

I pressed the fabric so the seams were flat and aligned the fabric folds of the hole so I can close it when I topstitch.  To aid in my mission to sew straight, I used a zipper foot with the needle on the right side (my zipper foot has a plastic piece that you can move from side to side, depending on what side the zipper teeth are on).  This actually worked the way I imagined, so I was happy!  Since this did not take too much time, I cut out another headband out of left-over fabric from my Halloween costume last year, where I was a cowgirl.  The fabric was a faux suede, like microfiber/moleskin, which was supposed to represent my cowhide skirt and vest.


Two new headbands

I can't forget that I did have help cutting out the pattern... 

I wouldn't have been able to do it without you, Roo!

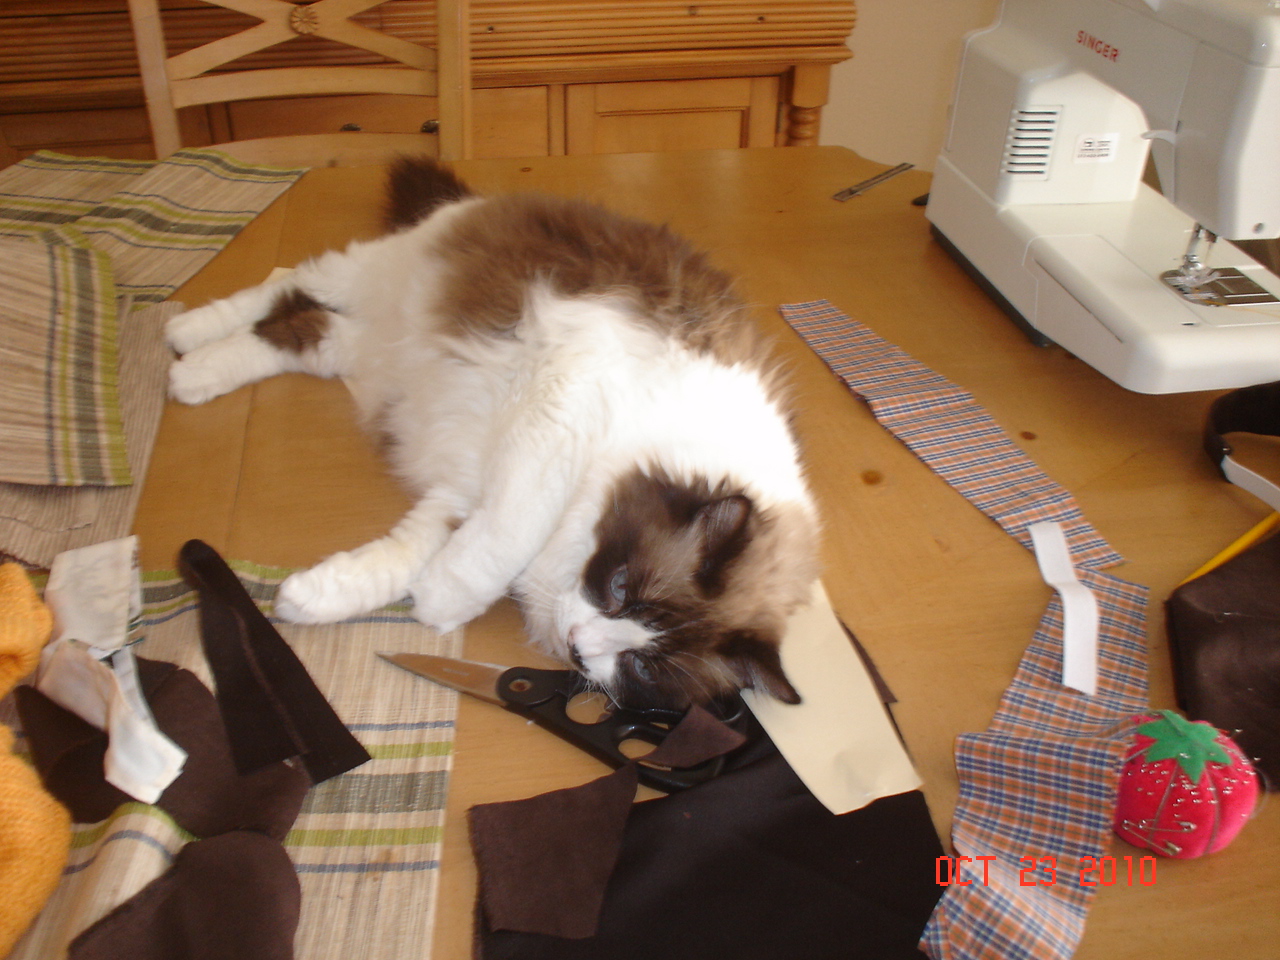
When I start a project, it is expected that either Julie or Jasmine will come and get themselves in the middle of it.  My eldest kitty, Julie (aka Roo) helped by laying all over the fabric and pushing it all over the table.  Like I said...typical!

Sunday, October 17, 2010

Tickled Pink Necklace

In honor of Breast Cancer Awareness Month, I've decided to fix a pink stone necklace and pair of earrings that had lost their luster.  Below, you will see that I did have to buy a chain and strings of pink stones. 

Elements of transformation

The third item from the left is a chain that I had from an old necklace and the forth item is the necklace in need of sprucing up.  Next to the necklace is the earrings in which I will add to, as well.  The necklace and earring set came from Khols and I thought it was real silver but I suppose it was only silver plated. 

Some links were tarnished beyond cleaning

My idea is to add more dangle to the earrings.  Once I started adding, I realized that I did not have head pins but only the pins with the eye-loop.  I had to improvise; I'm sure a real beader would cringe at what I had to do.  I was just going to leave the eye at the end but that looked unfinished, so I used the eye end to attach to the fishhook eye, added three stones and then twisted the straight end up to hook the last stone.  Amateur, yes, but I made the best of it!

Earrings, yes I only have one rubber back!

I think I need a new camera because I am aware that some of these pics are blurry.  Maybe I will buy a new one for myself for Christmas.  :-)  I intended on adding a third dangle, but since I did not have head pins, I thought two looked perfect!  (It orginally only had the one lone stone on each fishhook)

For the necklace, I wanted to make it a long, draping necklace that had stones, then chain, then stones, etc.  My vision did not really come out that good looking at first.  As you can see, the chain I chose was too chunky for the stones.  The stones were more delicate looking that I thought.

Too Mr. T for my liking

So, I decided to go with the chain that I had, pictured in the first picture.  The bad thing about that chain, is that the links are so tiny, that it was very frustrating trying to link them with the eye loops.  I tried not to toss the whole project out the window, but just breathed deeply and forged on.

The smaller chain looked much better, but I think a gauge in-between the Mr. T chain and the tiny-links chain would have made it a more balanced look.

Linking in-progress

I kept the single stones as they were wrapped.  The factory in China did a better job at beading than I am was doing, so why mess with it?  I did make the straight pins of 10 stones and alternating straight pins of 5 stones.  I did have a hard time making the eye hook at the opposite end of the pins.  I think that a person needs practice and patience, which I was low on both at this stage!

I used the clasp from the original necklace for the new one.  With draping necklaces, you can just put it over your head and not unclasp it, but if you want to double it up, then the clasp is needed.

All done!! 
Click on pic to enlarge if you want to critique my eye loops

I tip my hat to beaders.  This was a project that was not that difficult, but took longer than I expected.  The tiny links were enough to drive me to drink!  Instead, I had a cup of instant coffee in my new Cirque du Soleil mug I got last night while at the La Nouba show.  Classy necklace with a classy mug!

Tickled pink in pj's before dinner!