Showing posts with label novelty yarn. Show all posts

Sunday, January 19, 2014

Ruby Shoulders

Our work holiday party was this month, January.  My friend gifted me a cute maroon velvet skirt and black sequins tank top.  I want to wear this to the holiday party.  I know that the air conditioning will be on or the night air may be cool.  I wanted to knit up the Sidhe Shrug from Vampire Knits pattern book.  I wrote about my challenge in this post as #2:
My challenge is to knit my way through that book.  I love that book!  Anyway, I went to the yarn shop to get yarn for this project, but giving the fact that I was only just starting the week of Christmas, it was unlikely that I would knit a lacy long-sleeved shrug in a few weeks.

Instead, I bought a unique hank of yarn that is a combo of several different novelty yarns tied end-to end to make this one hank.


This is Alp Dazzle (Mixed Content), hand tied yarn by Feza yarns.  This yarn is made in Turkey.  This is not cheap yarn, but since one skein will make one decent sized shawl, I bought it.  I figured, the outfit was free, my shoes were free (had credit at the store, so no money spent), so, to spend money on this yarn, I felt okay with it.

Vince was a good sport and held the yarn while I balled it up.  The shop owner told me that the ball winder does not do a good job winding this yarn.  I will take her word for it and just ball it.  Even though Vince was not convinced that it could not be wound on the winder. 

I am using size 13 circ needles.  The pattern is simply, cast-on 20 stitches (if you want a triangle point, only cast-on 3 sts.  Knit each row (garter).  At the beginning of each row, increase by 1 (Make 1).  The shawl will grow and grow.  Knit until you run out of yarn.  Simple!


I started it as a rounded edge and I did not like it.  I unraveled it and made it a triangle.  It is very eclectic.  I did this much watching movies with Vince one evening.  I needed an easy project that would work up fast.  


This is the completed shawl.  It self-stripes, you just knit and it does all the work!


 A few samples of how different, but alike each yarn type is.  Comes out very elegant.


Here is me at the holiday party, trying to be a model...I really should not quit my day job...


~~~
 
 
~~~


The shawl was a big hit and it came in handy under the chilly weather we have been having.  Thank you, Crystal, for a super-cute outfit.  That was a big hit, too! 


Sunday, September 15, 2013

Romance Shell - Part 1

I seem to start summer projects in the summer and winter projects in the winter.  Well, normally that would make sense, but since it takes me forever to finish a project, I really should do the opposite: Knit a winter item in the summer and a summer item in the winter.  That way it will be done in the correct season for wearing it right away.
 
Alas, I have a summer frilly shell that I have started at the end of summer and I won't be able to really wear it until the spring.  Well, in Florida, the seasons are screwy anyway.  Our "winter" is like 1 week of weather where a jacket is nice for the morning, but not really needed on the way home.  But truly, this shell is a summer item to wear.
 
This project is from Tahki Yarns Intermix pattern booklet.  The pattern is called Romance Ruffle Collar Shell.

Romance by Tahki Yarns
 
When I was looking through the booklet I fell in love with almost everything in there!  That is my downfall, is that I like too many patterns and have a hard time choosing only one.
 
This pattern is knit in a novelty yarn called Ripple (100% Mercerized Cotton) that is thick and thin.  Charming at first, then after awhile, not so much.  I chose to do it in the same color as the model.  I typically try hard not to choose the same color, but the other colors in stock at Brandon Yarn Boutique, I had plenty of garments in those colors.  Vince suggested that I pick a color I would not normally have in my wardrobe.  Okaaaaay......

 
I need 5 balls of the Ripple yarn.  Here is a close-up of the thick and thin characteristic:


Knitting a gauge swatch was a bit of a challenge.  I went down one needle size, so I am using a size 6, rather than a 7. 


I'm starting with one of the front pieces, because my size 6 circs are being used for another project, so until those get miraculously get freed up or I buy another set, I can knit the front panels on straights.


The interesting trait about this yarn is that it knits up with a unique texture; it gives a pebbly look.  The basic pattern is a k8, p8 ribbing, so it even makes that basic pattern interesting.
 
To be totally honest, I really do not like knitting with this thick and thin yarn.  Often the thick portion almost gets stuck when you go to do the next stitch.  So if you leave it, then the stitch is tight, if you "let it go" then the stitch is loose.  Not exactly something that I like, when I am trying really hard to keep gauge.
 
Good luck to me!

Saturday, March 9, 2013

Relay For Life - Knitted Donations

Our work is involved in a charity, Relay for Life.  It is an American Cancer Society event and we are putting up a tent and walking a track on April 5th from 6 pm to the next morning.  We are getting excited to do this because this is the first time our company is having their own team there.  We have a monetary goal of $5000.  Which sounds like a lot and we are doing all that we can to raise this money.


If you would like to donate, please follow this link [Relay For Life] and click the orange DONATE button.  Then choose the blue Search For an Individual link.  Type in Nancy Victorino.  Any donation is greatly appreciated!

One of the fundraising events we are having is called a Silent Auction.  We asked the employees to donate a new or gently used item and on a designated day, they will be displayed for everyone to go around and place a bid by recording your bid on a sheet of paper for that item.  At the end of the bidding (We gave 2 days), the person with the last and highest bid wins.

So, I have donated a few items and two of the items are knitted items that I never got around to finishing them in time for the baby there were originally intended for.  I won't mention who they were supposed to be for (I feel too bad about it).

First up is a baby sweater knit in Berroco Touche (50% cotton, 50% rayon) in a raspberry pink.  The yarn has since been discontinued.  


All I needed to do was sew up the side and arm and weave in ends.  This was a UFO, so I am happy to be completing it and giving it to charity. 


I don't even remember what size I was making.  Probably a 6 month old or 1 year.  I can't tell!  I don't have kids, so I really have no clue how big or small babies are.  I know, for shame!!

Next up is a pair of baby booties knit in Berroco Suede (100% nylon) in a tan color they called Butch Cassidy.   This yarn has also been discontinued.  The name was cute, so I remembered it all these years.  I would consider this yarn a novelty yarn.


These were actually already complete, just sitting in my yarn stash and UFO bin.  They have little fringe going around the top edge.  So cute!

I am glad to have brought these two out so that some baby may enjoy them.  I've been wanting to knit for charity, so since I have not yet, here is my chance.

The auction is coming up on March 12th and 13th.  I'll update everyone if they sell! 

Sunday, January 6, 2013

Origami Sweater Finale - Part 3

Happy New Year!!

I have been working on this sweater since October and I was working steady on it for a good month and then my elbow/arm started to hurt from knitting nonstop that I slowed way down.  Here are my past two posts related to this sweater:
Just a quick overview:  This sweater pattern is from Berroco called Buzios.  I don't know who comes up with these names at Berroco, but typical is not an adjective I would use.  I enjoy that about them, though.  I knitted this with Berroco Origami.


During my weekends knitting, my cat Julie would occasionally nap on my project.  I would get up to get something or do a chore and I would often come back to that pic above.  Too cute!  She's literally face down in the yarn!  Here is another one:


I did have two resolves before the end of the year, 2012, and that was 1) To finish a book that I had been reading since Thanksgiving (have you noticed that I have not been posting about books lately??) and 2) to finish this sweater.  Well, I am happy to report that there are checks in each of those boxes!!


I was definitely going down to the wire with that second resolve!  The microwave clock read 9:59pm on New Year's Eve.  Phew, with two hours to spare!  That was finishing, binding off and weaving in ends.  I used a total of 6-1/2 hanks of Origami.  I had to run down to the Brandon Yarn Boutique to buy that 7th hank on Monday.  Unreal!


A few things about this sweater...The neck is way too big.  I needed to decrease more stitches.  Since I am not going to unravel it, I made a braided string with the extra yarn and laced the V up a bit.


I also replaced the tank underneath with a short-sleeved shirt, so that there is fabric for the sweater to "grab" onto.


I am very pleased with the final product that this sweater became to be.  This can be worn with jeans, leggings or even pajama pants!  I'm actually wearing pj/yoga pants in the above pic, so this can be worn with pretty much everything.

I'm loving it and I hope that you enjoyed my Origami Sweater journey. 

Have a great 2013!

Sunday, December 2, 2012

Origami Sweater - Part 2

I have been knitting like crazy all throughout November, and I'm still not done with my Origami Sweater.  I have been knitting the lace stripe then knitting the seed stitch like a robot.  That seed stitch is enough to drive anyone mad!

I started the Origami Sweater in the middle of October; the first post is here:
Now, I can positively say that I can see the light at the end of the tunnel.  Like I said, I'm still not done, but it's close.  I brought it with me when I visited Mass over Thanksgiving and got a good portion done.

I knitted the rest of the body, then left that on those needles.  I took a second set of longer size 7 circs and did the Magic Loop method to knit the sleeves in the round, rather than using double pointed needles.  My double points were metal and this yarn is like string, so it kept slipping off of them.  I knitted both sleeves and put a contrasting yellow yarn on the live loops to hold them until I was ready to attach them to the body.

Once I was ready with that I would knit a bit from the body, then knit from the yellow holding yarn from the sleeve, knit more body, then attach the second sleeve in the same manner.  It was a bit weird knitting from a piece of yarn, but it worked.


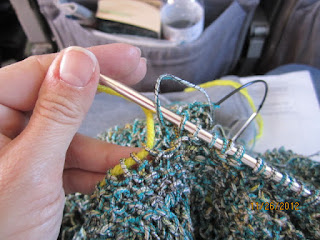
That yellow yarn in the pic is my left hand "needle".  The work on the right handed needle is the body of the sweater.

I got to attach the sleeves while I was on the plane.  I read a bit, then wanted to attach the sleeves before I forgot what I was supposed to do.  Then I went back to reading.


Can you believe that it is starting to look like a real sweater!  Although, it does look a bit shrunken; I'm expecting that once complete, I will stretch it this way and that way to get the stitches settled in and it will fit fine.  Keep your fingers crossed!

One bad thing about all this knitting is that I sort of injured myself.  Yes, a knitting injury, if you will.  My sister calls it epicondylitis, which is pretty much like tennis elbow in my left forearm.  When I knit, I keep my left hand and arm in a bent clenching position for long periods of time holding the left hand needle and that has made my arm very sore.


In the above pic, it is my extensor carpi radialis brevis that hurts!  When my elbow is bent for a period of time, it is very stiff when I extend it straight.  Ugh!  I do running, cross-fit, and the occasional bike ride...I don't get hurt doing any of those activities, no, I get hurt KNITTING!  Like, could it be any more ridiculous?

As a result of that, I have been slowing down on my knitting.  I'm not even done with my holiday gift knitting either.  I may have to forgo those other gifts and start mixing reading and sewing in between my knit projects.

On that note, let me put a warm compress on my arm so I may finish this sweater!

Sunday, November 11, 2012

Origami Sweater - Part 1

In my fog of knitting a few [hundred] Christmas gifts, I decided to start a project for myself.  Nothing like putting pressure on myself.  Meaning, I'm not done with my Christmas knitting yet, but I am throwing a sweater in the queue for myself...that I started already!

My local yarn shop (LYS), Brandon Yarn Boutique, was having a sale, so it was a perfect time to shop.  My intention was for myself, I won't fool anyone.  I picked a few projects that I had on my mind and went down there.  Luckily, only one panned out.

I am knitting the Buzios pullover from Berroco.  It was a free pattern from their website and it is knit with Origami (48% Acrylic, 19% Nylon, 17% Linen, 16% Cotton) in a green and blue blend called Turtle Bay.

Pic from Berroco website

As usual, I went down a needle size than what was recommended so that I could achieve the correct gauge.  So, I am using a size 7 circulars.  This sweater is knit in the round from the bottom up.


Here is the yarn.  It is actually not really yarn, but has beautiful colors.  It is several different types of string held together then wrapped with a black thread to bind it.  It's like working with a thin cord.  I don't see this sweater being all that warm, but since it is lacy and open, that was never it's intention!

I casted on and I was off!


The stitches in this sweater are a lace stitch and seed stitch.  There will be stripes of seed stitch alternating with the lace stitch.  I was joking with a fellow knitter and we were saying how seed stitch takes a lot of time.  I told her that this is half seed stitch and I said that this was a project doomed to be a UFO (unfinished object) before it even starts.  I was only joking because this yarn was pricey and it was not going to sit in the closet, unknit!

I'm actually chugging right along on it.  The seed stitch stripes are great for knitting while watching TV or chatting.  The lace stitch stripes, I need to pay attention and count the stitches after each row.  Lace stitching is made up of a lot of yarn overs (yo) and decreases, so you can miss one and not realize it until a row or two later.  Fixing lace is not fun.


I snugged a long pillow through the sweater so that you could see my progress.  From the bottom up, I knitted the seed stitch for 1", then there is the lace stripe, 2" seed stitch stripe, and another lace stripe, then a seed stitch stripe.


The lace stripe: A close-up.  To date, I have knitted a bunch more, I just have not taken any more pictures, but it is pretty much the same: alternating the seed and lace.  Since I am knitting in the round, there will be no seaming.  Once it's done, it's done.

But, since I'm still finishing up some Christmas knitting, this sweater I will work on in the background.  I have only a few more items to knit for gifts, but I'm dragging my feet on them.  One involves stranding, which is like using the yarn wrapping technique that you use for fair isle knitting (multi colors).  I do not have much practice with multiple colors.  We shall see.

Stay tuned for more fun stuff in the pipeline.

Related Links:

Sunday, September 2, 2012

Fuzzy Wuzzy

I am starting my Christmas knitting early.  I am on a roll and have completed two hat and scarf sets.  I don't know how many items I will make as Christmas gifts, but I will just knit until I run out of time.  That always seems to work :-)

I start out by buying some really cute yarn at a local store; they were inexpensive so I figured I'd buy a bunch and figure out what to do with them later.  The first set of yarn is a wool-like multicolored strand with a novelty strand of mini fuzzy nubs on them wound together.  I'll call this set of yarn "Fuzzy."  The brand is Gala Yarns and I believe it is a yarn company that must buy out other company's yarns and recycles them.  So I am being green by knitting something with recycled yarn.

Fuzzy

The second set of yarn is a brown worsted weight acrylic yarn with a novelty strand of mini fuzzy nubs on them wound together, like in the other yarn.  This set is also from Gala Yarns (again, being green).  I will call this set of yarn "Wuzzy."

Wuzzy

I decided to make a hat and scarf set for my friend's two daughters.  I made them a hat last year (I Heart Hats) as well, so they can add these to their collection.

The scarves are first.  It is a pattern that I am improvising on.  Here is my pattern:
  • Any yarn, at least one ball of 50g (more if you want fringe)
  • Size 8 or 9 knitting needles (8 if thin yarn, 9 if thick yarn)
  • Work the following pattern until you run out of yarn or reach the desired length:
    • CO 16 st, loosely
    • Row 1: k1, *yo, k2 tog, repeat from * to end
    • Row 2: p
    • Repeat Rows 1 and 2 until you reach desired length
    • Bind off loosely
    • Cut fringe in 10" pieces for fringe that is about 5" long once attached
      • For Fuzzy, I used 3 strands of yarn for each fringe
      • For Wuzzy, I used 2 strands of yarn and one strand of ribbon for each fringe
    • Attach fringe at the ends of scarf at the ribs
This pattern created a ribbed look with eyelets (holes) in between each rib.  It was to have an easy pattern to mindlessly knit without a pattern, but different than stockinette.  

Here is Fuzzy, while in the works:


Here is Wuzzy in the works:


Next was fringe.  I cut 54, 10" strands for Fuzzy and 36, 10" strands for Wuzzy.  Wuzzy also had 6, 10" strands of purple ribbon cut.  


I explain how to attach fringe in a past post: Quintet Scarf.  For Wuzzy, I placed the ribbon one on each end and one in the middle, so there are 3 strands of ribbon weaved in at each end.


On to the hats.  The hat pattern is a pattern I have used in the past and love it.  It is very versatile.  That pattern is available in my I Heart Hats post.  This time, the yarns were pretty thick, so the bottom edge did not naturally roll, so I made them like beanie hats.  You gotta roll with the punches and just go with it.  


How cute, huh?

Here are them as a set:


So, I can officially cross two little people off my list.  Not too shabby.

Monday, August 27, 2012

Yarn Stash

I had a long weekend this weekend, thanks to Hurricane Isaac.  Tampa Bay was expecting tons of rain and heavy winds, but the Hurricane went further west than the original forecast models predicted.  My employer had cancelled work for Monday.  Last time we got a lot of rain, my work was like an island, where the parking areas were completed flooded, even the road in.

So, I decided to work on a project that I have been meaning to do for some time now.  The online knit and crochet database & fiber community, Ravelry, allows you to enter in your patterns, yarn, needles & projects.  I had previously entered in my patterns, magazines & books.  This weekend I entered in all of my stash yarn.


Here is a bin of my oldest yarn.  I have had some of this yarn for years, that I even moved from Mass with it.  I swear I will use it one day.  There are some unfinished objects (UFOs) in there that I have full intention to rip out and make better use of the yarn.  Someday...


Here is a picnic basket full of one skein or half skeins of yarn.  This mostly houses the leftover yarn from my completed projects.  It also has my metal straight needle collection.  My cat, Roo, is dying to jump in that basket.


Here is a small basket of yarn from projects that I have recently completed and don't have room in the bin or the picnic basket.

I need to start stash busting.  Some ideas I have are to make scrap scarves, striping with different textures of yarns.  I did a bit of that for the Trio Scarf and the Quintet Scarf. I have other patterns that would look nice with multi textures and colors.  I also want to make a scrappy throw blanket where I would knit different blocks of different patterns and sew them together.  It would be so kitschy; I would love it.

I have a few knitted Christmas gifts to get through (I'm limiting it to just a few) and then I may just start on some scrappy scarves and throws! 
 

Sunday, May 6, 2012

Seafoam Lace Scarf - Part 2

It's been awhile, but I have been working on my Seafoam Lace Scarf bit by bit over the weeks.  I started the scarf back in March.  I have finished the main scarf today and I'm loving it!  But, I'm not done yet though.  Here is what I have so far:

Scarf before the edging

The next step is to crochet an edging around the entire perimeter of the scarf with hemp yarn, Hempathy from Elsebeth Lavold. 

Light and airy

The hemp yarn feels like a thin cotton yarn.  I'm curious how this is going to work out because the weight of the hemp is a lot heavier than the mohair that the scarf is knitted with.

Hemp blended yarn

Mixing textures in knitting is always fun and adds interesting texture.  Stay tuned for Part 3.

Sunday, February 6, 2011

Laptop Bag

This project had been on my mind for awhile; for I had this pair of jeans that I loved, but sadly, a hole had worn itself on the inner thigh.  I had worn them, even with the hole there, but I knelt down the other day and I heard the "rrrrrip" of the threadbare fabric; I knew their time had come.  But I had these jeans since forever and wanted to repurpose them somehow.

I've been to craft shows where little girl's pants are transformed into cute purses and seen denim purses selling in stores.  I went online to take a closer peek at these said items and came across a video on YouTube on making a laptop case out of a pair of old jeans.  The unknown chic who made this sped up the video so it was only about a two minute tutorial on how this is done, but it is really all you need.

But, you know me, I'll drag it on a bit longer than two minutes.

My poor favorite jeans!

First I took my jeans (see the worn spot), and cut the legs off just below the crotch.  This depth was adjusted later, but I did not want to cut it too short to begin with. 


Then, with the seam ripper, I opened up the front to the bottom of the zipper flap.  If anyone says that Gap jean are crap, then try taking the seams out and get back to me.  The inner seam had three layers of stitching.  Three layers!  It took longer than I though because this was baffling to me.  After I unstitched the plethera of stitches, I had all these little thread bits every where I cut the stitches (on both sides of the jean fabric and on the table).  There is this little trick I learned in a quilting class to get those little bits out of there in a jiffy.  So, I took a lint roller and slowly rolled it over where I cut the seam stitches.  Each one of the bits stuck to the lint roller in a crazy straight line.  Amazing!  Alternately, I ran out of lint roller tape and had to use packing tape.  That worked well too, you use it like you are waxing (put on, press where the threads are and rip)!

Flap over and stitch

Once, I had all of the threads out, I arranged the front so that one side flapped over the other (like in above pic) and sewed to the end.  Coats and Clark makes a denim thread that is orange and is a bit thicker than your average thread.  I used this to sew the flap down.  I only did one pass with the sewing machine, but a second, double row would have matched the way the rest of the stitching was done. 

Next, I then figured out how deep I needed the "bag" to be.  Then turned it inside-out and drew a line across the bottom so to make it straight, then I cut along the line and sewed it shut.

Measure from the waist to determine your line

The below pic shows that I also sewed and trimmed the corners off, but this is not necessary. 

You know, what this could be...

I turned the bag right side-out and ironed it.  The waist was crinkled from the store during the stonewashing, so they were always crinkled.  I ironed the heck out of it with a touch of starch so it would stay uncrinkled.  A little starch goes a long way.

Almost there!

If you watched the video link, you will see that the chic made holes in the waist and cut the side seams off of the legs.  She used the side seams as the handles to the bag.  In my opinion, this will not do for me.  I did cut them out, but I did not like the way it was going to look.  I imagine that you could tie them to the belt loops or thread them through the belt loops as you would a belt, but my legs are short and I would have to sew them end to end to make something long enough to do these ideas.  I was not in the mood for that.

Instead, I chose to insert rivets or grommets in the wasit area.  Just poking a hole was not enough of a finish for me.  I marked where I was going to place the grommets with some screwdriver thing with a point on it and tapped on it with a hammer.  (Vince said it was a size 1 Philips scewdriver, if that means anything to anyone).  This gave me a guide to make my snips into the denim to insert the grommet.

Two-piece grommet with anvil

I just followed the directions on how to install the grommets.  This type uses an anvil with that cylinder you see in the above pic.  I inserted the cylinder into the hole and tapped it with a hammer until it was flat.  I did one and then Vince did the rest.  My taps on the hammer were lighter than his.  He only needed two or three taps while it was me tapping several times.

Tap on a hard surface, like concrete

Once they were all in, it pretty much was done.  I just had to figure out what to use as handles.  I looked through my craft closet and then my belts and found a yarn belt that I made with an i-cord maker.  It used novelty yarn and a string of sequins.  I used it as a dressy belt tons of times, but the sequins-on-a-string got caught on themselves one time and I almost could not untie it to use the bathroom.  Yeah, so I had rarely used it since then.

My personal touch!

At first I thought this bag was a bit juvenile, but once I put my i-cord belt on it,  I was loving it!  It is large enough to fit my laptop and it's battery power cord with plenty of room to spare.  The front and back pockets are still functional and can hold your cell phone and/or mp3 player.

Very Chic!

As I was doing this project, I had a thought of another idea.  Take the same jeans and cut the leg a lot lower and make a skirt.  You have to do it slightly different, but it is the same concept.  I have another pair of jeans that just ripped, maybe I will have to give it another life as a skirt. 

Stayed tuned.