Showing posts with label black. Show all posts

Sunday, November 3, 2013

Fetching Fingerless Gloves

I finally started and finished a project in the same month (of the same year)!  Hooray!

I knitted a pair of fingerless gloves for a friend as a birthday gift.  She lives in Mass, so she may actually use these when it gets nippy out.

The project is called Fetching from Cheryl Niamath.  I got the pattern from Knitty.com.  Fetching are fingerless gloves that have a few row of cables around the wrist and on the knuckle.

The yarn I decided to use was Sheep(ish) from Vickie Howell for Caron.  I will have to be honest here:  I really do not like this yarn.  For this purpose, it was not the best yarn choice.  While knitting it kept splitting and there is not much of a twist or wind to it, so it was not the best for cables.  Please forgive my photography, I took most of these at night with the flash on.


The color I chose was Gun Metal(ish), which is a very dark gray.  I will admit they have such great colors to choose from, very vivid and saturated.  I knitted the gloves with a size 6.


I needed double pointed needles (dp), a cable hook (the U looking thing), a marker, darning needle and a row counter. 


While I was casting on, the yarn broke.  Ugh!


For dps, you cast on the required number of stitches, then with the other dps, transfer over several stitches, then with the 3rd dp, again.  You should have split up all the stitches so there are about the same number on each dp.  The first round is the most critical, because you must be careful that you do not have the stitches twisted.  If twisted, you will be knitting a Mobius and you don't want that.


I will then knit the gloves in the round.  Dps are good to use when you have a small number of stitches, but need it in the round.  This will have no seams (yea!) and just a few strands to weave in at the end.


In this pic, I am knitting some cables.  They will be around the wrist and arm.  To cable, you take your cable hook and slip 2 sts onto it.  Hold it in the back or the front (depending on which way it is going to twist) and knit the next sts on the main needle.  Then take the cable hook and knit from that hook.  You now have the start of a cable.  Then you knit in pattern (knit the knits and purl the purls) until the cable row again.  Really, it is easy.


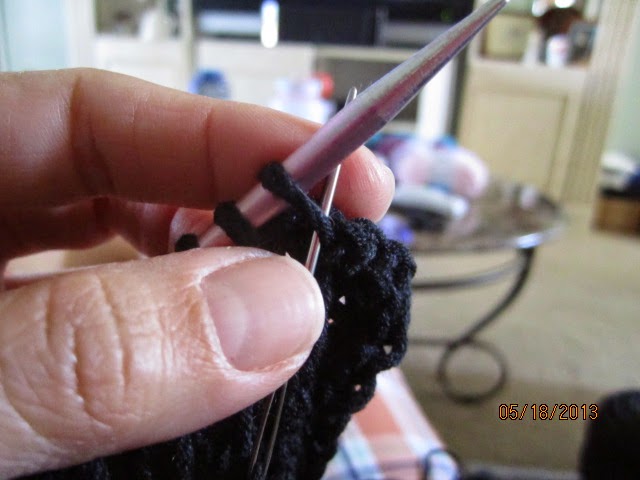
Another feature I want to show you is the thumb.  I was instructed to take waste yarn (a different yarn and color than the yarn you are using) and knit with that as the main yarn for 7 sts, then transfer them back to the left needle and knit them again, but dropping the waste yarn and knit with the main yarn again.


You will have something like this, with the waste yarn showing.  I will carefully unstitch the waste yarn, revealing live stitches.  I will immediately place the live stitches onto two double points.


Slowly unstitch each one and place onto the needle.


I will now knit this little opening in the round to make the thumb.

 
I finished by cabling around the knuckle and loosely bound off with a picot bind-off.  It created little bumps along the edge.  These did not come out as fabulous as I had hoped.  I don't know if I can really blame the yarn entirely, though.  Maybe if I adjusted how much I knit after the cable on the knuckle, or if my hands are too small for these gloves.


They have been sent off to my friend.  Hopefully they will fit her better or look better on her.


I'm sure she will be able to use them on the next blustery New England day.  Enjoy!

Sunday, October 27, 2013

Vampire Knits

I'm giving myself a challenge.  I want to knit my way through the pattern book, Vampire Knits. By no means is this a new book, but I have had it for a few years and have pined over so many of the projects in that book that I HAVE to knit more from it.

 
Vampire Knits by Genevieve Miller was copywritten in 2010, so 3 years ago, this book came out about the time Twilight and all of that was the rage.  It is cleverly written with vampire folklore, quizzes related to dark characters like werewolves and vampires with each project having a very calculated name with a brief summary of why it was chosen.  This is a story, not just a book of patterns and pictures.
 
I have actually already knitted from this book.  My Shapehifter Shrug is from this book.


In that pic, I'm wearing it like Little Red Riding Hood, but it shows how cool the weaved pattern looks.  Here is a pic from the book:
 
 
I am going to do a count down with the ones from the book that I want to make.  The count down will be from the one I love the most down through the book, but it does not mean that I will knit them in that order.  I can't predict what I will be feeling like when it comes time to knit, so I will go with the flow and knit out of order as the mood strikes.
 
Here is my Top 9 (I already knitting one, so it really is a Top 10 list...)
 
Lore Hoodie
 
I have been in love with this project for-ev-ver.  This is what I should have knitting first, but I always talked myself out of it because it was a sweater with a hood that is not very Florida-like, calling for 100% wool.  Well, screw it!  I am going to knit this one with a more Florida-friendly yarn, like a cotton-acrylic or acrylic-wool blend.  My local knit shop has a yarn that I see each and every time I go in there and it screams, "Lore Hoodie!" at me.  I cannot resist much longer!  Help! 
 
Sidhe Shrug
 
This shrug is something that is a bit more practical for Florida.  Just two arms, with all the A/C around here, wearing tank-tops and spaghetti straps makes these shrugs a necessity!
 
The Black Veil
 
This scarf is so pretty!  One of it's features is these picots all the way around the edge.  I have attempted to knit this a few times now, but cannot seem to have the correct gauge/correct weight of yarn.  I do not know why I am not getting gauge, but I will just break down and buy the yarn it calls for and the guessing will be over. 
 
Vampire Diary Protector
 
This is not practical for me, but I love it so!  It makes me want to keep a journal, but I'm not going to fool myself, I won't write in it.  I should make it big enough so that it covers a 3-ring-binder that I place my printed patterns in.  That is much bigger than this book, though.  I will have to see about what it can go on before I take the plunge and cast-on.
 
Under the Cover of Midnight Hooded Cowl
 
No, she is not a conjoined twin.  Ha!  This is even more unpractical in Florida than the Lore Hoodie.  I may have to knit this as a gift for a Northener, or I use it when I make my annual trek to Mass to visit my family.  It would beat having a scarf and a hat. I love the cables and how snuggly it looks.  If it was knit with an alpaca blend...I would die for it!  Just Maybe...
 
Pulse Protectors
 
I really like the fingerless gloves better than the throat cover (cowl).  Cables are so striking with yarn that had great stitch definition, that you just want to wear them...even if it doesn't go with your shorts and tank-top.  Alas, most likely this will be a gift.  I cannot really see myself wearing them around here, but one day out of the year.  That won't stop me from knitting them, though!
 
Rampage Fishnet Gloves
 
I attempted this project back when I bought this book.  I ordered the special yarn with elastic in it and everything.  I could not even cast-on!  I think that I was trying to do too many things: A new cast-on, elastic yarn, in the round, and trying Magic Loop.  Too much!!!  I may revisit this again, these are really cool.  They are like evening glove length and then you weave a red ribbon at the end.  Very dramatic.
 
Werewolf Hat
 
This is a felted hat with ears.  How cute is this!?  I clearly will never wear it, but it is so hard to resist the temptation of knitting it!  Maybe I can give it as a gift to a kid, just knit it smaller.  I know there are some Team Jacob's on my Christmas list!
 
Glamour Earrings
 
These are like dripping blood.  I would have to go to the bead store and see what they have, but maybe I could just loosely use this pattern as a guide, because the odds of me finding these beads are very slim.  This looks like a simple project; it calls for DMC thread.  Oh boy, do I have embroidery thread...3 cases of it.
 
That concludes my Top 9 list of pattern projects in the Vampire Knits book.  I can't say that this will be an easy feat or that I will stick to only knitting these projects.  I have magazine subscriptions and I fall in love so easily with every pattern that it will be hard to stay on-track.
 
No way will I knit any of these items quickly.  Quickly and knit do not belong in the same sentence when it is pertaining to me and knitting.  I love the craft, but I'm just not that fast with it.  I wonder how long it will take me to knit all 9 of these projects???  Let the counting begin...


Sunday, July 7, 2013

T-Shirt Tanks

Happy 4th of July!

I know that the official day of summer already occurred, but the 4th always licks off the summer with a bang!

I have been sitting on this project for a few months.  I promised to work on this for a friend and kept putting it off.  But now, no more excuses!  I have completed this project and think that it was a quick and simple project.

My friend got this idea from Pintrest and I found the source of the project.  It started off as a no sew t-shirt tank project, but I only use fusible webbing for when I'm in a pinch or when a needle is not the most practical way to go.  My machine will make it more durable, so that is what I did.

The project is from the blog Crafter Hours and it is how to make a t-shirt into a tied tank top.

First you take a t-shirt you don't mind cutting up.  But pick one that you would wear to the beach, the pool, hanging around the house or running errands on the weekend.


Cut the neck off straight, then the sleeves and a few strips from the bottom.  I threw away the very bottom edge that has the hemming.  Cut 2 more strips from the bottom.

Then seam  the top cut edges where the neck is big enough to form a casing for the tying strips.


Snip the strips so they are long and thin, not a circle.  Then thread the strips, one in the front and one in the back.  Bunch the fabric up a bit and tie on the shoulders with the strips.  Trim away any excess striping material once you have the ties at a good length.


I left two out of the three shirts I did with the cut raw edge at the bottom.  Once that is done, then you are done!!


Another one:


And one more:


This one I also put a casing at the bottom and threaded another strip so that it can cinch on the side.  This t-shirt was a men's XXL, so I had to take it in at the sides.  I had plenty of room at the bottom to do the cinching.


There you go, go forth and cut up all of your husband's t-shirts so that you can have some chic beach shirts and all-round comfy tees.

Sunday, May 19, 2013

Weekend Shrug - Finished

Okay, let's call this the Two-Weekend Shrug!  I did mainly work on this on the weekend days, so it is safe to say that it was a quick knit.  I bought two hanks of Berroco Weekend and I ended up only needing less than 1-1/2 hanks.

My last post, explained the source of the pattern and a bit about why I chose this to knit:
Continuing with the open weave pattern, I need to knit to a length of about 15 inches.


Once I had 15 inches knit, then I knitted the ribbing again, like in the start.  I have essentially knit a rectangle, with ribbing at the top and bottom of the long sides of the rectangle.


There was a special bind-off method that was needed to mimic a cast-on edge, called Elizabeth Zimmermann's sewn bind-off.  Elizabeth Zimmermann was a British-born knitter that revolutionized the modern practice of kntting, so essentially she is the Mother of Knitting.  What she says goes. :-)

So, this is how it is done.  First, when you are ready to bind-off, you cut the yarn really long; put it on a sewing needle.  Thread the yarn from right to left through the first two sts, purlwise.


Second, thread the yarn from left to right into the first st, knitwise.


Third, pop the first st off the needle.


Repeat, threading the needle in this fashion until you have threaded through the last st on the needle.


The bound-off edge looks like the cast-on edge.  Yippee!  Even if it doesn't, who is going to know??


Then I sewed the ribbed edges together for 3-1/4 inches on each side; folded the ribbed edge that will be on my neck and I was DONE

I went by Brandon Yarn Boutique to show off how much I had done (I was at the final ribbing part at the time I stopped by the shop).  There were other people there and enjoyed looking at my project.  I loved hearing their praise and comments.


How neat is this little shrug?  I can't wait to wear it!  This will be my newest favorite article of clothing.


I am vowing to make only practical pieces.  I have several items that I have knit and barely wear because it's too warm out or it only goes with one thing.  That is a good-intention statement, but in my UFO pile there are wool items and long-sleeved pullovers. Sigh.... 

Sunday, May 12, 2013

Weekend Shrug - Part 1

Hooray!  

I'm back to knitting and blogging.  This is a good thing!

My newest project (yeah, yeah, I know I have a few UFO's hanging out there) is called my Weekend Shrug.  It was a free pattern on Ravelry called Ribbed Lace Bolero by Kelly Maher published in her blog: 10 feet high.

Kelly Maher's pic of bolero - Front

Kelly Maher's pic of bolero - Back

Isn't that cute?  I wanted something that I can do in cotton or cotton blend, versatile with my spaghetti strap and sleeveless blouses, and will be a quick-knit.

I went to my local yarn shop (LYS): Brandon Yarn Boutique to find the perfect yarn.  I knew if I went to Joann's or Michael's, I'd end up not liking the yarn I chose or something, so I decided to splurge and do it right.  My time is worth it!

Anyway, I chose Berrocco Weekend (75% Acrylic, 25% Cotton) in Pitch Black.  I am using size 8 and 10.5 knitting needles.


Weekend is a nice acrylic/cotton blend that feels and acts more like cotton than acrylic.  It is not springy like acrylic, but true to form like cotton (aka, no give).  Just what I wanted...something that can get thrown in the wash; carefree.

First you start out by ribbing a k2, p2 on the 8's.  I would use my 8 circs, but they are tied up with my UFO Cabled Cardi KAL.  Oh well, I have so many straights, that is what I used.  It was a little awkward because I used the 14" ones, which gave me arm fatigue holding them up.  I did not realize how spoiled I had gotten with the circs!

Little ribbing

Next you start the lace or open weave on the 10.5's.  These were even more awkward to work with at the 14" length.  How did our foremothers knit all day with these things?!

Kathy, my sister, talked my into buying the 10.5 circs.  Her convincing argument was that you only have to buy them once and you will always have them.  So true...consider me convinced.  I printed out a Michael's coupon and bought them at 40% off.  Yeah me!

Once the open weave portion is done, then you knit the ribbing again, back on the 8's, and connect the corners which meet under the arm and sew.  Right now, I would consider myself only about 25% done.  I have about 6" of the open weave knitted and I need about 18".


I will not let this shrug stay a UFO for long.  I have been wanting a black short-sleeved shrug for awhile and have been too cheap and lazy to go shopping for one.  I figured that I would be crafty and just knit the darn thing myself.

Cheers to a quick knit!