Showing posts with label tie. Show all posts

Sunday, July 7, 2013

T-Shirt Tanks

Happy 4th of July!

I know that the official day of summer already occurred, but the 4th always licks off the summer with a bang!

I have been sitting on this project for a few months.  I promised to work on this for a friend and kept putting it off.  But now, no more excuses!  I have completed this project and think that it was a quick and simple project.

My friend got this idea from Pintrest and I found the source of the project.  It started off as a no sew t-shirt tank project, but I only use fusible webbing for when I'm in a pinch or when a needle is not the most practical way to go.  My machine will make it more durable, so that is what I did.

The project is from the blog Crafter Hours and it is how to make a t-shirt into a tied tank top.

First you take a t-shirt you don't mind cutting up.  But pick one that you would wear to the beach, the pool, hanging around the house or running errands on the weekend.


Cut the neck off straight, then the sleeves and a few strips from the bottom.  I threw away the very bottom edge that has the hemming.  Cut 2 more strips from the bottom.

Then seam  the top cut edges where the neck is big enough to form a casing for the tying strips.


Snip the strips so they are long and thin, not a circle.  Then thread the strips, one in the front and one in the back.  Bunch the fabric up a bit and tie on the shoulders with the strips.  Trim away any excess striping material once you have the ties at a good length.


I left two out of the three shirts I did with the cut raw edge at the bottom.  Once that is done, then you are done!!


Another one:


And one more:


This one I also put a casing at the bottom and threaded another strip so that it can cinch on the side.  This t-shirt was a men's XXL, so I had to take it in at the sides.  I had plenty of room at the bottom to do the cinching.


There you go, go forth and cut up all of your husband's t-shirts so that you can have some chic beach shirts and all-round comfy tees.

Sunday, May 13, 2012

Headbands-A-Plenty

Happy Mother's Day!

I was surfing the web of my favorite websites and blogs for some inspiration and I found some on P.S.-I Made This.  Today's project idea came from the braided headband all the way down the bottom of the page.

It is making headbands with covered elastic hair ties, scraps of fabric and odds and ends.  I not only braided some headbands but also made some from a bag of old neck ties I bought at a yard sale for a buck.

My odds and ends

Here is my collection of odds and ends: it includes neck ties, ribbon, yarn, lace and strips of fabric.  Yes, there is some feather boa in there, but it ended up being a bit too elaborate for a headband this time around.  I know, I'm no fun!

Good ol' Goody

First, I did the neck tie headbands first.  I used the skinny portion of the tie and cut a length that fit my head.

Making use of ugly neck ties

I knew these ties would come in handy!  I sewed one end around the elastic and pinned the other end to the elastic so I could fit it to my head perfectly.  I have a small head, so many elastic headbands slip off because they are too big.

Half done already

Once I got it where it fit the best, I sewed that end down.  Viola!  I'm done!

Ugly ties = chic headband

I made a few neck tie headbands, because they took no time to whip up.  I then made a few braided ones.  For the first one, I took a strip of denim, a green and white polka dot ribbon and a strip of black lace.  I sewed them around the elastic like I did the ties.

Neon is back!  Really!

That one had a very retro 80's feeling to it.  Very Debbie Gibson.  The second braided one, I took some brown chenille yarn, navy blue nylon cord and baby blue cotton yarn.

Skinny headbands are cool, too

That one is very skinny.  The chenille gives it texture that holds to your hair a bit.  The blue and brown together reminds me of Holly Hobby with her brown field boots and blue bonnet.

Love Holly Hobby! <3

So, all-in-all I made six headbands in the course of about an hour.  This was an easy project and you really don't even need a sewing machine.  You can just needle and thread the neck tie ones and then knot the braided ones.

Busy bee, I was

Show me some blog love and send me some pics or comments to let me know what your thinking!  I would love to see your WIPs or finished projects!

Sunday, March 4, 2012

T-Shirt Skirts

I had leftover material from my 5K Shrug from a few weeks ago that I was going to throw away if I could not make something useful from it.  I figured it might make a cute skirt that I could use as a bathing suit cover-up or hanging around the house skirt.

Leftover 5K Shrug Material (T-shirt Bottom)

Here is what I had to work with.  It's not much, that's why I think it would be a good pool skirt.  I evened off the top raw edge with my rotary cutter.

Nice and Even

I always have elastic lengths in my sewing kit, so I measured some out and use the width of it to determine how thick my elastic casing needs to be.

Casing for the Elastic

I measured an inch and did not bother to iron the fold nor did I do a double-fold.  It's a hanging-around skirt, so I'm not too concerned with being exact and perfect.  I marked an area with purple chalk on the casing, to leave open so I can feed the elastic through.  You can't see the chalk markings, but they are between the cutting ruler and my second ruler on the right. 

Feeding the Elastic Through

I have a handy-dandy threader that I use in cases such as this, but if you do not have one, then a large safety pin works well too.

Once the elastic was in, I sewed the elastic ends to each other and then sewed the casing closed.  I made sure the elastic was flat and not twisted.  Then I fixed the runching so it was evenly distributed around the waist.  I sewed a tacking stitch or two on each side to anchor the elastic to the casing so it will not twist when I wash and wear it.

Very Plain

The skirt is very plain, but functional.  I would wear it with my tank top or shirt over the waistband.  Otherwise, it came out fine.  I'll have to bedazzle it or something (later, though)!

It's Comfy!

I have a second t-shirt that I wanted to chop up.  This one is an XL t-shirt that our bowling friend gave me.  He always gets promo stuff because he works for a liquor distributor company.  The t-shirt has the Malibu Black logo on it.  I love the original coconut-flavored Malibu rum, but I have not tried the Black yet.


This Will Make a Good Skirt

I cut the top part off, right below the armpits.  This t-shirt was really big, so I had to cut some width off too, or this would have looked like a sack on me.

Sewed Along the White Chalk Line

I did not want to have an elastic on this one though.  I decided to cut two strips from the leftover fabric and make this a side-tie skirt.


Side Ties

 I sewed these strips horizontally along the side of the top raw edge of the skirt. 

Sewed Only the One End Down

I tried it on and tied it.  Not too bad...I like it!

Side Tie Action

Here it is again:

Another Pool Skirt

This one is a bit more form-fitting, but I still like it.  I've lost a few pounds so I'm feeling pretty confident. 

Watch out pool...here I come!  (Saturday was really warm, like 80's, but today its back down to the high 50's...brrr!).  I will put these two away until the end of April.  It's never too early to prepare for warm weather!

Sunday, April 24, 2011

Sweater Purse 5.0

Happy Easter!  Even though this is not an Easter inspired project, it is a project that I did back in February.  Guess what it is?  Yes, another Sweater Purse!  You will never escape this project!  Well, maybe once this year is over, then I will move on to a new obsession for 2012!  Anyway, this is a purse that came from the same J. Crew sweater as my last Sweater Purse.  I took that sweater and some odds and ends that I thought may spice up the purse a bit and went to work.

A little bit of this and a little bit of that...

I have Santana featuring Michelle Branch's song Game of Love in my head when I was typing this.  I love that song! 

I had made this purse for my friend that I went to The Melting Pot for in one of my previous posts.  Her favorite color is purple, when I thought it was blue.  So, I had to dig around for the purple tulle you see above.  I also had bought a box-o-ties from an estate sale a while back, not sure what I was going to use them for, but when they are only $1, you gotta go for it!  So, I will use one of them for this purse.

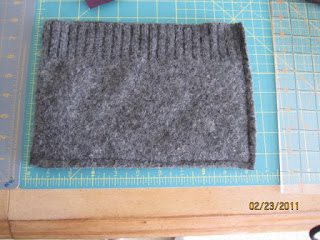
First, I cut out a rectangle section of sweater, utilizing the side seam.


I have scaled down my sweater purse size from what I did over Christmas, because I thought it would be easier to handle, but it takes just as much time.  But, scaling it down has allowed me to make more than one purse from a sweater.

Next, I sewed the side seam and the bottom seam.
Upside Down Purse!

I actually flipped the material upside-down so the ribbing that is normally at the bottom of the sweater will be the top of the purse.  I then cut out a section of purple lining to match my purple tulle.  Those purple items were remnants from a dress I made to attend the Sex and the City II movie with my Ladies.  It was a fun night and I wore the dress at least one additional time since, so it was worth it.

Drinking Cosmos before we left the hotel room!!

Anyway, back to the purse.  Always save remnants, you never know when you will need them.  Here is the cut section of the lining:

They should make a no-fray lining-I'd buy it!

I folded it and inserted it into the sweater purse to get a good fit.  I pinned it and then sewed the lining like I did the purse.  I put that aside and tried to come up with some creative idea to do with the tulle.  I already made a rosette for the last one, so not that.  I knew that the tulle would not make a good handle...so I was stumped.  I finally decided to bunch it up going around the circumference of the purse.  I then realized that I would need to unstitch a little of one of the side seams so that I could tuck it in to secure it good.

Unstitching...


I pinned the tulle to the inside of the purse at the seam I unstitched, then periodically scrunched the tulle together with purple thread and anchored to the purse.  I did the same on the other side.  Then turned it inside-out and sewed up the side seam again.

I pinned before I scrunched.


Once I was happy with that I took the lining and folded down the top until it lined up with the purse.  I then iron the lining at that fold, wrong sides together.


Fold and Press.

Then I inserted the lining in the purse and pinned it in place.  Now comes the tie.  I ironed the tie a million times and used startch, but could not get all of the wrinkles out.  I measured a decent length of the tie for a handle/shoulder strap so that it would fit right under the armpit when worn on the shoulder.  I then measured a "closure", using the tie bottom/front (where the V is in the tie) so that would be the closure front.  I pinned those to the purse between the purse and the lining.  

Tie ends-strap and closure.

I then sewed the lining to the purse with a zig-zag stitch along the top edge ensuring that I sewed through the tie handle and closure end.  Since the edge was finished already, no more needed to be done.


Finally coming together.

Once I sewed the lining in, the purse was complete!

Black-tie Purse!

With each purse I do, I like them even more!  See how I scrunched the tulle at the right places so the tie closure could be threaded though?  Nice, touch, if I do say so myself! 

From the top

While I was on a break, thinking of what to do, my cat Julie decided to warm up the purse before I got started.

Roo-girl!  I can't walk away for a minute! 

How can you be mad at a fuzzy face like that!  So, Sheri, if you find some white cat hairs on the sweater, this is why!  I figured she would not mind too much, she has a cat of her own (fellow cat-owners know you can never get away from cat hair)!

I do have more Sweater Purses in my queue to blog about, so stay tuned!