Showing posts with label mesh. Show all posts

Sunday, May 19, 2013

Weekend Shrug - Finished

Okay, let's call this the Two-Weekend Shrug!  I did mainly work on this on the weekend days, so it is safe to say that it was a quick knit.  I bought two hanks of Berroco Weekend and I ended up only needing less than 1-1/2 hanks.

My last post, explained the source of the pattern and a bit about why I chose this to knit:
Continuing with the open weave pattern, I need to knit to a length of about 15 inches.


Once I had 15 inches knit, then I knitted the ribbing again, like in the start.  I have essentially knit a rectangle, with ribbing at the top and bottom of the long sides of the rectangle.


There was a special bind-off method that was needed to mimic a cast-on edge, called Elizabeth Zimmermann's sewn bind-off.  Elizabeth Zimmermann was a British-born knitter that revolutionized the modern practice of kntting, so essentially she is the Mother of Knitting.  What she says goes. :-)

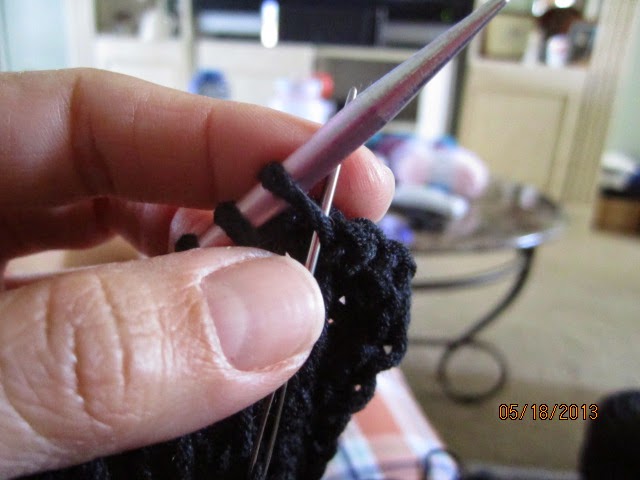
So, this is how it is done.  First, when you are ready to bind-off, you cut the yarn really long; put it on a sewing needle.  Thread the yarn from right to left through the first two sts, purlwise.


Second, thread the yarn from left to right into the first st, knitwise.


Third, pop the first st off the needle.


Repeat, threading the needle in this fashion until you have threaded through the last st on the needle.


The bound-off edge looks like the cast-on edge.  Yippee!  Even if it doesn't, who is going to know??


Then I sewed the ribbed edges together for 3-1/4 inches on each side; folded the ribbed edge that will be on my neck and I was DONE! 

I went by Brandon Yarn Boutique to show off how much I had done (I was at the final ribbing part at the time I stopped by the shop).  There were other people there and enjoyed looking at my project.  I loved hearing their praise and comments.


How neat is this little shrug?  I can't wait to wear it!  This will be my newest favorite article of clothing.


I am vowing to make only practical pieces.  I have several items that I have knit and barely wear because it's too warm out or it only goes with one thing.  That is a good-intention statement, but in my UFO pile there are wool items and long-sleeved pullovers. Sigh.... 

Sunday, November 11, 2012

Origami Sweater - Part 1

In my fog of knitting a few [hundred] Christmas gifts, I decided to start a project for myself.  Nothing like putting pressure on myself.  Meaning, I'm not done with my Christmas knitting yet, but I am throwing a sweater in the queue for myself...that I started already!

My local yarn shop (LYS), Brandon Yarn Boutique, was having a sale, so it was a perfect time to shop.  My intention was for myself, I won't fool anyone.  I picked a few projects that I had on my mind and went down there.  Luckily, only one panned out.

I am knitting the Buzios pullover from Berroco.  It was a free pattern from their website and it is knit with Origami (48% Acrylic, 19% Nylon, 17% Linen, 16% Cotton) in a green and blue blend called Turtle Bay.

Pic from Berroco website

As usual, I went down a needle size than what was recommended so that I could achieve the correct gauge.  So, I am using a size 7 circulars.  This sweater is knit in the round from the bottom up.


Here is the yarn.  It is actually not really yarn, but has beautiful colors.  It is several different types of string held together then wrapped with a black thread to bind it.  It's like working with a thin cord.  I don't see this sweater being all that warm, but since it is lacy and open, that was never it's intention!

I casted on and I was off!


The stitches in this sweater are a lace stitch and seed stitch.  There will be stripes of seed stitch alternating with the lace stitch.  I was joking with a fellow knitter and we were saying how seed stitch takes a lot of time.  I told her that this is half seed stitch and I said that this was a project doomed to be a UFO (unfinished object) before it even starts.  I was only joking because this yarn was pricey and it was not going to sit in the closet, unknit!

I'm actually chugging right along on it.  The seed stitch stripes are great for knitting while watching TV or chatting.  The lace stitch stripes, I need to pay attention and count the stitches after each row.  Lace stitching is made up of a lot of yarn overs (yo) and decreases, so you can miss one and not realize it until a row or two later.  Fixing lace is not fun.


I snugged a long pillow through the sweater so that you could see my progress.  From the bottom up, I knitted the seed stitch for 1", then there is the lace stripe, 2" seed stitch stripe, and another lace stripe, then a seed stitch stripe.


The lace stripe: A close-up.  To date, I have knitted a bunch more, I just have not taken any more pictures, but it is pretty much the same: alternating the seed and lace.  Since I am knitting in the round, there will be no seaming.  Once it's done, it's done.

But, since I'm still finishing up some Christmas knitting, this sweater I will work on in the background.  I have only a few more items to knit for gifts, but I'm dragging my feet on them.  One involves stranding, which is like using the yarn wrapping technique that you use for fair isle knitting (multi colors).  I do not have much practice with multiple colors.  We shall see.

Stay tuned for more fun stuff in the pipeline.

Related Links:

Sunday, June 17, 2012

Pima Pullover - Part 1

My sister is down from Mass visiting me for about a week.  I love it!  I took that time off from work and we have been busy everyday.  The first day she got here, we went to the local yarn shop, Brandon Yarn Boutique.  I had a crochet pattern I wanted to make while she was here.  (Between you and I: I'm not a crocheter and barely know what I'm doing).

Alex, myself, Kathy (my sister)

The project I want to crochet is an open-weave / mesh v-neck pullover from Lion Brand called the Persimmon Pullover.  It is an experienced crochet pattern...gulp.  I've already nicknamed it Pain In the A$$ pullover (PIMA, cute, huh?).

Lion Brand: Persimmon Pullover

I bought the softest cotton yarn: Ultra Pima from Cascade Yarns, which is 100% pima cotton.  Merriam-Webster dictionary defines pima cotton as a cotton that produces fiber of exceptional strength and firmness and that was developed in the southwestern United States by selection and breeding of Egyptian cottons.  It's first known uses was in 1925.


The color is called Cranberry.  It looks a bit lighter in the picture than it really is.  It comes in twisted hanks and you need to wind it in order to actually use it or it will become a complete rat's nest.  Fortunately, for Christmas, Vince bought me an umbrella yarn holder and ball winder.  Sweet, huh?


That is my sister winding one of the balls for me on the winder couple.  Once wound, it looks like this:


So, I have to be good and do a gauge swatch.  I used a size H hook to crochet the swatch, with my sister's help.


This yarn is so nice to work with.  I'm glad I went with pima cotton.  I felt comfortable enough to start a foundation chain, which is some fancy chain that is like a increase chain of some sort.  So, here comes my sister's help right out of the gate.  I get stuck on the first 2 rows, which is discouraging, but I have to keep on trucking because she is down only for a short period of time.

Once those were completed and I'm working the pattern stitch for the bulk of it, I'm feeling a bit more at ease.  She also suggested that I take out Purl to help me.  Remember Purl, my string doll?


Since I took her out of my accessories bag, I've been doing much better.  Phew!

Ok, so this pullover is crocheted from the top-down, which I find interesting.  I have not made anything like that before.  I love trying new techniques (aka biting off more than I can chew).  Hehehe.


The above pic is showing what has been done up to this point.  It is the shoulders and back.  Once it is on, then the open weave will be more visible.  

Well, if I'm going to even come close to finishing this while she is here, I need to stop typing and start hooking!  See you next week.

Related Links:

Sunday, October 30, 2011

Halloween 2011

Happy Halloween!

This Halloween, Vince and I were invited to a house party with the theme "2011 Bates Senior Prom".  Bates being from the movie Carrie (which was the Hostess costume).  So, with that being said, I went as a prom teenager.  I went to Prom in the early 90s, so the styles were not quite as strange as the 80s, but strange enough.  My reconstructed dress might have more like a late 80s/early 90s feel to it, with elements spanning 3 decades (70s through the 90s) rather than straight 90s.  To my original prom, I wore a knee-length fitted purple sequined dress with a white rhinestone halter strap.  I LOVED it.  I may have asked my mom to keep that one, but there was no way in this decade that I was fitting back into it (ah, size 2, 90 lbs) so I must improvise with a dress from Goodwill.

Vince was my date, but he went as Don Johnson from Miami Vice (aka Detective James Crockett).  I played it off as the "boyfriend that went to college."  You all had that friend that had the older boyfriend that no one ever saw because he either lived in another city/state or was older than they were and went to another school;  whether they were totally lying or not, you may never have found out the real story.  That was my story last night.

I bought my dress at Goodwill, which was a bridesmaid's dress made of satin and organza in GOLD.  Yes, that is my throwback to the 70's decade.  Oh, and it had BIG boobs.


I think saying that it had big boobs was an understatement.  It had really big boobs.  This dress had an organza attached skirt with the satin top extending below the waist in an asymmetrical hem. Underneath was a petticoat to make it pouf a bit.


To reconstruct this dress to be Prom-worthy, I first had to cut the length.  A selling point for me was the asymmetrical hem of the satin top.  My prom had asymmetrical hems all over the place, so I am playing them up to the max.  I pinned up the organza and petticoat and just had the liner hanging down.  I trimmed 12 inches down from the satin hem.


Once that was trimmed away, I sewed a hem.  I then unpinned the organza and gathered it in little bunches along the new hemline of the liner.  Once the bunches were made, I took needle and thread and tacked the bunches in place.  I trimmed the remaining organza to follow the liner hemline.


I pinned up the liner and organza layer to reveal only the petticoat.  The petticoat part was really only at the bottom of the dress, so I just pinned it up and sewed to match the same asymmetrical hem.  This allowed the petticoat to have the pouf effect and stick out the bottom (in a Madonna/tacky 80s way).


I took in the sides at the top.  Just so you know, I'm keeping the big boobs.  I took it in so it's not falling off, but those boobs will be back.

You can't have a fun dress without the one-shoulder-poufy sleeve.  I cut one strap completely off.  I then unstitched the remaining one in the back only.  I needed to reposition this strap to hold my new boobs up effectively.

I took some leftover liner fabric and made a tube.  I affixed one tube end onto the front part of the dress encompassing the strap.  I then stuffed the tube sleeve with leftover organza.  I scrunched up the tube and sewed the strap back onto the back of the dress, but more towards the center zipper.  I then sewed the loose tube end onto the back of the dress.


It's hard to tell, but that is the makings of the poufy sleeve in the above pic.

I still had more leftover liner.  This is where my new boobs come into the story.  I made another tube, but larger.  I took leftover quilting batting and stuffed the tube.  With some arranging, I made a nice set of C's for myself. (With my own boobs, they must add up to D's, right??)  I put the dress on and adjusted the fill and evened it out.  I just tied the boobs on like a bandeau top.  Since they are not real, they don't weigh anything.  I took the strap I cut off earlier and tied it in the middle of the boobs to give a bit more definition, rather than a uniboob.


Here is the finished dress:


The dress actually is not too bad.  It's starting to grow on me.  Vince then spray painted with gold, my shoes and the white petticoat.


These shoes rock!  Who knew a can of spray paint can do such a transformation?

I then put on some finishing touches like black hose and teased my hair and I'm ready for the Prom!  I did my hair just like I used to do it back in the day: banana clip with the hair wall for the bangs with a long tendril.


I had to take the picture by the hedge, just like my parents would have done it.  Not only did I dress up, but Vince did as well, as I said above.  Here is us taking a "professional portrait" at the prom (notice my new rack):


I have to say, no offense to my high school friends out there, but I had so much fun at this prom, more than at my real prom (no teenage boy drama).  If anyone is looking for a party to throw, throw a theme party.  They are a huge amount of fun. (You'll have to check my Facebook to get a hint of how it went) :-)

I also am dressing up for work, but instead of a prom teenager, I will be going as something else.  You'll have to check back later in the week to see my Monday costume!

Happy Trick or Treating!

Saturday, August 20, 2011

Suede Beanie

I started and finished this project in 3 days.  Yes, 3 days!!  Let me start off by saying that I don't consider myself a crocheter and I feel when I start a crochet project, I have to relearn all the stitches again.  Thank you to my sister, Kathy, who had to talk me through the basics (again) so I could start.

My inspiration for this was a conversation about back-to-school shopping.  Vince's youngest daughter is starting high school and she had her shopping list written out with lots of detail.  On the list was accessories, which included a hat.  I asked, "What kind of hat?"  I mean, who knows these days?  She may have wanted a fedora or a ten-gallon.  She wanted a beanie-like hat, but not really a beanie.  I then asked, "A yamaka?"  Her reply was, "Yea kind of."  Okay, I had something to go on.

I went through my knit magazines and found one from a Berroco booklet called #225 - Scarves and More.  The pattern was called Kathe.  It was a crochet pattern and the yarn was Suede by Berroco.  The color I chose was a pink shade they call Annie Oakley (100% nylon) because I already had it in my yarn stash.  Yeah for using up stash yarn! 


So, I start and right away something didn't seem right.  They have you chain 5, connect to make a ring, then do 6 double crochets (dc) in the ring.  Increase in the next round, etc.  I found that the hat was already curling in on the third row.  I did several rounds according to the pattern (and, yes, I even did a gauge swatch) and it was looking like the smallest hat in the word.  I ripped it out and moved up from a G hook to an H hook and redid it.  Still too small.  Hmmmm, what is going on here?

After a day of trial and error I decided that I'm going to alter the pattern to what makes sense to me.  Now, where do I get off altering crochet patterns when I can barely chain, is beyond me, but I was willing to try.  I did the ring again on the H hook and made 9 dc in the ring.  I increased like the pattern said to do for the first 5 rounds where the pattern was pretty basic: ch-1, dc, ch-1 in the spaces.


I'll admit, maybe 9 dc in the ring was too much because this was looking really flat and too loose on my head even though at this stage, I had the required amount of dc, ch-1 spaces as the pattern indicated.  I decided to do a few rounds without increasing.  Still too loose.  Okay, my next round I just did dc in the spaces and left out the ch-1: a little better.  I was feeling some confidence starting to rise up in me at this point.

My 12th round I did dc in the each space four times then skipped a space, then dc four times, etc.  I was hoping this would tighten it up a bit and it did.  Whoo-hoo, my plan is working!

I finished as how the pattern read with 3 rounds of single crochet (sc) in the back loop but moved up one more hook size to an I (it was really tight with the sc rounds on the H hook).  Okay, I'm admitting that I have no clue where the back loop was, but I worked into something in the back around each time.


Ta-da!  I say, not bad for my first, "let's wing it" project.  Crochet is so much faster and a bit more forgiving than knitting it.  I still feel more confident when I knit than crochet, but I do enjoy doing a crochet item every once in awhile.  


I am imagining this is how the daughter will wear it.


She is actually going to high school in another state, so this was her last week in Florida.  I finished in time to give this to her before she left for the airport.  Good luck, G!  I'll see you at Christmas!