Showing posts with label Magic Loop. Show all posts

Sunday, November 24, 2013

Vivien's Layette

I had scheduled a few vacation days mid November to chill and get a jump start on my Christmas shopping/knitted gift knit time.  Since I was going to be off from work, I wanted to pay my friend a visit who had a preemie baby in September.  You know what that means??  I needed a homemade gift, pronto!
 
I had crocheted a few baby blankets:
But did not have the time to crochet up a baby blanket so I chose a baby layette.  The pattern was a free pattern I found on Ravelry by Linda and here is her blog: http://clickertyclick.blogspot.com/.  Very crafty gal!
 
I chose Cherub DK Multi by Cascade Yarns in Rainbow Sherbert (55% Nylon/45% Acrylic).  This yarn to so soft and was a pleasure to work with.  One skein worked up this newborn baby layette.  I used a size 4 circular needle.
 
This yarn is so sweet!
 
I followed the pattern to the T.  I could have made it a bit longer, but it all worked out in the end.
 
 
This sweater had raglan sleeves (sleeves that are worked with no seams) and I am in love with raglan sleeves!  You leave the stitches live at a certain point you simply place them back on the needle and knit in the round to complete them.  So simple!!
 
 
The sweater design had eyelets as the pattern.  Nice and simple = fast knit.  No time for fancy-smancy lace design right now!
 
 
Stitches are live, so I placed them back on the same 40" long circ needle  and I finished the sleeves using the Magic Loop technique.
 
 
The hat was way too small.  I will make another hat for her at a later date.  The sweater did fit:
 
 
So cute and little!
 
 
I posted this pic of me holding Vivien on Facebook and everyone thought that I was a natural and/or thought that this was my baby or I should be having one!  Ha!  I like other people's baby's...I'm good!
 
After I fed her a bottle, she fell right to sleep in this position.  No boppy needed after the feeding.  I'm glad that Vivien is healthy and doing well and (on the side, am happy that the sweater fit).
 
Until next time, Baby Vivien!
 

Sunday, October 27, 2013

Vampire Knits

I'm giving myself a challenge.  I want to knit my way through the pattern book, Vampire Knits. By no means is this a new book, but I have had it for a few years and have pined over so many of the projects in that book that I HAVE to knit more from it.

 
Vampire Knits by Genevieve Miller was copywritten in 2010, so 3 years ago, this book came out about the time Twilight and all of that was the rage.  It is cleverly written with vampire folklore, quizzes related to dark characters like werewolves and vampires with each project having a very calculated name with a brief summary of why it was chosen.  This is a story, not just a book of patterns and pictures.
 
I have actually already knitted from this book.  My Shapehifter Shrug is from this book.


In that pic, I'm wearing it like Little Red Riding Hood, but it shows how cool the weaved pattern looks.  Here is a pic from the book:
 
 
I am going to do a count down with the ones from the book that I want to make.  The count down will be from the one I love the most down through the book, but it does not mean that I will knit them in that order.  I can't predict what I will be feeling like when it comes time to knit, so I will go with the flow and knit out of order as the mood strikes.
 
Here is my Top 9 (I already knitting one, so it really is a Top 10 list...)
 
Lore Hoodie
 
I have been in love with this project for-ev-ver.  This is what I should have knitting first, but I always talked myself out of it because it was a sweater with a hood that is not very Florida-like, calling for 100% wool.  Well, screw it!  I am going to knit this one with a more Florida-friendly yarn, like a cotton-acrylic or acrylic-wool blend.  My local knit shop has a yarn that I see each and every time I go in there and it screams, "Lore Hoodie!" at me.  I cannot resist much longer!  Help! 
 
Sidhe Shrug
 
This shrug is something that is a bit more practical for Florida.  Just two arms, with all the A/C around here, wearing tank-tops and spaghetti straps makes these shrugs a necessity!
 
The Black Veil
 
This scarf is so pretty!  One of it's features is these picots all the way around the edge.  I have attempted to knit this a few times now, but cannot seem to have the correct gauge/correct weight of yarn.  I do not know why I am not getting gauge, but I will just break down and buy the yarn it calls for and the guessing will be over. 
 
Vampire Diary Protector
 
This is not practical for me, but I love it so!  It makes me want to keep a journal, but I'm not going to fool myself, I won't write in it.  I should make it big enough so that it covers a 3-ring-binder that I place my printed patterns in.  That is much bigger than this book, though.  I will have to see about what it can go on before I take the plunge and cast-on.
 
Under the Cover of Midnight Hooded Cowl
 
No, she is not a conjoined twin.  Ha!  This is even more unpractical in Florida than the Lore Hoodie.  I may have to knit this as a gift for a Northener, or I use it when I make my annual trek to Mass to visit my family.  It would beat having a scarf and a hat. I love the cables and how snuggly it looks.  If it was knit with an alpaca blend...I would die for it!  Just Maybe...
 
Pulse Protectors
 
I really like the fingerless gloves better than the throat cover (cowl).  Cables are so striking with yarn that had great stitch definition, that you just want to wear them...even if it doesn't go with your shorts and tank-top.  Alas, most likely this will be a gift.  I cannot really see myself wearing them around here, but one day out of the year.  That won't stop me from knitting them, though!
 
Rampage Fishnet Gloves
 
I attempted this project back when I bought this book.  I ordered the special yarn with elastic in it and everything.  I could not even cast-on!  I think that I was trying to do too many things: A new cast-on, elastic yarn, in the round, and trying Magic Loop.  Too much!!!  I may revisit this again, these are really cool.  They are like evening glove length and then you weave a red ribbon at the end.  Very dramatic.
 
Werewolf Hat
 
This is a felted hat with ears.  How cute is this!?  I clearly will never wear it, but it is so hard to resist the temptation of knitting it!  Maybe I can give it as a gift to a kid, just knit it smaller.  I know there are some Team Jacob's on my Christmas list!
 
Glamour Earrings
 
These are like dripping blood.  I would have to go to the bead store and see what they have, but maybe I could just loosely use this pattern as a guide, because the odds of me finding these beads are very slim.  This looks like a simple project; it calls for DMC thread.  Oh boy, do I have embroidery thread...3 cases of it.
 
That concludes my Top 9 list of pattern projects in the Vampire Knits book.  I can't say that this will be an easy feat or that I will stick to only knitting these projects.  I have magazine subscriptions and I fall in love so easily with every pattern that it will be hard to stay on-track.
 
No way will I knit any of these items quickly.  Quickly and knit do not belong in the same sentence when it is pertaining to me and knitting.  I love the craft, but I'm just not that fast with it.  I wonder how long it will take me to knit all 9 of these projects???  Let the counting begin...


Sunday, December 16, 2012

Sporty Wristlets

This is a gift that I had on my To-Do list.  It is for a friend's daughter, who I think would look so perfect in!  The pattern came from the 2012 Holiday issue of Knit Simple magazine.  They named them Simple Mitts, which they are, but I'm calling them Sporty Wristlets.


I'm using Beehive Baby Sport from Patons (70% Acrylic/30% Nylon).  It is sport weight, which is often used in baby items.  That is why I thought it would be the perfect yarn to make this pattern with.  Very soft.


I knitted these with size 4 circulars so that I could use the Magic Loop method.  I knitted the main arm, then left an opening for the thumb and finished at the knuckle.  I did two exactly the same.


At this point they are almost done.  I have to actually add a thumb snuggie on each one.


I picked up 18 sts around the thumb opening.  Then I knitted in the round again to make the thumb.  I finished it so it would look like the edge where the knuckles are.


Just need to bind off and weave in the ends.


They are cozy, as you can see, I'm modeling them while I hold my cat.  Very nice!


Another check mark on the Christmas Done List! 

Sunday, January 8, 2012

Razzy Socks

When I went to visit my family in Mass just before Christmas my sister showed me how to knit socks.  I brought a skein of my own up there, but failed to take a pic of it before starting (I know, what kind of blogger am I?).

First we had to separate the skein into two equal weighted balls (50g each).  This yarn is called "self-striping" because the colors in the skein vary, but different from variegated, in that as you knit around the sock, stripes appear as if you purposely knit them there.  Really neat.
Then we took the ends of the balls and matched up the colors.  This took a few yards to get the colors striping at the same rate; we snipped off the extra yarn.  

My sister showed me the techniques she uses from the book Socks from the Toe Up by Wendy Johnson.


She showed me the "Judy's Magic Cast On" and I was off and knitting!


I am still knitting them, but I am close to being done.  See how they are striped?  That is the yarn doing all of the work.  Near the toe, it started knitting up a peach and black checker-like appearance.  It reminds me of one of my cats, Jasmine (aka Razzy); she is a Bengal cat.  Her hair shafts are striped with orange and black.


I will model what I have so far:


I am now finishing it up with a k2p2 rib.  Now I must stop blogging and start knitting!

UPDATE:  Click here to see them complete.

Wednesday, March 9, 2011

Craftolution Update - Organize

So, it is March and it appears as though I am not working on any of my Craftolutions.  Untrue!  I just have not been blogging about them.  Let's first start with Craftolution # 1 & 2.  I wanted to organize my patterns and projects and start on some WIPs (Work In Progess); so this post is going to be a picture blog this time (you are probably thinking: "Yeah, she talks too much, anyway").  I first went to my craft closet and took stock of what was in there, yarnwise (I have other crafts such as sewing and misc crafts that I am not talking about here):

Stuff that is not organized

Above are the items that are in the closet that are not in a bin or a basket.  Then I have the items that are in a bin or a basket that appear to be organized, but it has been ages since I looked in them.  Which is what we have below:

All seems neat, but I have no clue what's even in them!

So, let's pull the bin apart and see what we got here.....

UFO#1:Toddler's Sweater

First, I can't get this picture to rotate, so it is sideways.  It is a toddler's sweater that I had thought would be fun with the bright colors.  This sweater was originally going to be for my friend Nicole's daughter.  Nic, this was going to be Allison's!  For those of you that don't know, Allison is 6.   Yeah, no longer a toddler.  This was only the back of the sweater, I never made it to the two front sides or the sleeves.  Hmmm......Next:

UFO#2:Baby Sweater

Again, this pic won't rotate correctly.  Now, this one I really have no excuse.  This is a baby sweater that all I have to do is seam the side and weave in the ends.  It's about 98% done.  Laziness, that is all I have to say about this one.  It has been in this state for about, oh, 5 or more years.  I know, I'm ashamed, but I stuffed it back in the bag it came in to deal with another day, just the same.

UFO#3:Ugly Purple Vest

This pic should speak for itself.  This is the ugliest item of clothing that I have ever made with my two bare hands.  But, this was my first crochet project; still not a good excuse!  This was an actual pattern I got from a magazine and it looked so cute in print.  It should have a crocheted flower near one of the shoulders.  I wanted to use an eyelash yarn to fringe the edges, but that went horribly wrong and I tore it out.  This yarn is very scratchy, too.  Just downright ugly.  This will never leave the yarn bin or the UFO list.  Next:

UFO#4:Irish Knit Sweater

This one I'm not sure if I can even call it a UFO (Unfinished Object).  I would think that it had to be put to needles to be considered a project, but alas, I have about 4 large skeins of this fisherman's wool from Lion Brand.  This was going to be my sister's Irish knitted sweater.  Kathy, I know I promised this to you about a decade ago...sorry!  Next...

UFO#5:T-neck Sweater

These are two skeins that I have that were left over from a baby blanket I made for a friend and now I was using it for a T-neck sleeveless sweater.  It actually will have a cowl neck, but for some reason the pattern called it T-neck.  Whatever.  This UFO is in another bag that appeared in the first pic of loose items.  The UFO project is in the black bag and this reserve yarn was found in the bin.  Below is the rest:

UFO#5 Continued

This UFO is almost complete, too.  It will consist of a front and back and an added cowl neck.  No sleeves.  The front is complete and I am on the back.  I would say it is about 85% done.  I made a mistake and do not want to rip it out, so I placed it back in the bag until I can convince myself that nobody will notice that I did a purl row on a knit row.  I know it is there and I refuse to rip it out so I guess I refuse to work on it right now.  Stubborn, that is how I will describe my thinking on this one.

UFO#5:Beaded Sachet

This next one was from a beading class where you knit with beads.  I took the class at Knit 'n Knibble in Tampa back when I lived in St Pete, which was in 2006.  The goal was to knit a square with your initial in it as the front and then just knit another matching size square as the back and sew them together to become a sachet.  So the pink beads would have been the N and the blue beads would have been the background.  You have to string them on in a certain order before you begin knitting.  I strung them on incorrectly and so a pink or blue was not going to line up correctly.  Ha, so I ripped it out and placed it neatly back in a zip baggie.  I found out by reading an article just recently that you don't have to rip out everything, you just have to rip back to the beginning of the row and cut the yarn and fix the beads in the correct order and restart.  Duh, it sounds so logical now, but not at the time I messed-up.  Oh well.

Seaming Scraps

This one is not a UFO but scraps from another class from Knit 'n Knibble.  This was a seaming class.  Seaming is assembling separate pieces together so they look like they were meant to go together, like sides of a sweater and sleeves in the body.  This was a valuable class that I kept the scraps and refer back to them from time to time.  The red yarn is to simulate that when done correctly, you should not see the red once the tan pieces are seamed together.  Really cool.

Circular Needles

I keep all of my circs in this bin.  I used to store them in zip bags that I wrote the size on the bag, but I had to coil them up to fit them.  I read once that you should not keep them coiled but flattened or uncurled in some manner.  If they are curly, then you have to uncurl them by using very hot, almost boiling water and dip them in until they relax.  That may be ok for the metal ones to do that to over and over, but most of my "vintage" circs are plastic and I am afraid that they will melt one day.  (Who am I kidding, I have not used these circs in years.  I most likely could have left them in the zip baggies for years before I really needed them....).  Let's see what else is in this bin:

Bag-o-Patterns

This bag contained many patterns that I have made over the years.  It also contained all my double pointed needles.  I have said in past posts that I like Magic Loop so much better than using double pointed needles, that this was not such a great find.  But they are there in case I ever need them.  The patterns are what I need to organize in my pattern binder.  I have swatches, patterns, and yarn labels in this bag.  So I threw all of them in a pile and put them in another project bag with the 3-ring binder and plastic page protectors.

Craftolution #2 - Organize Patterns

For me, every project needs its own project bag.  This can be anything from a plastic shopping bag to canvas totes to reusable silky travel bags.  I am not too picky when it comes to project bags because I may not see them for awhile, so I can't be too attached to them.  But what bag I do place them in will determine the order in which I work on them.  Strange, but true.  My favorite bags will get worked on first, then the ones that end up in a plastic shopping bag may never get seen in this decade.  Sad, but true.
 
Extra Project Bags

Here are two extra project bags that I found in the bin.  My People's Saving tote that I got while working at a bank while attending college and a Mobic tote bag that I got in a 5K race promoting a drug for arthritis.  These are great totes for projects.  I will hold them aside for when new projects come in.

I packed up all these UFOs and placed them back in the bin.  I have decided not to work on any of these projects yet.  I am going to organize my binder and then get to the other pile of loose items.  I have my picnic basket of yarn and my loose items to still go through. 

I know you wanted to see me complete something in this post, but I actually did.  I got to see how I have progressed into projects and got to see what my thought process was when I chose these UFOs.  Remember, Craftolution #1 says that I can reuse yarn in a UFO for another project that I will actually complete.  That is a post yet to be written, but it is coming up.

I have to still organize the patterns, swatches and yarn labels, but I have at least gotten to the point where they are in a bag and considered a UFO.  That is more than what they were last month!

Sunday, January 23, 2011

Raspberry Scarf

For the record, this is my fifth scarf of the winter season.  The funny thing is, is that it is not even cold in Florida (compared to the North, getting snow and ice)!  I am not complaining anymore when the weather is 50 degrees in Tampa and my parents are shoveling snow in Mass.  I say that now, but when I have to put a sweatshirt on over my tank top, then I probally will. :-)

This scarf I am calling my Raspberry Scarf (rather than beret) because I am using this saturated deep pink that I love.  There is a story with this yarn/project that I would love to tell you about, but you have to be willing  to read for awhile with no pics.  First, I brought a lovely dainty pink ball of sock yarn to Mass with me during my December visit and had a pattern picked out and was going to start on the plane.  This yarn has more air miles than the average yarn ball because I originally bought it last December and brought it home with me, never used it, then brought it back to Mass to try out this pattern. 


Just lovely

Well, the pattern actually called for a yarn weight of a 3, which is like sport weight or light worsted weight.  There lies my first problem: I had sock yarn which is considered a yarn weight of a 1 or 2.  (Translation: my sock yarn was too thin for this pattern).  I start the pattern (which was a scarf, surprise!) and the details are not that defined and the drape is all wrong.  I knew this was not the right yarn for the project, but I desparately wanted to use it!  I tried it on a smaller size needle, but then the scarf would end up being only a few inches wide.  I was disappointed, but realized that the dainty pink yarn would be wasted if I used it on this pattern. 

So, in being Miss Preparedness, I had another project on the ready when I got to my sister's house.  I ordered this yarn online ahead of time and had it mailed to her house; so it was waiting for me when I arrived.  Since my scarf was not working out, I was glad I had this back-up project.  This new project was to be knit with yarn with 1% elastic.  I did not think that would be a big deal, well my blogger-readers, it actually was.  Of course, this new project I wanted to do Magic Loop on it (can't be simple, can it?) but the size needles I ended up needing, I did not have.  Remember, Magic Loop needles need to be at least 36" long.  I went to Michael's and the longest they had was 29" or something.  I bought them, but in my gut, I knew it was not going to work.  Rats! 

At some point during the visit, I make my sister bring me to her local yarn shop (not Michael's or Joann's, but a real yarn shop).  They had the needles I needed in 40" - cool!  We are cooking with gas now!  I figured, while we are here, let me get the proper yarn for the scarf I tried working on while on the plane.  I had one of the shop keepers help me and I explain the sock yarn thing vs. the sport weight, blah, blah.  She directs me to the sock yarn.  I did bring my pink sock yarn to show her that it was thin, but she chose another brand that was a bit thicker and said that it should be perfect for my scarf.  I was doubtful, but thought, "she's the expert."  I bought two balls of yarn and the 40" circular needles. 

Now, normally when you go to a real yarn shop, if the yarn you are buying is in a hank (a twisted skein of yarn) and not in a normal looking ball form, the shop with wind it for you.  You cannot work with yarn that is in a hank form; you must wind it into a ball or cone form.  The yarn manufacturer's put it in a hank so that the yarn can be properly showed-off to visually see the colors and the texture that yarn in a ball form could never do.  But, the hank is impossible to knit directly from because the yarn will tangle and you will have a huge, expensive rat's nest on your hands.

I asked the shop keepers if they wind the yarn and she replied that I could wind it myself, but they will not wind it for me.  Hmmmm...okay.  So, they set me up on the winder, but they only have the winder that holds the hank of yarn, not the winder that winds the yarn into the cone.  Guess what?  My sister and I had to hand ball the yarn ourselves.  She took one ball and I took the other.  Some customer service, huh?

Ok, now I know you are wanting some pictures or for me to hurry up with this story.  It gets better.  I get home to my sister's and try out the new yarn.  Can you predict what my next sentence will be?  You betcha!  The new sock yarn was still TOO THIN for the scarf pattern!!!!!  I knew it!  Dumb yarn ladies.

So, now I have two sets of yarn that I cannot use on this pattern.  I now turn to my elastic yarn project, now that I have the 40" long circs.  I could not get the Magic Loop to work with the elastic yarn, I kept getting the laddering that I prided myself on overcoming in my last post, Lace-up Fingerless Gloves.  So, this is strike 3 with the project thing.

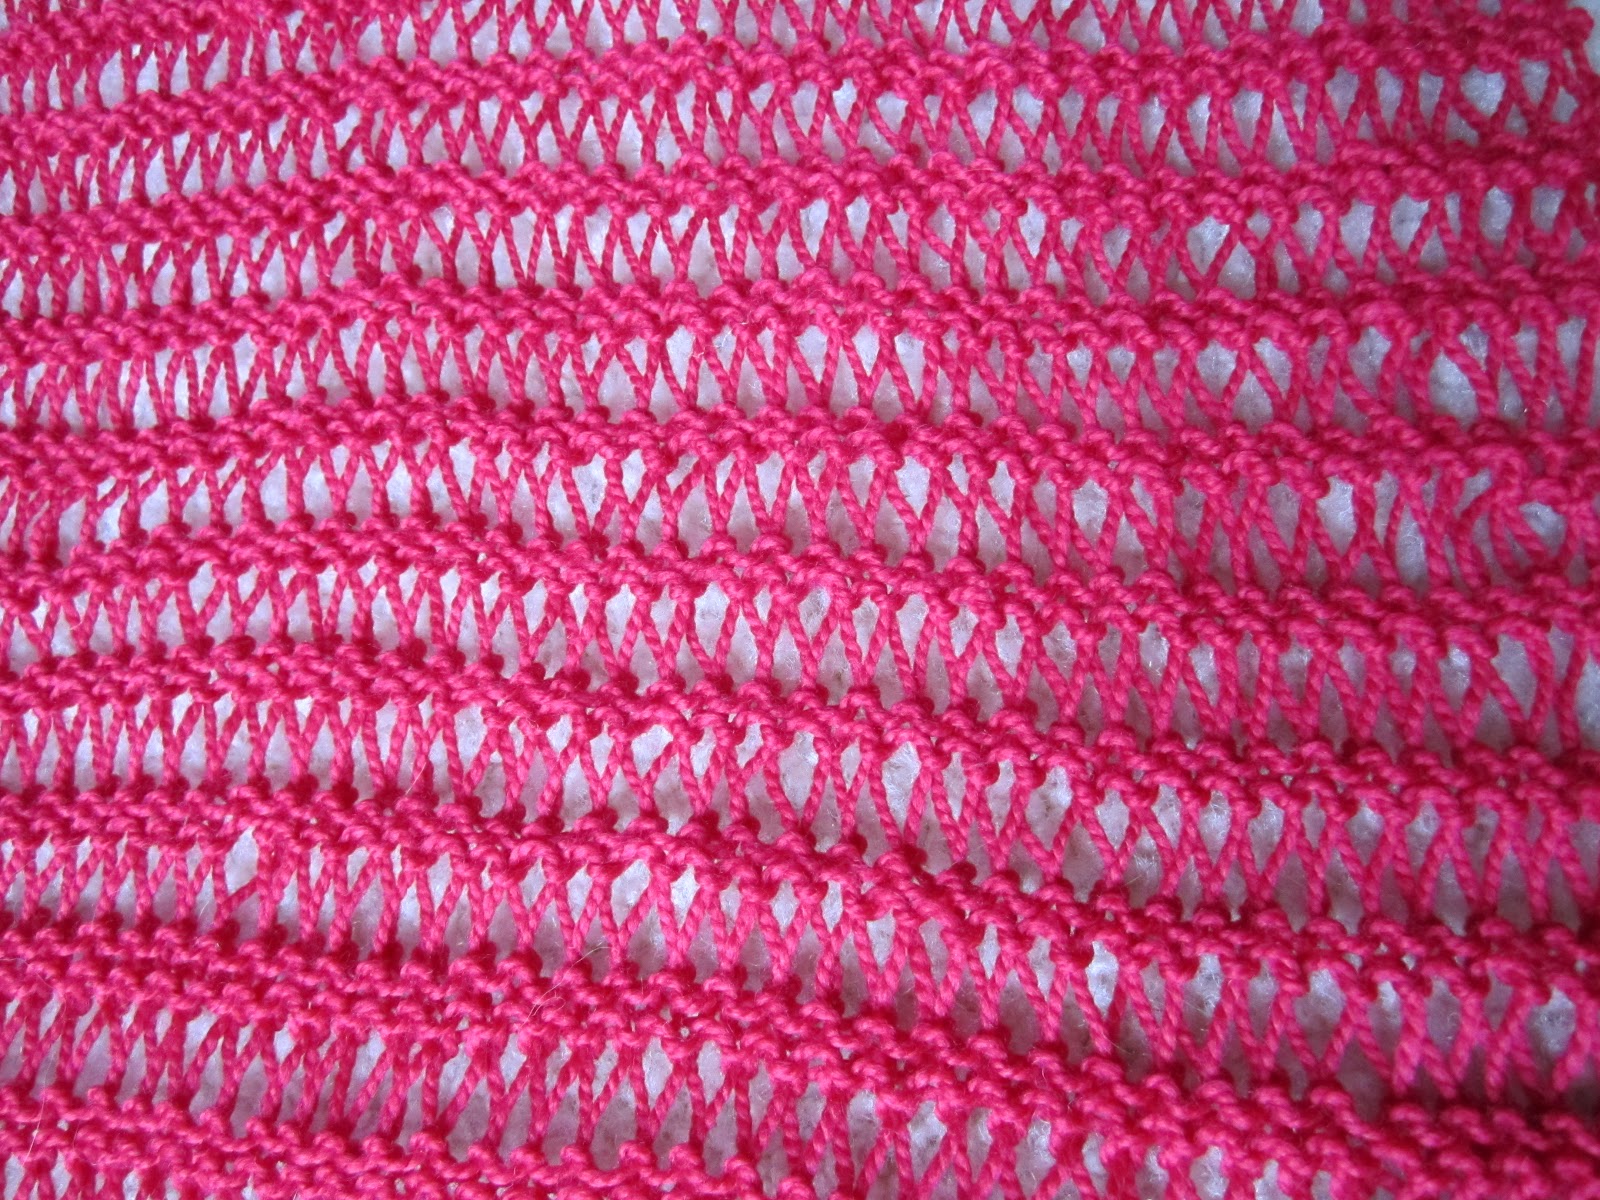
I finally go online to Berroco and find a scarf pattern perfect for my new sock yarn.  This is where the Raspberry Scarf comes on stage.  The yarn I bought from the dumb yarn ladies was called Happy Feet from Plymouth Yarn Co (90% Superwash Merino Wool / 10% Nylon).  Now, this was not good for the original scarf pattern, but it is wonderful for the pattern called Facinate on the Berroco website.  If you click on the Berroco link in this paragraph, it will bring you to the pattern.  It is an elongated stitch scarf.  The pattern is a four row repeat, with knit being two of the four rows and most of what you do on the other two rows.  It took some practice, but I was able to get it right.

A little swatch...

At first, I was thinking that this was going to be difficult because I had never tried an elongated stitch before. I did my mini gauge swatch (gauge is not important in this pattern) and seem to have gotten the hang of it.  The color of this scarf is a raspberry not a red, like how is may seem in the picture.

I have to tell ya, this is the most forgiving knit pattern I have ever done.  At the start of this scarf, I was not counting the rows but "remembering" what row number I was on.  Don't ask me why I thought this would work, because I misremembered several times and just finally got a counter to track it.  But, I did not rip out the wrong rows.  That is the forgiving part, you cannot even tell where my mess-ups are.  I love this pattern!!

Hidden picture: can you see the incorrect rows??

This scarf is like an optical illusion where there are incorrect rows in the above picture but because your eyes focus on the elongated stitch, you can't notice them!  Perfect!  Although not recommended as a beginner pattern, a very good one for knitting while talking and watching TV.

As I say this is a great pattern, since it is so repetitive, it got boring after the first ball of yarn was knitted.  But, like I said, it ended up being simplier than I thought.  It is a good combo of easy but looks elegant. 

Stitch close up

I knitted this as a scarf, but now that it is done, it can be several types of accessory pieces.  I will begin my montage of scarf modeling.  It can be a cowl:

Holy cowl, this is cozy!

Another way is it can be worn as a shawl during an elegant evening out (or at work when they have the A/C on in the winter):

No, you may not take my shawl, sir.

Or as tied caplet:

The possibilities are endless!
I can always wear it as a normal scarf or tie it on my waist as a waist scarf.  I could go on and on.  I did go on and on during this post, but I felt as though it was necessary for you to know the history of how this scarf and I met.

I will go back and try that elastic yarn project again and will search for the perfect yarn for my original pattern.  But, I think I will break from the scarves for a bit.  I have some sewing ideas that I need to blog about that I have already done and some that I need to put into motion.

Thanks for sticking around! 

PS.
Kathy, I'll mail you back your bambo needles soon!  TY!