Showing posts with label peach. Show all posts

Sunday, December 23, 2012

Ben Ice Cream Cozy

Yup, that's right:  I knitted an ice cream cozy.  Wait until you see it!  

Let me start from the beginning.  Last year, I got a Knitting Desk Calendar (2011) and in there was a pattern for ice cream cozies.  They fit a pint of Ben & Jerry's ice cream, hugging the condensation, insulating, protecting your hands from the cold when you eat from the carton.  How awesome is that?!?!

Pic from the Knitting Desk Calendar

I knew I wanted to knit it.  At the time I was dieting and the thought of eating right out of a pint of Ben & Jerry's ice cream was undo-able, so I did not knit one right away (I was not going to use it while on the diet).  So, when I started thinking of who I was going to knit gifts for this Christmas, I thought, "Who can I knit the ice cream cozy for?  Someone must eat Ben & Jerry's ice cream!"  That's when I realized that I do, in fact, have a friend who eats this ice cream.  She even goes online to find what store is selling the exact flavor she is looking for.  This was a no-brainer.

Perfect!

Well, Christmas was sneaking up on me and I had not started it as of the beginning of December.  Nothing like waiting until the last minute.  I was on a roll and then was out with my knitting injury (see the Origami Sweater - Part 2 post).  I still have it and when I think about knitting, my elbow and arm will suddenly hurt.  Ridiculous!

I started it on December 13th, which was a Thursday and was done by Sunday.  So, not too bad.  Here are the details:

 
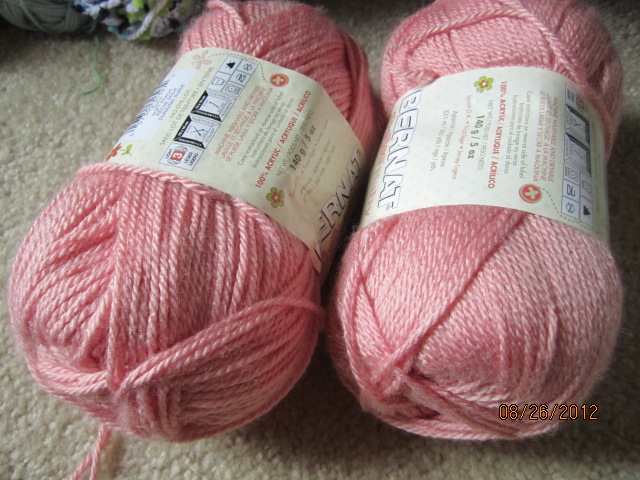
I used some stash yarn: Bernat Softee Baby (100% Acrylic), in Soft Peach (looks pink in real life) and Premier Yarn Everyday Soft Worsted (100% Acrylic) in Baby Yellow.  I have used the Bernat Softee Baby in a couple projects: I Heart Hats and Vivecita Beret.  The Premier Yarn, I used in my Cookie Swap 2012, Rapunzel braid.

The Softee Baby is a DK weight and the Premier Yarn is a worsted weight.  What does that mean?  That means that the DK is a thinner yarn than the worsted and I had to use 2 strands of the DK to 1 strand of the worsted.  That brought a challenge:  I had only one skein of yarn of each, so I had to ball up the DK yarn (the peach/pink) into 2 balls.

This gave me an excuse to use my ball winder.  I love that thing!


It was kind of a pain to wind it from a skein, but after a tangle or two, I had 2 balls of yarn to work with:


This way I can hold the 2 strands together without a huge mess on my hands by trying to use both ends of the skein (it would not have worked, I tried that way before I balled it up.  Trust me!)

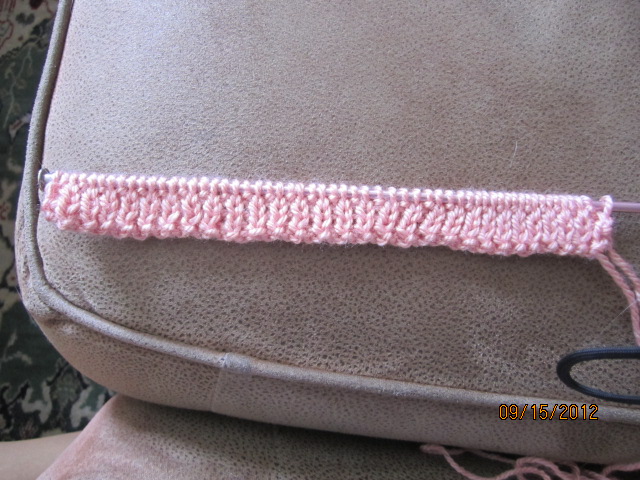
So, this is knitted on double pointed needles (dpn).  The pattern calls for a size 10, but I knit loose, so I went down a needle size to a size 9.  I casted-on and was off.


It's always confusing to me when I cast-on to dpn's.  I always think that I am doing it wrong, but it works out somehow.  So, I have started it, as you see above.


This 2 color knitting is called stranding or simply colorwork.  This is where you carry the unused color behind in the work.  I'll show you in a pic, down below.  I worked in a ribbing pattern, so the cozy can be stretchy.  I worked from the top-down.


Here is a close-up of the rib pattern, where the color changes for the knit and the purl stitch.


This is what the stranding looks like.  This is a pic of the inside of the cozy.  This extra "layer" of yarn behind the stitches helps insulate it, so your hand will not get cold from holding it.


Unfortunately, I completed it and then realized that it was a bit too long and looked like a sock, not a cozy.  I had to rip out about 4 rounds of the colorwork.  Oh well, I fixed it in no time.


That was an awful lot of yarn for 4 rounds.  I put the dpn's back into the live stitches and finished it off again.


Vince and I took one for the team...the Anything-for-the-Christmas-Gifts Team.  We bought a pint of Phish Food (love that one, and it is Gluten Free) and tried the cozy on it.  It fit!!!!  So, we ate the ice cream while watching a DVR'd episode of Dancing with the Stars.  I washed out the carton and gave the gift, with the cozy on the empty Ben & Jerry's pint.  I put a gift card for the local supermarket in it, so she can buy a pint for her to try the cozy out on.  I'm not that cruel, that I would completely tease her with no ice cream!

There is also a Jerry ice cream cozy that I will knit at some point.  I gave her an IOU for that one.  I do not have any more stash yarn that fits the bill for this project, so I will buy some the next time I'm out at Joann's.

What do you think?  Is this a fab gift or what?!?

Sunday, September 23, 2012

Vivecita Beret

I am a knitting fool, with all these knitted gifts getting completed.  Here is another knitted gift that I made with stash yarn.  Vivecita is a small, child-size version of Viveca, from Berroco.  So far I have made a total of 3 berets:
  1. Viveca Beret (for myself back in February)
  2. Viveca Hunter Beret (as a gift earlier this month)
  3. Vivecita (as a gift, today's blog post)
The yarn I used is Bernat Softee Baby, in Soft Peach.  It is 100% acrylic.  I used this yarn (that's why I called it a stashed yarn) for the I Heart Hats that I made last Christmas.


The modifications that I did for this pattern was to only do 6 fan repeats across the row, rather than the 12 for an adult beret and on the height, knit up 3 fans, rather than the 6 for an adult then start the crown shaping.  I also knitted the ribbing at the start edge for about a half inch rather than a full inch.


The ribbing makes it stretchy.  This ribbing is a K1, P1 ribbing.  The back and forth with the yarn string to go from purling to knitting is enough to make you batty.  That is one reason for the half inch modification, mentioned earlier.


That's a close-up of the ribbing.  Since I was knitting a child-size version of my favorite beret, this knitted up in no time.   This only took one weekend to do.  I knitted while watching movies last Sunday.


I really hope that the modifications worked and that it actually will fit the recipient's head.  She is only 2-ish, but still.  I hope it fits!!

Sunday, January 15, 2012

Tangerine Tango

Each year the color matching system company, Pantone, announces a "Color of the Year."  This color is used in many industries to shape the upcoming trends in color (home decor and fashion, being a few).  This year, Pantone announce Tangerine Tango as the latest color.


It is a cross between a coral and and orange.  I like it, but not sure how it should fit in my wardrobe.  I went searching last week for a shirt or something that was this color or similar to wear to my work's holiday party.

Our holiday party was this weekend (yes, an after-holiday party) on the Starship Yacht.  It is fairly nice weather in the winter in Florida, but unfortunately, was not the case this weekend.  It was and still is in the 50's.  Yikes!  Cold weather on a boat did not seem good.

Back to shopping: my search was rewarded with a sequined-trimmed tank top.  It has that crumpled look like it was knotted-up and not ironed.


But, as you can see below, the straps were too long.  Not a problem.

 
All I did was fold down the strap in the back were it was connected and resewed it.


I trimmed the excess fabric and I was done.  Pretty easy.  I don't usually let something minor like like persuade me from not buying it.  The only extra thing I needed for it was matching thread, that I bought on sale at Joann's.


With this tank, I also bought a sheer, light turquoise blouse with tangerine colored flowers on it.  Since I figured it may be a bit chilly, I chose the dress pants option rather than the dress or skirt.  I also bought a light turquoise fitted jacket to wear over it.  

I painted my nails to match my tank top with a nail color that I already owned (an old color from Mary Kay called Mango Spice):


 In the end, we all had a great time.  Here is me dancing with a broom:


For some reason, someone grabbed a broom and each person had to dance in the middle of the floor with the broom.  Whatever, I did it, it was hilarious!

Here is me and my sweetie :


The outfit was comfortable, the night's festivities were fun and being with my sweetie completed the night.

Sunday, January 8, 2012

Razzy Socks

When I went to visit my family in Mass just before Christmas my sister showed me how to knit socks.  I brought a skein of my own up there, but failed to take a pic of it before starting (I know, what kind of blogger am I?).

First we had to separate the skein into two equal weighted balls (50g each).  This yarn is called "self-striping" because the colors in the skein vary, but different from variegated, in that as you knit around the sock, stripes appear as if you purposely knit them there.  Really neat.
Then we took the ends of the balls and matched up the colors.  This took a few yards to get the colors striping at the same rate; we snipped off the extra yarn.  

My sister showed me the techniques she uses from the book Socks from the Toe Up by Wendy Johnson.


She showed me the "Judy's Magic Cast On" and I was off and knitting!


I am still knitting them, but I am close to being done.  See how they are striped?  That is the yarn doing all of the work.  Near the toe, it started knitting up a peach and black checker-like appearance.  It reminds me of one of my cats, Jasmine (aka Razzy); she is a Bengal cat.  Her hair shafts are striped with orange and black.


I will model what I have so far:


I am now finishing it up with a k2p2 rib.  Now I must stop blogging and start knitting!

UPDATE:  Click here to see them complete.

Sunday, January 9, 2011

Lace-up Fingerless Gloves

Let's back-up a bit this week.  In addition to a few scarves, I also made a pair of lace-up fingerless gloves as a Christmas gift this year.  These gloves came from a knit book called AlterKnits by Leigh Radford

Very creative knit pattern book

This book I received as a gift one year for my birthday.  I've had the book for about four years and this is the first project I have made from it.  There are a ton of cute and cool items to knit or otherwise create with wool that it is definitely worth checking out. 

The yarn I chose for this project was Encore by Plymouth Yarn (75% Acrylic / 25% Wool) in a peach color. First, they instruct you to knit a gauge swatch.  You know how I feel about gauge swatches, so I sort of make one then just go with the needle size recommended, which was a size 7.  The cool thing about these gloves that make them different than many other gloves, are that they are longer up the arm and lace-up with a ribbon.  Wait until you see how nice they came out.

So, right away I make a mistake.  The pattern starts at the arm and you knit on straight needles for 6" or so.  In the arm part, on each side you do some yarn overs (yo) and create eyelets for the threading of the ribbon.  I missed the first eyelet on one side.  I did not discover this until I was, oh, I don't know.....

Can you read the tape measure?

Let's see, what does the tape measure read?  Yup, five inches along.  Well, I did what any insane knitter would do:  I ripped it out and started over.  I had to!!  I could not lace it up, in good faith, through a random stitch and give it as a gift.

Rip, rip, rip!

By this time, I had the eyelet pattern repeat down pat.  Once I got myself back on my feet and knitted the required inches for the arm, they instruct to transfer to double pointed needles (dp), aka double points, so you can knit in the round (join the two sides together to form a tube).  Double points are knitting needles that are short and have a point on each side and come in sets of four or five.  I have several sets and I hate using them.  You have to evenly distrubute the stitches over three or four needles and use the empty one as the second knitting needle.  I may have lost you but that is okay.  They are confusing and I can't ever hold them right.

But, alas!  There is a cure for the dp blues.  It is called Magic Loop.  You get a pair of circular needles in a length of at least 32" long and you do this thing where you have loops on both sides of your knitted tube.  This technique eliminates the "ladder" effect that alot of knitters get with the dps.  I'm not really going to try to explain, just click on the link above to see a video from YouTube.  It is only three (3) minutes long and it will convert you!!

Me, Magic Looping!!

This part is shaping the hand portion and the thumb.  The below pic shows that the join of the sides is seamless and you cannot tell (no laddering).  Laddering is when the joining stitch is slack and is not uniform with the rest of the stitches, but is consistent going up the side and looks like rungs on a ladder.  I think I am getting too technical, so forget all this!  Just let me show off my seamless stitches and be done with it! :-)

Yeah, Me!

Nothing else disasterous happened while knitting the rest of the gloves.  You work the hand up to the  knuckle, making a spot for the thumb.  Meanwhile, the thumb stitches are placed on a holder to be worked later. 

WIP (Work in Progress)

Once the thumb was knitted and yarn tails weaved in (I had to sew up a hole that formed between the thumb and the hand, so I just used the tail that was from the thumb), I had to model to show the almost complete fruits of my labor.

The rolled-edge is cute, huh?

So, when I got to this point, I just wanted to be done already!  But I wanted to block the gloves so the stitches will lay flat and to tame the eyelets so they will be straight and flat, not curling.  Here are some things you need when you block something:

Take the time to block, you will thank yourself

A flat surface (I used a wooden tv tray), a spray bottle with water, towel, and pins.  In this case, I did not need the pins.  The pins help set the item to a measured size; I did not need to size the gloves.  I wet the gloves on both sides until they were damp, but not soaking wet.  Rub the water into the stitches (this, to me, is like feeling a wet dog...yuck), then position the gloves in a single layer on the towel.  I folded the towel over the gloves, but left the rolled edges hanging out.  I did not want the rolls to be flat.  So I had essentially sandwiched the gloves between two layers of towel.

Towel sandwich

Then I placed some heavy items on top to weight it down.  Then I came back the next morning and took a look.  The gloves were dry and set.  On a side note, yes, that is a Dexter board game!  I just got it for Christmas from a very close friend and I played it on New Year's Eve.  The game is won by collecting your suspect game tokens in a mini black garbage bag and moving your piece around the board until you get to the marina to "dump" the evidence.  Yes, a bit demented, but if you are in love with the show, you would get a kick out of the game concept.

So, here are the final results of my lace-up fingerless gloves:

Now, how do you lace the ribbon?

I am pleased with how they came out.  I did have an interesting time actually lacing up the ribbon.  I wanted the ribbon to actually show but could only think of how a shoe was laced.  I figured it out, eventually. 

In my opinion, this was not a difficult project, considering that they are pretty much a half a glove (no fingers), but it still took me at least two weeks to complete them.  It actually spanned about a month, but I did not work on them each day and I visited MA for 10 days in December, so I finished them up when I got home during Christmas weekend.  I did not give these as a gift until New Year's weekend, so I had a bit of breathing room.

No matter what, it is always hard for me to part with my creations.  I may not have come up with the pattern or the idea, but I take pride in the finished piece, so I end up wishing I made the item for myself!  Selfish, I know, but I did give the gloves away, so it is not too selfish.  (I hope).

Now that you see how I got through a pattern, with a few hiccups.  What hiccups have you encountered in your latest WIP?  Let me know, take pics, send them to my email by clicking the envelope link below.  I would love to show off your pieces!